Farmhouse style wreaths are so popular right now and this is a style you can leave up for weeks. Products used in this tutorial were all from Trendy Tree of course and we even have them in a kit for you to make shopping easy))
Supply List
XX7488W4-Burlap Work Wreath - 1
AP8380 Farmhouse Sign -1
RY800518-Natural Jute Mesh 10.5" - 2
RG01910R3-Beige and Red Farmhouse Ribbon 2.5" -1
RG0132061- Black and Tan Check Ribbon 1.5" -1
RG0145724- Beige and Red Ticking Ribbon 1.5" -1
RG200924-Beige and Red Rickrack Ribbon 2.5"-1
Link to purchase kit: 2019 Farmhouse Wreath Supply KitNote: The tutorial and video will be left up even after the kits may have sold out. You can follow these basic directions and make other styles of wreaths just by choosing other colors/styles of mesh, ribbons, signs. etc.
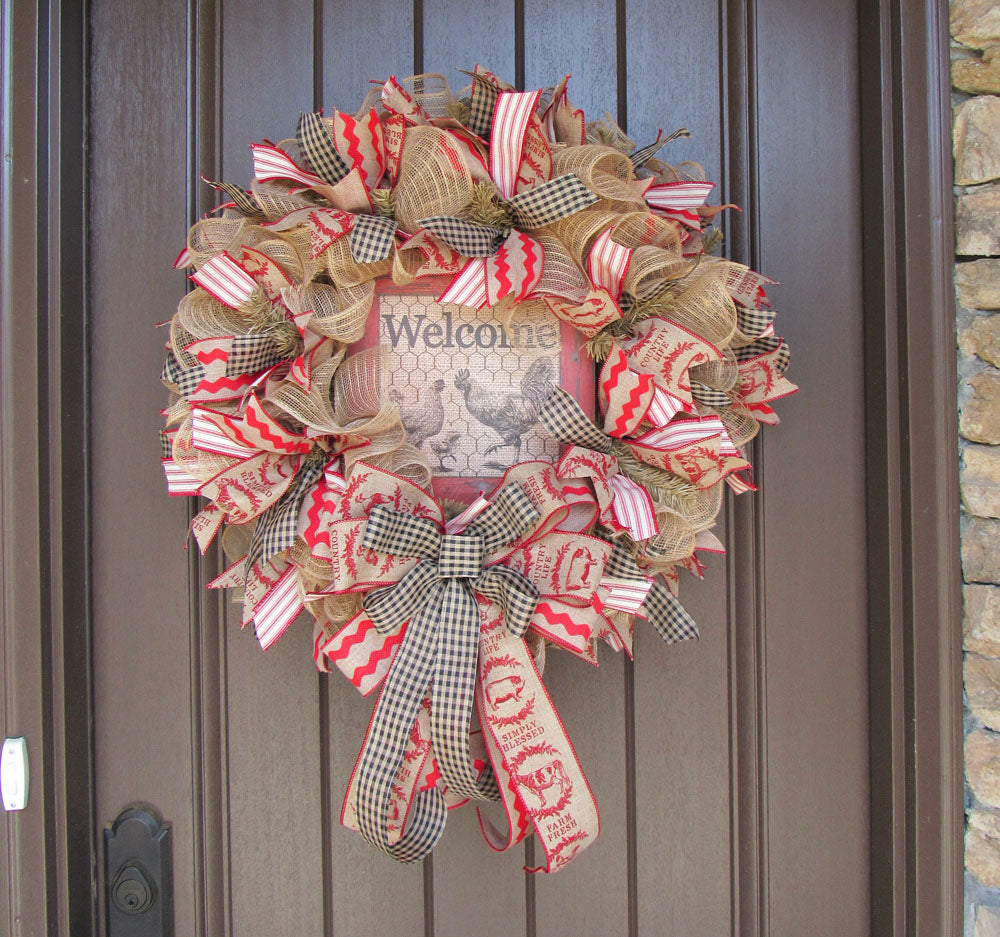
Summary:Work Wreath: We chose a 24" burlap work wreath for this project. Our 24" wreaths measure 15" across the widest ring. You could also use a 24" pencil wreath.
Mesh: The mesh we chose is a poly jute product. It's 10" in width and 10 yards on a roll. It will not take all of the two rolls, but one is not enough. The mesh is made of Polypropylene but also has a jute thread which gives it more texture. This natural color in the 10" is sold out at the moment, but there are other colors available.
The mesh was cut into 30" lengths for the ruffles. We cut 18 pieces since there are 18 twists on our work wreath. Since we were using the one color of mesh, we were able too use 30" pieces for the ruffles. If we had been using two styles of mesh, we would have created two ruffles, 15" in length. Lori Jacobs, Hard Working Mom, was the first person I saw making 30" ruffles. Thank you Lori! In the past, we had been cutting 10" ruffles and placing three ruffles in each twist. The look is the same whether you use three 10" ruffles or one 30" ruffle. And you have less cutting which means less raveling. Check out Lori's YouTube channel, she has lots of great tutorials there.
To make a ruffle, just let the mesh roll up naturally, then spread it out. Scrunch up through the middle making a ruffle. It sort of looks like a bow tie. Hold it pinched and secure it in one of the twist on the wreath. Place a ruffle in each twist on the outer ring and inner ring.
Ribbon: Trendy Tree has over 700 styles of ribbon to choose from! We chose two 2.5" ribbons and two 1.5". Ribbon can be added to a wreath in a number of ways. You can do simple ribbon strips like we did, or loops and tails, small or large bows. It's all a matter of preference.
We made 12" ribbon strips. You should always do a test strip before cutting up your ribbon. It's a disaster to cut all your ribbon and find they are too short, or too long and now you have to trim and waste ribbon.
We took a 12" strip of ribbon from each style and made a cluster. The twist on the wreath was opened, ribbon cluster laid down, and the twist re-secured with 3-4 turns.
A ribbon cluster was placed in each twist on the outer and inner ring.
Some of the extra ribbon was used to make a large bow for the front of the wreath, and there was still ribbon left over.
Sign: The farmhouse style square rooster sign was placed in the center of the wreath and the burlap string was used to secure the sign to the wreath form using a chenille stem. This is not the best way to secure a sign, but we were working from home and didn't have access to our heavy duty stapler. The best way, would be to staple a chenille stem to each corner of the back of the sign and secure to the work wreath frame.
We have an abundance of signs at Trendy Tree with almost 600 in stock. You can find most any kind of sign for any occasion. Farmhouse style is all the rage right now and the perfect time to create some everyday farmhouse wreaths that will hang on your door from February to July or longer!
Finishing: Trim your strings. You will have some, all mesh ravels. Check the back of your wreath for anything sharp that might scratch your door. Fluff your ribbons and you'll have to do this more than once. Make sure all your ribbons are facing up. Make a hanger for the wreath using a chenille stem or zip tie.
Happy Wreathing!
If you're a wreathmaker and Trendy Tree customer, you might be interested in having your creations shared on Trendy Tree's social media platform. Here's a link with more information. Trendy Tree Marketing Group