Versatile spring lantern that will serve you through Easter, and all the way to fall. I love decorating with lanterns! They are a perfect spot of decoration for your home if you don't want to go all out decorating for a holiday.
This lantern is a great piece for Easter because Rachel decorated it so that the Easter eggs can be popped out, and the carrot removed from the top of the lantern. Viola! What you have left is a spring lantern with pretty florals, a bird nest and cheerful bow.
Here's how she did it.
The lantern in this spring lantern tutorial was a black silver distressed metal lantern that was stock back in the fall for Christmas and winter decorating. Rachel wanted to freshen the look a bit for spring and spray painted it with a copper rose gold metallic color.
The lantern is only $20 so it's not a, well...it's just an inexpensive lantern! It has no glass, which is nice because you can place florals in it and just let them branch out from the lantern for a casual look. Rachel put two coats of paint on the lantern and I think already has plans to change its color for the next project.
The spring lantern measures about 6.75" in width and 14-15" in ht.
Styrofoam
Rachel cut a piece of Styrofoam to place in the bottom of the lantern and secured it with hot glue.
You can't see it in the image or video, but Rachel uses a simple electric skillet and Gorilla glue sticks. Just melt the glue sticks and keep the temperature low. When your project is finished, just turn off the skillet and let it cool. Next project, reheat and use again.
Bird Nest with Egg
The RAZ bird nest with egg was the first thing to go in the lantern. The stem was cut with a bush cutter or you could use heavy duty wire cutters. Secure the nest in the Styrofoam letting the tendrils of the branch fall out through the sides of the lantern. All the pieces of the branch are wired for easy shaping.
Easter Eggs
In the next step Rachel placed a wooden floral pick in the foam Easter Eggs. She used about three eggs. You can put a bit of hot glue on the eggs for extra security if needed.
Secure the picked eggs in the Styrofoam. Rachel decorated this spring lantern with the thought that it might be used on a coffee table or somewhere where it could be viewed from all sides.
Pink Baby's Breath
Cut the stems of the baby's breath and insert pieces in the Styrofoam. You can use a Steelpix machine if needed. You can also add hot glue to the tips of the stems before inserting them. The picks on the Steelpix machine are a bit jagged and hold very well in the Styrofoam. But if you have any doubt about a piece's security, just dab with a bit of hot glue.
Spanish Moss
Cover the mechanics (Styrofoam) of the spring lantern with Spanish Moss. Use floral pins or hot glue to secure the Spanish moss to the Syrofoam. Be sure to cover from all sides. You can make your own floral pins by snipped about a 2" piece of floral wire and bending into a "U" shape.
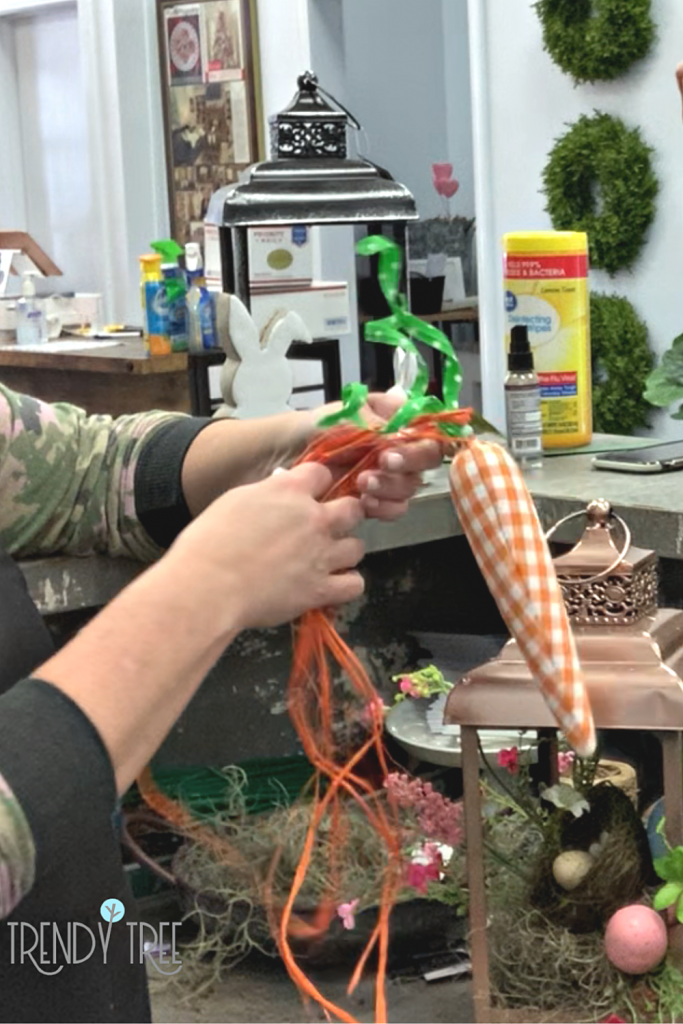
Fabric Carrot
Tie the fabric carrot on with a bit of raffia to the top of the spring lantern. If you don't have raffia, use a bit of ribbon, or floral wire.
Secure the carrot to the lantern separately from your bow, so that you can easily remove it after Easter.
Watercolor Stripe Ribbon Bow
Make a bow using 2.5" ribbon. Rachel chose to just use one style of ribbon for this lantern. Make a simple loop bow by hand, or you can use a bowmaker like the E-Z Bowmaker, Bowdabra or Probow.
This simple striped bow only had two loops on each side and two tails. Easy peasy! Secure bow with floral wire and attach it to the top of the lantern. Again, since the carrot was tied on separately from the bow, you can remove it easily after Easter without disturbing your bow.
All Done!
Want to see more spring tutorials? Here you go!
Easter Basket CenterpieceTwig Easter Egg Wall HangingMilk Bucket with Carrots
*Disclosure: (Jeannie Pence)
The Trendy Tree blog and social media post may generate some income (Jeannie Pence) through affiliate links, sponsored post or general advertising. Trendy Tree only works with companies we trust and personally use. Affiliate links may result in a small commission based on a click-through or referral fee paid by the seller. It is a form of advertising.