Valentine Wreath Tutorial
Supplies:XX751150 24" White Iridescent Pencil Wreath
RE1041F1 21" White Iridescent Wide Foil Mesh
RE134122 10" Pink Wide Foil Mesh
9732429 15" Pink Heart
MTX 54853 2.5" Gold Metallic Ribbon
X530340-14 2.5" Light Gold Stripe Ribbon
Assorted Valentine Ribbons
Please note that if some or all of the products used for this tutorial are sold out, we will leave the tutorial up since other products can be chosen and the basic instructions followed for a similar wreath.
Summary:
Wreath: We used a 24" pencil wreath for this project. You could use other colors rather than the iridescent and you also could use a Work Wreath.
The ties are just a little wider on a Work Wreath, others the spacing and size is the same. Our 24" pencil/work wreaths measure 15" across the widest ring, but with the addition of mesh, ribbons, etc, you wind up with a finished wreath of 24" or greater.
This wreath measured about 26-27" when completed.
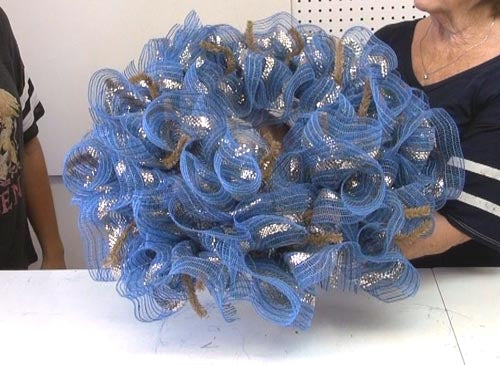
Mesh: We chose two different styles of mesh. The first mesh was a 21" wide foil mesh. The wide foil mesh products have mesh strips that are a little wider than just metallic mesh. The mesh used for the poufs was a white iridescent mesh.
You could make this project using a variety of other colors of mesh also.
We used the pouf technique for our first layer of this wreath. Just gather the mesh 3-4" from the end and secure in a twist along the outer ring. You can start on the inner right if you prefer.
We attached the mesh and just tucked the raw edge to the inside of the wreath. Then we measured 12" gathered the mesh and attached in the next twist. Poufs can be made anywhere from 10" to 14" but if you get larger than 14" the poufs tend to be a little loose and floppy. The size of the pouf just depends on preference. Our sign was rather large, so we opted to make our poufs 12"
Just continue making poufs around the outer ring.
When you get to the space for the last pouf, open up the twist where you started (making sure your initial pouf stays in place), lay the last pouf down and secure both back at the same time.
Once that last pouf is secured, pull the mesh up snug and attach to the closest twist on the inner ring. This is your starting point for the rest of the wreath.
Continue making the same size poufs, 12" and finish the inner ring. When you get to the space for the last pouf, again open up the twist where you started on the inner ring and secure the last pouf in the same twist.
At this point, you can cut your mesh free leaving a tail of 4-5" Tuck the raw edges of the mesh to the inside. You should be close to the raw edges of your first pouf. Just wrap the raw edges together and secure with a couple of zip ties to the wreath frame. This will keep the raw edges from popping out.
When your poufs are finished, just check them, fluff them out. If you have any that need adjusting now is a good time to do it. You do want to try to keep your poufs all the same size.
Ruffles: We chose a 10" pink wide foil mesh for the ruffles. We wanted to add some contrast. You could choose a number of other colors for this same project. We cut 18 pieces of mesh for the ruffles. The mesh is 10" in width and 10 yards in length. Each ruffle was cut 15" in length.
For ease in cutting, we used a self-healing cutting mat and a 60mm rotary cutter. These are great tools to use for wreath making especially when you have repetitive cutting to do. We don't sell these items on Trendy Tree right now, but we can share our affiliate Amazon links with you.
Let the 15" piece of mesh roll up naturally on the table. Then smooth it out with selvage edges to the sides. Scrunch up through the middle and make your ruffle.
Open up a twist, it doesn't matter if you start on the inner or outer ring, and attach the ruffle. It's really a matter of preference as to whether you open up the twist to attach the ruffle, or just leave the twist closed and attach the ruffle, it can be done either way.
Typically there are 18 twists on a 24" wreath, so we added a ruffle to each twist around the inner and outer ring.
Sign: The sign we used was a large pink heart with love written with metal wire. The sign is made of MDF material and has a decoupaged surface. If the sign was going to be out in the weather, you might need to waterproof it with a coating of clear spray maybe.
To prepare the sign for attachment, we removed the gold hanger. You could use this sign alone for a nice door hanger and just add a bow.
We attached some chenille stems to the eyelet screws at the top of the heart and added more chenille stems to the sides on the back using a heavy duty stapler. You could also use tiny eyelet screws but I would be careful that it didn't go all the way through the sign. The chenille stems stapled on felt pretty secure.
Also in hindsight, I had to go back and add extra length to the chenille stems. You don't want the sign to be attached so tightly to the wreath frame that it squashes down the mesh so you need extra length on the chenille stems to allow for it to be secured, but not buried in the mesh.
Make a hanger for the back of your wreath using chenille stems, zip ties or floral wire. You may want to hang the wreath and practice on the placement of your sign before you secure it well. On my first attempt to secure, I attached the heart using the top chenille stems first, and it was hanging too low. So next I secured it first using the chenille stems on the sides, and then attached the top. This worked much better. You can cover up your attachment at the top by pulling the ruffles/mesh around your attachment.
Bow: We used a version of the Terri Bow for our bows. Terri Marshall with Mil and Dil Designs designed the Terri Bow using the Pro Bow bowmaker. The Pro Bow is for sale on Trendy Tree, we're out of them today, but should have more soon. You can make this version of a bow, or simply make a loop bow. Terri has a great video on YouTube demonstrating her bow technique. It's very easy to follow and bows turn out beautifully.
We chose several different ribbons for our bow and the Terri bow is a great way to use up scrap ribbon. Some of the ribbons were used were from our scrap ribbon bin and some were new ribbons. We made two identical bows and attached one at the right upper side and one at the lower left side. Bows were attached to the wreath form.
When you're all finished, check the back of the wreath for anything sharp that needs to be covered up or turned to the inside and clip your strings. You will have some raveling, as all mesh products ravel. But, with the pouf technique you probably have less raveling than with any other method.
The overall width of the wreath was about 26-27"
This basic white/pink wreath is a great color combination for use later too. The sign would also work for Mother's Day. Or, you could take the sign and bows off and add something for Easter....or baby....lots of choices. Re-purpose that wreath!


 We attached the mesh and just tucked the raw edge to the inside of the wreath. Then we measured 12" gathered the mesh and attached in the next twist. Poufs can be made anywhere from 10" to 14" but if you get larger than 14" the poufs tend to be a little loose and floppy. The size of the pouf just depends on preference. Our sign was rather large, so we opted to make our poufs 12"
Just continue making poufs around the outer ring.
We attached the mesh and just tucked the raw edge to the inside of the wreath. Then we measured 12" gathered the mesh and attached in the next twist. Poufs can be made anywhere from 10" to 14" but if you get larger than 14" the poufs tend to be a little loose and floppy. The size of the pouf just depends on preference. Our sign was rather large, so we opted to make our poufs 12"
Just continue making poufs around the outer ring.
 When you get to the space for the last pouf, open up the twist where you started (making sure your initial pouf stays in place), lay the last pouf down and secure both back at the same time.
 Once that last pouf is secured, pull the mesh up snug and attach to the closest twist on the inner ring. This is your starting point for the rest of the wreath.
Continue making the same size poufs, 12" and finish the inner ring. When you get to the space for the last pouf, again open up the twist where you started on the inner ring and secure the last pouf in the same twist.
At this point, you can cut your mesh free leaving a tail of 4-5" Tuck the raw edges of the mesh to the inside. You should be close to the raw edges of your first pouf. Just wrap the raw edges together and secure with a couple of zip ties to the wreath frame. This will keep the raw edges from popping out.
Once that last pouf is secured, pull the mesh up snug and attach to the closest twist on the inner ring. This is your starting point for the rest of the wreath.
Continue making the same size poufs, 12" and finish the inner ring. When you get to the space for the last pouf, again open up the twist where you started on the inner ring and secure the last pouf in the same twist.
At this point, you can cut your mesh free leaving a tail of 4-5" Tuck the raw edges of the mesh to the inside. You should be close to the raw edges of your first pouf. Just wrap the raw edges together and secure with a couple of zip ties to the wreath frame. This will keep the raw edges from popping out.
 When your poufs are finished, just check them, fluff them out. If you have any that need adjusting now is a good time to do it. You do want to try to keep your poufs all the same size.
Ruffles: We chose a 10" pink wide foil mesh for the ruffles. We wanted to add some contrast. You could choose a number of other colors for this
When your poufs are finished, just check them, fluff them out. If you have any that need adjusting now is a good time to do it. You do want to try to keep your poufs all the same size.
Ruffles: We chose a 10" pink wide foil mesh for the ruffles. We wanted to add some contrast. You could choose a number of other colors for this 
 Let the 15" piece of mesh roll up naturally on the table. Then smooth it out with selvage edges to the sides. Scrunch up through the middle and make your ruffle.

 Open up a twist, it doesn't matter if you start on the inner or outer ring, and attach the ruffle. It's really a matter of preference as to whether you open up the twist to attach the ruffle, or just leave the twist closed and attach the ruffle, it can be done either way.
 Typically there are 18 twists on a 24" wreath, so we added a ruffle to each twist around the inner and outer ring.
 Sign: The sign we used was a large pink heart with love written with metal wire. The sign is made of MDF material and has a decoupaged surface. If the sign was going to be out in the weather, you might need to waterproof it with a coating of clear spray maybe.
  To prepare the sign for attachment, we removed the gold hanger. You could use this sign alone for a nice door hanger and just add a bow.
We attached some chenille stems to the eyelet screws at the top of the heart and added more chenille stems to the sides on the back using a heavy duty stapler. You could also use tiny eyelet screws but I would be careful that it didn't go all the way through the sign. The chenille stems stapled on felt pretty secure.
Also in hindsight, I had to go back and add extra length to the chenille stems. You don't want the sign to be attached so tightly to the wreath frame that it squashes down the mesh so you need extra length on the chenille stems to allow for it to be secured, but not buried in the mesh.
Make a hanger for the back of your wreath using chenille stems, zip ties or floral wire. You may want to hang the wreath and practice on the placement of your sign before you secure it well. On my first attempt to secure, I attached the heart using the top chenille stems first, and it was hanging too low. So next I secured it first using the chenille stems on the sides, and then attached the top. This worked much better. You can cover up your attachment at the top by pulling the ruffles/mesh around your attachment.
Bow: We used a version of the Terri Bow for our bows. Terri Marshall with Mil and Dil Designs designed the Terri Bow using the Pro Bow bowmaker. The Pro Bow is for sale on Trendy Tree, we're out of them today, but should have more soon. You can make this version of a bow, or simply make a loop bow. Terri has a great video on YouTube demonstrating her bow technique. It's very easy to follow and bows turn out beautifully.
We chose several different ribbons for our bow and the Terri bow is a great way to use up scrap ribbon. Some of the ribbons were used were from our scrap ribbon bin and some were new ribbons. We made two identical bows and attached one at the right upper side and one at the lower left side. Bows were attached to the wreath form.
To prepare the sign for attachment, we removed the gold hanger. You could use this sign alone for a nice door hanger and just add a bow.
We attached some chenille stems to the eyelet screws at the top of the heart and added more chenille stems to the sides on the back using a heavy duty stapler. You could also use tiny eyelet screws but I would be careful that it didn't go all the way through the sign. The chenille stems stapled on felt pretty secure.
Also in hindsight, I had to go back and add extra length to the chenille stems. You don't want the sign to be attached so tightly to the wreath frame that it squashes down the mesh so you need extra length on the chenille stems to allow for it to be secured, but not buried in the mesh.
Make a hanger for the back of your wreath using chenille stems, zip ties or floral wire. You may want to hang the wreath and practice on the placement of your sign before you secure it well. On my first attempt to secure, I attached the heart using the top chenille stems first, and it was hanging too low. So next I secured it first using the chenille stems on the sides, and then attached the top. This worked much better. You can cover up your attachment at the top by pulling the ruffles/mesh around your attachment.
Bow: We used a version of the Terri Bow for our bows. Terri Marshall with Mil and Dil Designs designed the Terri Bow using the Pro Bow bowmaker. The Pro Bow is for sale on Trendy Tree, we're out of them today, but should have more soon. You can make this version of a bow, or simply make a loop bow. Terri has a great video on YouTube demonstrating her bow technique. It's very easy to follow and bows turn out beautifully.
We chose several different ribbons for our bow and the Terri bow is a great way to use up scrap ribbon. Some of the ribbons were used were from our scrap ribbon bin and some were new ribbons. We made two identical bows and attached one at the right upper side and one at the lower left side. Bows were attached to the wreath form.
 When you're all finished, check the back of the wreath for anything sharp that needs to be covered up or turned to the inside and clip your strings. You will have some raveling, as all mesh products ravel. But, with the pouf technique you probably have less raveling than with any other method.
The overall width of the wreath was about 26-27"
This basic white/pink wreath is a great color combination for use later too. The sign would also work for Mother's Day. Or, you could take the sign and bows off and add something for Easter....or baby....lots of choices. Re-purpose that wreath!
When you're all finished, check the back of the wreath for anything sharp that needs to be covered up or turned to the inside and clip your strings. You will have some raveling, as all mesh products ravel. But, with the pouf technique you probably have less raveling than with any other method.
The overall width of the wreath was about 26-27"
This basic white/pink wreath is a great color combination for use later too. The sign would also work for Mother's Day. Or, you could take the sign and bows off and add something for Easter....or baby....lots of choices. Re-purpose that wreath!
