(REPOSTED APRIL 2014)
Morning all! It's a cool rainy Saturday morning and a perfect time for blogging))) Here's a wreath tutorial that Carrie and I did yesterday using a new mesh that is a combination product of poly and jute. To see the video, click on the image below.

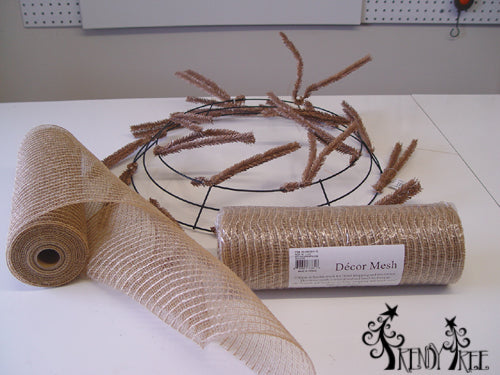
The mesh is a natural burlap color, 10" in width and 10 yards in length. The SKU is XB93210-15
This mesh is new to us and we also have it available in the 21" width. Since it is made of part poly and part jute, it works for inside or out. You get the great natural color and look of the burlap and the waterproof, retention properties of the poly mesh. A great combination! We'll more more colors coming in within a few months too.
The Burlap Pencil Wreath is also another new product. Course we've had Pencil Wreaths now for a couple of years, but the color is new. It's a natural looking burlap color that also resembles a brown paper sack color.
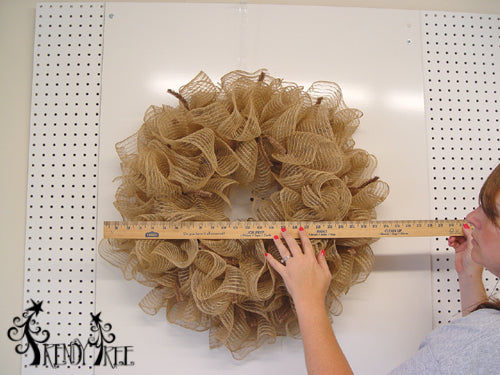
The 24" wreaths that we sell on Trendy Tree, measure about 15" across the metal frame. But with the twists and the addition of your mesh, burlap or other products, the overall finished widths of wreaths measure anywhere from 24" and up. Sometimes this is confusing to customers who have seen work wreaths at other places with different measurements.
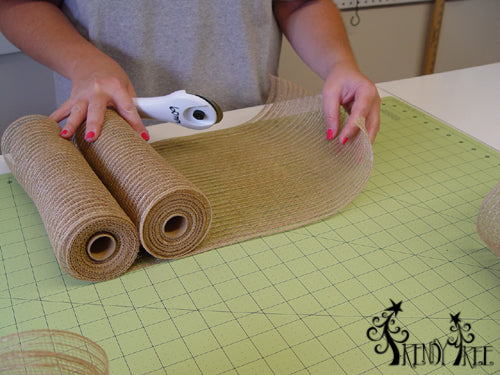
To get started, Carrie took both rolls of mesh and placed them on the cutting mat to cut mesh in 15" lengths.
We use a 24" x 36" self healing
Omnigrid Cutting Mat and a
45mm Omnigrid Rotary Cutter (these are available at Amazon and we have included our affiliate links.)
Cutting two at the same time, just makes the work go a little quicker. And if you don't have one of the cutting mats, I would highly recommend one. If you would to see more information about the cutting mat and the rotary cutter, just click on this blog post. We promote these so much we need to start stocking them!
Note: Since this tutorial was created, we have started cutting our mesh in 10" lengths for the ruffle technique, it works just about the same, and saves a little on mesh.
The 10" mesh comes on 10 yard rolls, so by cutting the strips 15" in lengths, we were able to get 24 strips from each roll giving us 48. The Pencil Wreath has 18 pairs of twists, so to go around the wreath with two layers of ruffles, we would need 36 ruffles. We wanted to go ahead and use all the mesh, but you wouldn't have to. And if you wanted a smaller, less full wreath....you could make your strips shorter. We planned to use this basic wreath to show you several different ways to decorate it, so we wanted it nice and full.
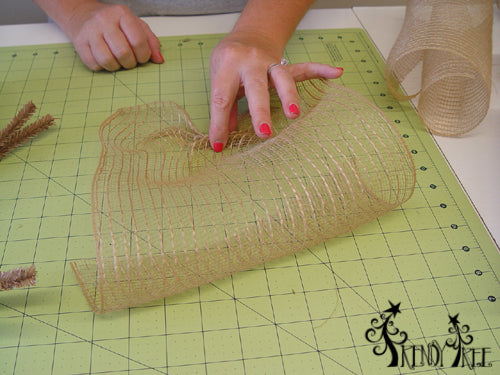
After all the strips had been cut, Carrie laid the Burlap Pencil Wreath on the table and just smoothed out the twists. Then she started making her first ruffle. Just place the mesh down (where it naturally curls under) and pinch or gather right up through the center, lengthwise up through the mesh.
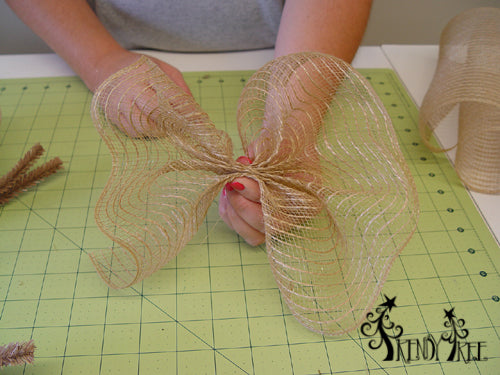
Just hold it pinched in your hand and it's ready to place in your first twist. It doesn't matter if you start on the inner ring or outer ring for this wreath.
Just place in the twist and give the twist a couple of turns. You want it snug, but we're not finished with this layer yet, so just a couple of turns is sufficient. Continue working around the wreath until you have a ruffle in each twist.
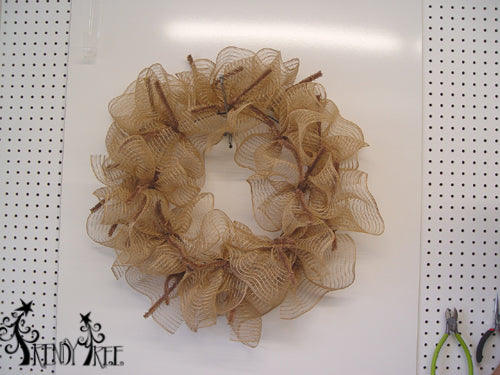
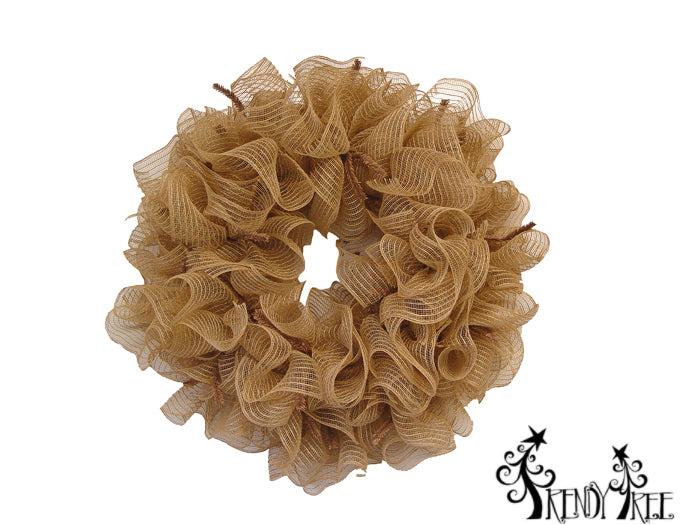
This is the wreath after one layer of ruffles have been added to the inner and outer ring. Pretty good coverage, but we're not finished yet.

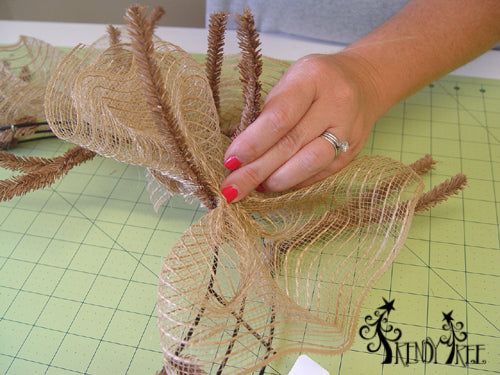
Continue with the ruffles and start with your next layer. Just open up one of the twists and make sure the previous ruffle stays in place. Lay the second ruffle right down on top of it and give the twist a couple of turns. Now it's holding the layer of two ruffles. Continue around the inner and outer rings.
After the second layer was completed, we still had abut 12 strips left, so we added those to about every other twist. So some of the twists have three layers of ruffles. They were secured in the same manner, undo the twist and lay the third ruffle down on top of the other two and re-secure the twist with a couple of turns.
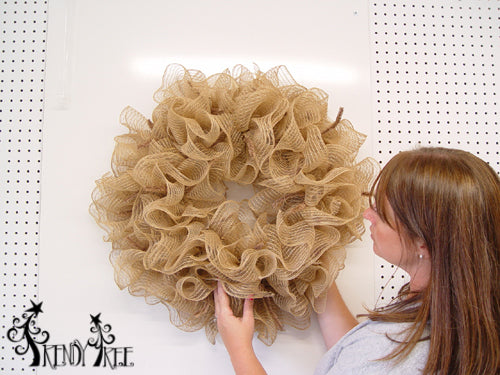
This is our wreath after all the ruffles had been applied. Nice and full and ready to decorate.
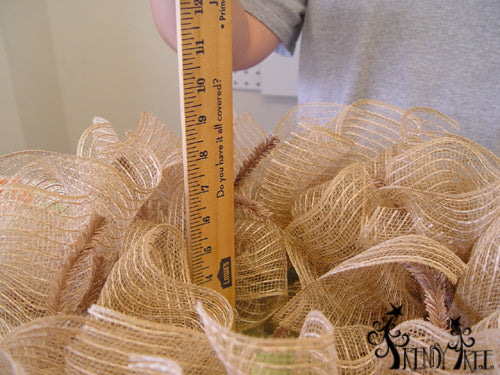
The depth of this wreath measured about 9 inches or so and about 25" in width.
If we had been finished with this wreath, we would have secured those twists the last time with 3-4 turns, but we know we're going to be adding more product like ribbons, roping ect a little later.
Also if you were finished, you could push your twists to the inside of the wreath where they wouldn't show, unless you wanted them too. But, since we have more to do we left those too.
We're going to decorate this Poly Burlap wreath is several different ways to show you how to use a basic wreath for more than one occasion. If you're just making wreaths for yourself, like we do, we make a wreath, add items, take them off and add more and use it for another occasion. It doesn't take long to have way too many wreaths hanging around if you don't re-purpose them sometime!

Be sure to click on the pink button to subscribe to our Trendy Tree Video Channel!
Save
