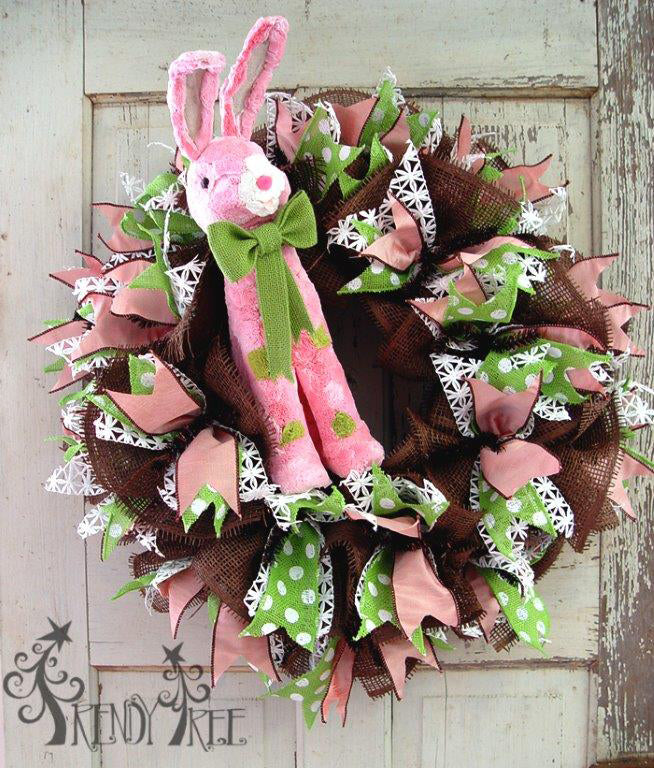
Easter wreath we made using
10" Chocolate Deco Paper Mesh (one roll), a
24" Chocolate Pencil Wreath,
RAZ Pink Polka Dot Bunny and three assorted ribbon styles for contrast. We've created a video tutorial - just click on the image below to go to YouTube to view. Be sure to subscribe to the Trendy Tree Video Channel while you're there!

We didn't take images all along the way while we were making this wreath, but here's a break down of the supplies and steps taken.
Supplies:
-
RR800131 10" Chocolate Deco Paper Mesh - 1 roll
-
XX751140 24" Chocolate Metallic Pencil Wreath - 1
-
E3453318 RAZ 14" Sitting Bunny - 1
-
Q414240-09 Lime Green Jute Polka Dot Ribbon - 1
-
R3327706 RAZ 2.5" Pink Dupion Ribbon - 1
-
R3256806 RAZ 4" White Paper Ribbon - 1
 First step:
 Take the roll of Deco Paper Mesh and cut strips of mesh 10" in length.
We use a 24" x 36" self healing
Omnigrid Cutting Mat and a
45mm Fiskars Rotary Cutter (these are available at Amazon and we have included our affiliate links.)
This roll of paper mesh is 10" wide and 10 yards in length. By cutting the strips 10" in length, you have a square to make your ruffle from and you should get 36 ruffles from one roll of mesh. If you mesh is a little short, just make an adjustment in the last couple that your are cutting, it won't make any difference to your wreath.

We like to use a cutting mat and rotary cutter. It makes the tedious work go faster and is easier on your hands than cutting with scissors.
Cut all your strips, just let them roll up naturally and place aside, out of the way.
Next Step: Take your Chocolate Metallic Pencil Wreath and smooth out the ties.
Next Step: Make your first ruffle by placing a square of the paper mesh down on the table with the natural curve downward. Starting at the cut edge, scrunch up through the middle, gathering, and hold the ruffle pinch in your hand like a bow tie.
Open one of the twist on the outer ring, lay the ruffle down and secure the ruffle with a couple turns of the twist. Continue making ruffles and proceed around the outer ring of the work wreath.
Next Step: After you have gone all the way around the outer ring with a layer of ruffles, start a second layer of ruffles on the outer ring again. Just make your ruffle, and open one of the twist, lay the second ruffle down on top of the first ruffle and secure both ruffles with a couple of turns of the twist.
Continue around the outer ring until you have two layers of ruffles in every twist.
Next Step: Move to the inner ring of the work wreath. Place two layers of ruffles around the inner ring using the same technique as the outer ring.
After you have completed two layers of ruffles around the inner and outer rings ......you are ready to decorate!
This wreath can be decorated in any number of ways. The basic chocolate color is perfect for Easter with the additional of pink, green, lavender, blue....or tans, beige and burlap. You could decorate it for Easter....remove the embellishments and add other items for a whole new look)))
We added the RAZ 14" Bunny. When adding a large piece such as this to a wreath, the main thing is that you want to secure it well. Items will be secured in different fashions depending on how they are made. For this bunny, we were able to slip a zip tie between the front and hind legs and secure the zip time to the frame. To give some extra security to the head, we tied a piece of clear fishing line around the neck and secure that to the frame also.
Next Step: To add ribbon strips, just pick out an assortment of ribbon. You can use one or as many colors as you wish. We used three styles of ribbon on this wreath. One was a 4" and the other two were 2.5". You can layer your ribbons and secure then all together, or alternate around your wreath. Just try different methods until you're happy with your result.
The main thing about adding ribbon strips is to measure before you cut up all your ribbon! The depth of wreaths varies, so it's always wise to cut a ribbon strip the length you think you'll need and actually place it in the wreath to check. Then cut your strips according to that. These strips were about 12" We also cut the ends of the strips to make a nice chevron finish or you can just cut the edges across at an angle. You can make loops with your ribbon and secure, or you can secure your ribbon in the twists going around the wreath with cutting it.


Oh by the way......the door in the background for this image is just an old door that we picked up at an antique store downtown. We love it! It's leaned up against our wall in the shop and we'll be using it for our wreath images and other projects in the future.
 Save
Save
Save
Save


