2017 Halloween Witch Stop in for a Spell Wreath Tutorial
New Halloween wreath tutorial.....Stop in for a Spell! Cute wreath that's easy to make.
SuppliesXX748855 24" Fresh Green Work Wreath
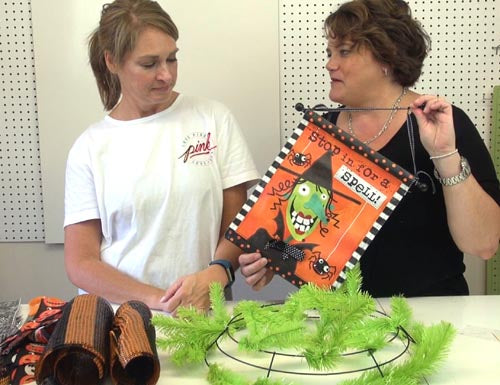
J7336 Halloween Banner (available only in the kit) Other Halloween signs or banners could be used.
XB99510-19 10" Orange Black Matte Stripe Mesh - 2 Rolls
X762540-16 2.5" Silver Python Ribbon Sold out on websiteX710240-21 2.5" Striped Jack O'Lantern Ribbon
UX501-1119 1.5" Orange Purple Glitter Dot Ribbon
Note: A limited number of kits containing the above supplies will be available. Once the kits have sold out, there may still be some of the individual products remaining on the website. The tutorial will be left up even after items may be sold out since the basic directions can be followed and other product chosen. You could pick out any number of different products to make a similar wreath.
Click here to purchase wreath kit: 2017 Halloween Stop in for a Spell Wreath KitSummary:Wreath: A 24" Fresh Green Work Wreath was chosen for this product, so that the twists on the wreath would add a little touch of green to the wreath.
A 24" work wreath actually measures 15" across the widest ring, but with the addition of mesh and other products you wind up with a finished wreath that measures 24" or greater. You want to sort of smooth out your twists before you get started.
You could use a lime green, purple, orange or black wreath for this project equally as well.
I apologize for the quality of the images used that reflect the actual creation of this project. I had to grab them from video frames and that's not the best way for sure!
Mesh: The mesh chosen for this project was a 10" orange black stripe mesh that has a matte finish. This mesh measures 10" in width and 10 yards in length.
This mesh is also available in the same color pattern but with a metallic finish. We used almost two rolls. You will have a little left. You could use other styles of Halloween colored mesh just as well, but to do the ruffle technique it's best to stick with a product that is 10" in width.
We used the ruffle technique but this time instead of cutting ruffles 10" in length, we cut pieces 30" in length. We had watched a video tutorial done by Lori with Hard Working Mom, and she demonstrated how to make ruffles using 30" pieces of mesh. She felt that this reduced the raveling and achieved the same look and we have to agree!
When we first started making the ruffle technique, we cut our pieces in about 15" and then decided it didn't quite take that much to achieve a nice look. But I'm liking the 30" method!
We really didn't show it in the video this time, since we prepared our materials ahead of time to reduce the time on the video, but we use a self-healing cutting mat and rotary cutter to cut the mesh strips. These are both tools that are very helpful for crafting and wreath making. Here's a image from a previous project that shows you the tools. We used to sell both these items on Trendy Tree, but it's very difficult to compete with Amazon))) So now we just refer you to them, but we'll include our affiliate links in this post if you're interested in purchasing. The self healing mat has measurements on it and and be reversed since it's the same on both sides, just a different color. The rotary cutter is a 60mm cutter and the blade can be changed when it becomes dull. It think we've only had to change our blade one time, but we're not making wreaths everyday either like some folks. You can cut multiple pieces of mesh at the same time. We've cut up to three layers without any problem.
To make the ruffle, let the 30" piece of mesh roll up naturally on the table, then smooth it out and starting at the center of the cut edge (selvage or uncut edges to the sides), scrunch up through the middle of the mesh making a ruffle. Hold it pinched in your fingers and secure it in a twist on the wreath. You can start on the outer or inner ring, it really doesn't matter, just whichever is more convenient for you. Close the twist with only a couple of turns at this time, since you will be un-doing it later to add ribbon strips.
Continue around both the outer and inner ring with one 30" ruffle. If you decide that you don't like this method, you can revert to the 10" ruffle length. Just use a cluster of three ruffles if you do that. With this particular mesh, since it gives good coverage, you might actually get by with just two 10" ruffles. You would just have to test and see how you liked it.
Ribbon Strips: Once all the ruffles have been attached, you're ready to add your ribbon. Ribbon can be added by cutting strips, making small bows or even just loops. It's just whatever you prefer.
It's always good to do a "test" cut on your ribbon before you start cutting up ribbon. The length that may have worked on your last project, might not be the same for this project, so just always test.
We cut the ribbon strips in 12" length. We had chosen three types of ribbon, two 2.5" ribbons and one 1.5" ribbon. It's good to vary the size and styles of your ribbon and even texture. The ribbon ends were finished off with an angled cut. You can finish your ribbon ends doing a chevron or pointed cut, blunt or angled, just whichever you prefer.
Ribbons strips were pinched in the center and all three ribbons grasped in a cluster. Don't just stack your ribbons right on top of each other, hold them in your hand, but separate the ribbons out so you can see them all well. Ribbons should be face up (right side).
To attach the ribbon cluster, you must first un-do a twist. Make sure your mesh ruffle stays in place, lay the ribbon cluster down and then secure the twist back. This time you can give the twist three or four turns since it's the last thing you're adding to the twist.
We did notice on the silver python ribbon, that it does have a fairly strong paint smell. It's not really unpleasant or anything, but if you are sensitive to odors, you might want to unwrap it and let it air out a bit before using. Course the wreath will be on the outside when you're finished, but it does just have a noticeable smell to it.
Banner: You may want to hang the wreath on a wall to see where you want to place your witch banner. You could put it in the center or off to a side. The banner has a ribbon hanger and a bit of the slack was taken out of this by attaching a piece of floral wire, just making a loop at the top of the banner. The banner was attached using the twist from the work wreath. Typically we say attach embellishments down to the work wreath frame, but with the banner you want it to lay on the front of the wreath.
If you need to attach it a little at the bottom of the banner, you can run a straight piece of floral wire through the bottom of the banner and just attach to a twist of the wreath also.
You could add a bow if you like with the remaining ribbon. We added a very simple two loop shoestring style bow with a 40" piece of the 2.5" pumpkin ribbon and attached it to the top of the banner.
Finish: Just check the back of your wreath for any sharp edges that might be there from wires, or the twists. Cover them with tape in needed or push to the inside of the wreath. Fluff your bows and you're ready to go! This wreath overall measured 24-26" in width. A hanger was made for the back of the wreath using a chenille stem.
Happy Halloween and Stop in for a Spell!
SaveSaveSaveSaveSaveSaveSaveSaveSaveSaveSave