This is an updated version of the Poinsettia Wreath Tutorial that we initially did back in 2016.
We used a stacked method with two wreaths, one was a 24" pencil wreath and one 10" pencil wreath. This method results in a fuller, thicker wreath and only takes a little more time to finish.
Watch the video below.
Supplies
Work Forms: 24" Fresh Green Pencil Work Wreath (in the video we used a fresh green pencil wreath, you could use evergreen or lime in either a Work form style or Pencil style)
Tutorial will be left up even after the kit and/or exact supplies are sold out, since you can use these basic instructions and choose other product.
Other choices in mesh would include fabric mesh or faux jute.
Any of the products above can be substitute with other colors for a different look.
You can also use any style of 10" Deco Poly Mesh, but depending on the type product chosen, you might need to buy extra for more coverage since some mesh is more "see through" than others.
This tutorial can also be created with 10" Deco Paper Mesh. Paper Mesh project can only be used in areas away from moisture.
First Step
Connect the two wreath forms. The 24" Pencil Work Wreath actually measures 15" across the widest of the rings. The 10" Pencil Work Wreath measures 10" across the widest ring.
The smaller 10" wreath was centered on to the 24" wreath. Zip ties (cable ties) were used to attach the wreaths together.
We started at areas where straight posts were on each wreath and slipped a zip tie around them.
Don't pull the zip ties snug until you get about four evenly placed around the wreaths. Snug them up a little at a time, going from one zip tie to the other so that the smaller wreath will stay centered.
Next
Next step is to cut the lime green poly burlap into 10" length. Poly burlap will ravel as does any open weave product.
I don't know of any specific solution that will stop it from raveling, but there are some things you can do to help.
Make as few cuts in the product as possible and handle as little as possible.
That's why we choose 10" wide mesh for the petal technique and not a 21" wide product that would have to be split down the middle and then cut again.
Update: A wood burning cutter tool does work well with poly burlap. You must use a heat-proof surface such has a glass cutting board underneath the mesh.
This does help with paper mesh so it would be a good option to try. It is recommended that you always test the product on a scrap before spraying your entire wreath to see how it works for you.
Some climates are different than others, and we have tested some products that never seemed to dry completely.
Another option is spraying the edges with clear acrylic spray. If you choose to try this, be sure gently lift the petals when spraying. As they dry, they will become sticky and you need to gently lift them out a little bit to keep them from sticking together.
Petals
Back to the petals))) Cut the lime green mesh into 10" lengths. You can go ahead and cut the whole roll since you will need about 36 pieces to go around the 24" Work Wreath.
You should be able to cut about 36 pieces from the roll, but don't fret if you only get 35.
You can short yourself one petal in a twist and it will never be noticeable. You can cut the mesh with scissors or a rotary cutter.
Using a rotary cutter and mat does speed the process up a bit. Can't say that it matters one bit what you cut with in regards to raveling. Just be prepared to snip strings at the end.
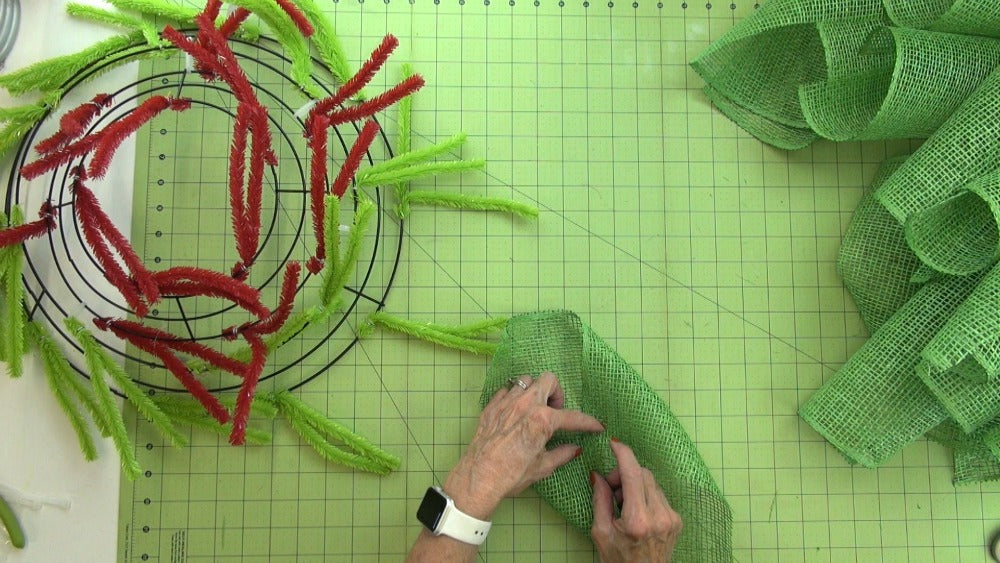
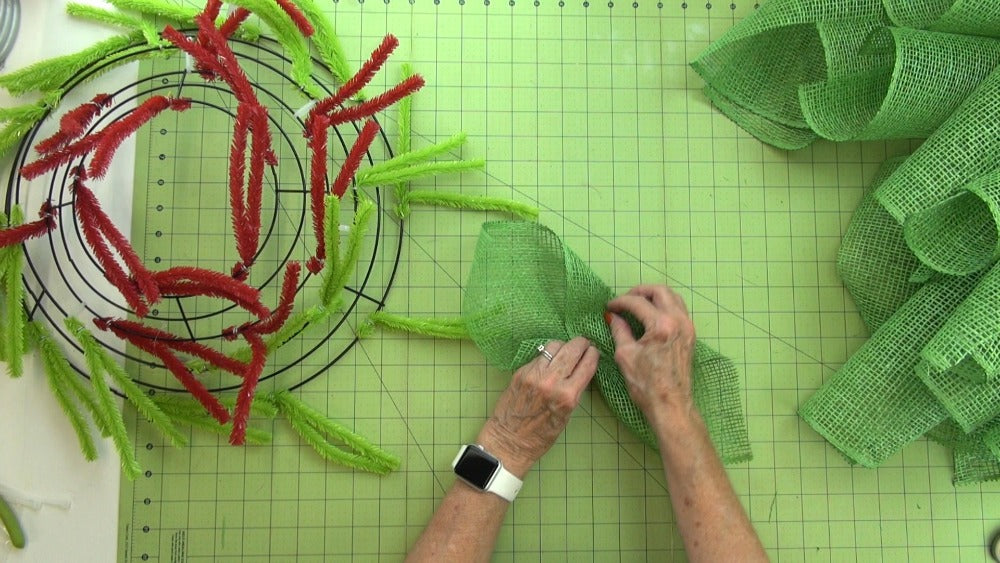
To make a petal, let the mesh roll up in it's natural position.
Take a corner and bring to the center, then take an opposing corner and bring to the center.
Pinch the center together and hold.
Flip the petal over and open a twist on the outer ring of the green pencil wreath.
Secure the pinched up petal into a twist. You only have to give it a turn right now, just enough to hold it in place. Pinch the petal and push the ends toward the outside of the wreath, it sort of makes a "V."
Next, make another petal, open up the twist and lay the second petal down on top of the first and re-secure the twist this time with 3-4 turns. You can tuck the ends of the twist to the inside of the wreath to get them out of the way.
It's very important to always open up the twist, make sure the first petal stays in place, and then re-secure the twist around both petals.
Continue working around the outer ring of the green wreath until you have two petals secured in each twist.
Once you have have completed the outer ring, move up to the inner ring on the green wreath and continue to place two petals in each twist.
We were only able to cut 35 pieces from our roll of green poly burlap so we were short one petal.....not noticeable))) Next, cut the red poly burlap in 10" lengths same as the lime green.
You can go ahead and 32 pieces to start with, since there is usually about 12 twists on a 10" wreath and you'll need 24 pieces for that, and then you will need about 8 more pieces to fill in around the center.
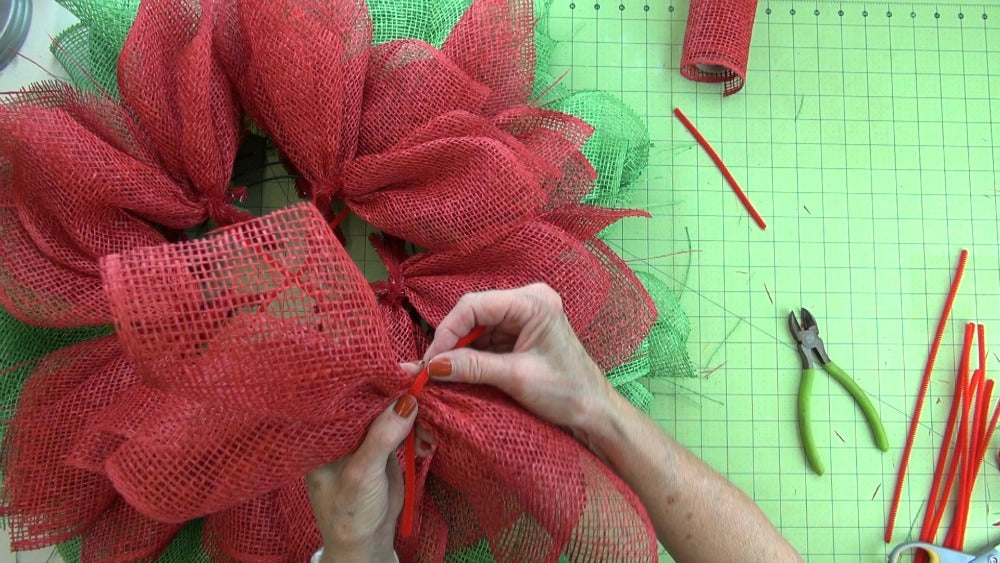
Before you start making the red petals, you will need to make a "crossbar" across the center of the red 10" wreath.
We did this with chenille stems. You could also use zip ties if you like. Just attach them around the straight posts and that will keep them from slipping around.
You need this "crossbar" to have a place to attach petals to help fill in the center. Attach two red petals into each twist around the red 10" work wreath.
Start on the outer ring first, and then complete the inner ring.
Once you have placed the red petals, you can see you still need to fill in the center with more petals. To do this, we made a "pick" of two petals.
Just make two petals and cut a chenille stem in half.
Pinch your two petals together and place the half of chenille stem on top of the petals at the pinched center. Twist the chenille stem from the underneath side to secure.
Place the "pick" of two petals on top of one of "crossbar" stems in the middle. Just slip the pick down on top of the chenille stem and reach from the underneath side to twist the ends to secure.
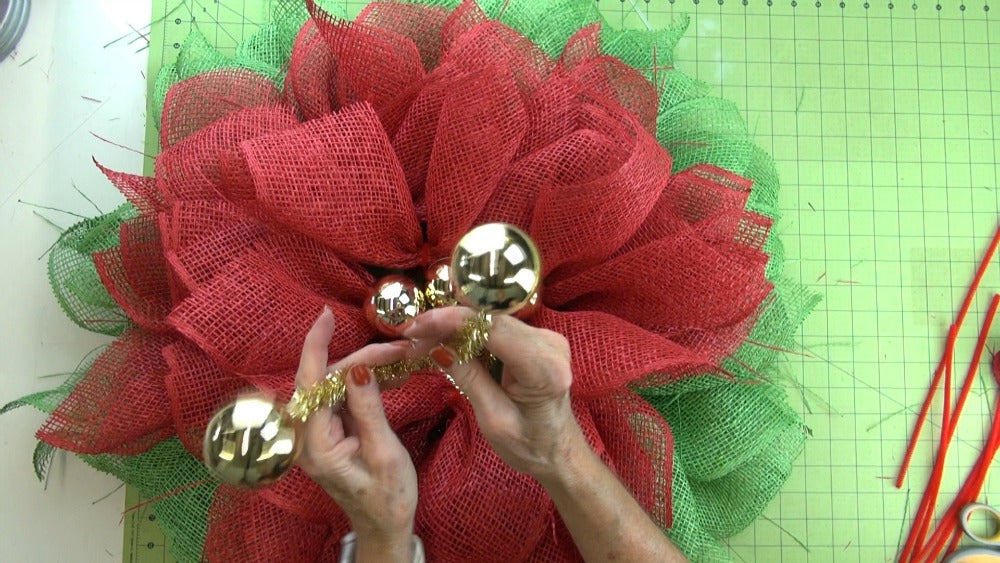
Place a cluster of two petals on to each of the four segments. Next you are ready to finish filling in the center with the gold twist balls.
We used three of the gold twist balls (twist balls are a piece of tinsel with a ball on each end).
The balls were inserted up through the back of the wreath and secure around the "crossbar" in the center. Insert all three balls up through the middle from the back, and gently twist them around until you have the center filled in snugly.
Don't twist so tight that you pull the balls off the tinsel piece.
If you have any gaps in the center that need filling in, you can make a pick with a single petal and just fill in the gap, secure from the back same as the extra petals you added to the "crossbar."
Your wreath is ready for clipping now! It does help if you clip strings rather than pull on them, otherwise you can get a never ending raveling process. Of course, some strings will just fall out. The more you handle the wreath, the more you will have to clip strings.
Next step is optional. We did spray the edges with Elmer's Craft Bond Spray adhesive. This step we did outside since it is a little messy. If you choose to do this, be sure to lift out the petals gently to keep them from sticking together. Allow the wreath to dry thoroughly.
In addition to this, we also tried a new step, for us anyway. We sprayed the wreath very lightly with a clear acrylic spray. Again, lifting out the petals to keep them from sticking together. You will generate some strings as you do this, just clip at the end when you're finished.
I would advise you to try any spray products on a scrap before you spray an entire project.
Climates are different across the country and some products dry better than others. We have used some products that never seemed to dry at all.
Some customers have reported that they spray their wreaths with clear spray to help with the fading. I can't respond by experience to how this works, but sounds like worth a try)))
Poly Burlap is made of all poly which is polypropylene. It's a plastic. Plastic in the sunshine fades....it all depends on the amount of direct sunlight and exposure time.
Always check the back of your wreath for any sharp edges that need to be fixed, and when checking the back of your wreath, hold it up and don't lay if flat down so you want flatten your petals.
You can make a hanger using a couple of zip ties put together. The finished wreath measured about 26" in diameter and had a depth of 8-9"
Don't forget to subscribe to our YouTube Channel so you won't miss our next video .... coming out soon! (Post contains some affiliate links.)