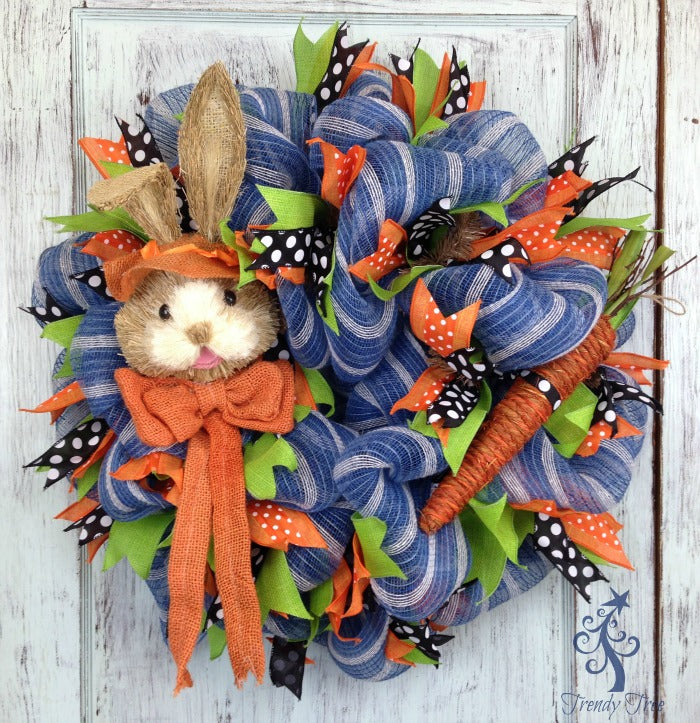
Here's a new orange bunny head tutorial using the pouf technique that's easy to put together.
Insert video here (please check back later, video is still uploading)
Supplies (A limited number of wreath kits with supplies will be available)
Click here to purchase the kit with supplies
Sorry - this kit is now sold out, no more kits will be available.
XX7488W4 24" Burlap Work Wreath (
click here to order other colors)
XB964-05 21" Denim Poly Burlap with Ivory Stripes (
click here to order other colors)
H256 16" Orange Bunny Head (not available for purchase on website, will only be in kit, but other
styles and colors available)
RG158602 Black/White Polka Dot 1.5" x 10 yd (in kit only, but many other
polka dot ribbons are available)
RG121298 Lime Green 2.5" x 10 yd (in kit only, but other
ribbon styles available on website)
RG813820 Orange Polka Dot 2.5" x 10 yd (in kit only, but other
ribbon styles available on website)
E3536101 RAZ Rustic Carrot
(Sold out - but other carrots available)
This tutorial will still be available once the kits are sold out, since the same technique can be applied just using different materials.

Here's an image of the supplies we used for this wreath project. The tutorial can be used and different materials chosen and still achieve a similar look. It's basic wreath making using the pouf technique and ribbon strips.
The 24" Burlap Work Wreath was chosen for this project. Our 24" Work Wreaths actually measure 15" across the outer ring, but with the addition of mesh, ribbons, etc you wind up with a finished wreath that measures anywhere from 24" to 30" just depending on the type products used.
To start the pouf technique, take the 21" mesh and grasp about 3" from the end, pinch p the mesh and attach in one of the twists on the work wreath, we started with the outer ring. Just secure your twists a couple of turns for now, because you will be un-doing them and adding ribbon strips later. Once the final item has been added, you want to secure your twist 3-4 times. The mat in the image is a 24" x 36" self-healing
Omnigrid Cutting Mat.


Just push the raw end of the mesh toward the inside of the wreath.

Next, measure 14" of your mesh. Grasp the mesh at the 14" mark and pinch up in your hand. You may want to take your other hand and fluff out the pouf from the underneath side. Secure this mesh into the next twist on the outer ring. Continue measuring and securing until you have worked all the way around the outer ring.
Why 14"? We have tried doing the math and measuring the mesh to where each inch of the mesh was used in the wreath. This called for poufs that were a little larger than 14". But they seemed to be too large and floppy, so we went back to 14". You may see some wreath makers make them all different sizes....it's just depends on the look you want, the materials you have and what you want to do with it. It's all a matter of preference. These are just basic instructions to build on.
Once you get around the outer ring and back to your starting point, gently untwist that first twist, making sure your beginning end stays in place, and secure your last pouf into that twist.

Undo that twist that my right hand is on, measure your mesh and secure your last pouf on top of the mesh beginning point, making sure both layers stay secure.
Now you're ready to move up to the inner ring. Just grasp the mesh snug and pull up to the closest twist on the inner ring.

Secure the mesh in the twist and start measuring your 14" and continue making poufs around the inner ring. When you work your way back to your starting point, you will open that twist and secure your last pouf on top of the starting point same as on the outer ring. You are now ready to cut your mesh from the roll. We had about a couple of yards left over mayve.

Cut the mesh leaving a tail of 4-5" and poke the raw ends to the inside of the wreath. Flip the wreath over and find your beginning and ending raw ends.

Smooth the raw end together and attach the beginning end to the work wreath frame using a zip tie or chenille stem. I personally rather use zip ties since they hold tighter and are less visible. Secure the ending raw end the same way. This keeps your raw ends from slipping out to the front of your wreath at some point.
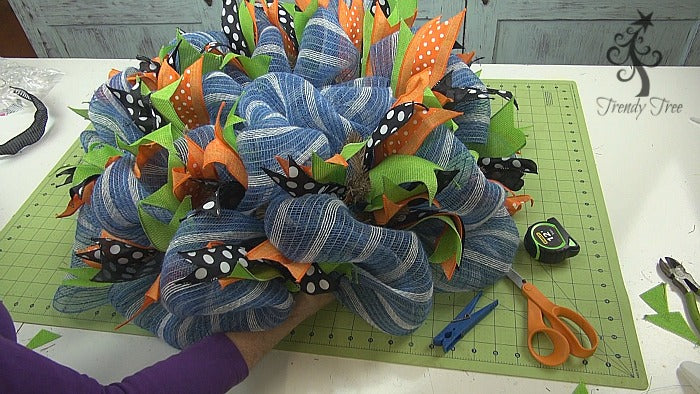
Next you're ready to decide on placement of your embellishments.

We didn't secure our bunny head or carrot at this point, just wanted to get an idea of placement. Our next step was to cut ribbon strips.
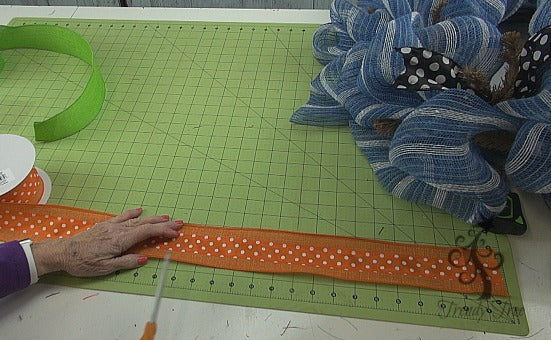
It's always wise to cut a test strip ribbon before your start cutting up your ribbon strips. We started out with a 12" length that was too short and settled on 16" for our ribbon strips. In hindsight, anywhere fro 14-15" would have been fine. The longer the ribbon strips, the more opportunity you have for the ribbon tips to get bent and have to be straightened out. If I was making this wreath again, I would probably go with 14-15" But, the point is, you don't want to cut your ribbon strips and then find out you have cut them too short. Too long, you can fix, but you can't fix when they are too short.
We always use wire edge ribbons for the wreaths because it helps to hold it's shape. We used three different ribbons for this wreath, you can use more or less, it just all depends on your preference. It is good to combine patterns and colors that contrast with each other and also sizes. We used two ribbons that were 2.5" in width and one that was 1.5".

We started out with a pattern of placing the ribbons and then wound up making a cluster of all three ribbons with the most narrow on top and securing that ribbon cluster into each twist. To attach the ribbon cluster, open the twist and lay the ribbon cluster down on top of the mesh, then re-secure the twist. This time you can give the twist 3-4 turns since the ribbon strips are the last layer.
The Orange Bunny Head was secured to the left side of the wreath using the burlap hanger that was on the bunny head and securing this to the work wreath frame with a zip tie. We also then used a double strand of clear fishing line around the bunny's neck as an extra securing point. The fishing line was tied directly to the work wreath frame from the back.
The RAZ Rustic Carrot was secured to the work wreath frame with a piece of folded ribbon. The ribbon was tied around the carrot and then tied to the work wreath from from the back.

We have tons of supplies for making all kinds of bunny wreaths for this spring!

I may just have to keep this little guy for my front door)))
Don't forget to subscribe to our YouTube channel so you don't miss any of our upcoming videos!
 Save
Save
