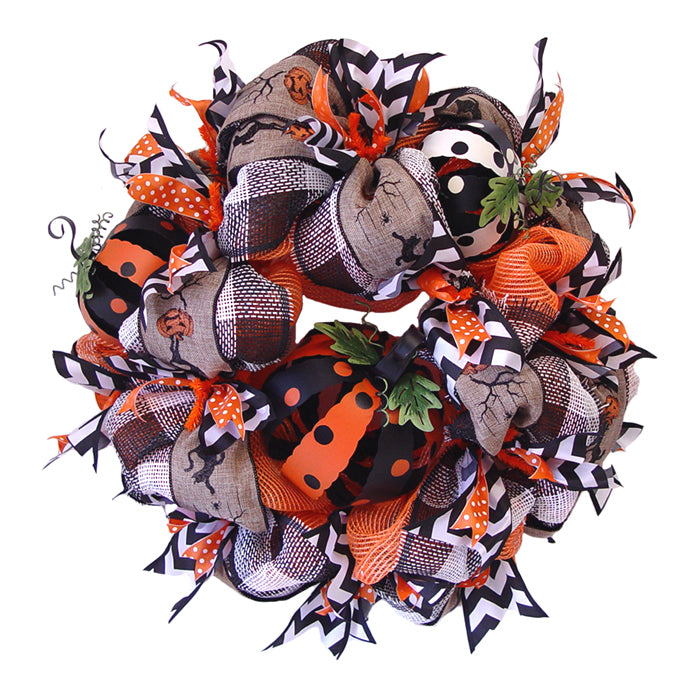
Halloween wreath tutorial using
Orange Vertical Line Deco Poly Mesh,
Black and White Check Paper Mesh, metal polka dot pumpkins and assorted ribbons.

We chose
Orange Vertical Line Deco Poly Mesh because it makes an inexpensive base and gives good coverage. It doesn't have any foil in it, but has a nice nubby texture that gives it a little more body than plain or metallic foil mesh.
The
Black and White Paper Check is a 10" roll by 10 yards and it was used as a second layer. It is made of paper of course and should be used inside on in a very heavily protected area away from moisture. The Paper Mesh products from Craig Bachman do have a coating sprayed on them which does help, but they still need protection.

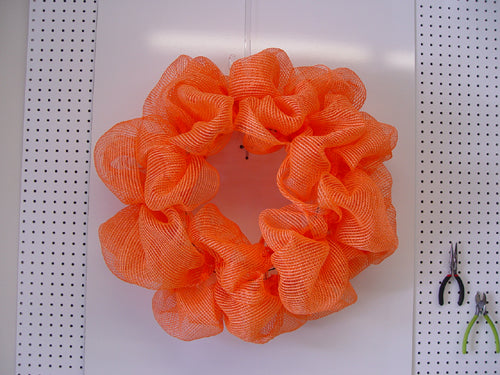
This is one of the new non-metallic
Pencil Wreaths that just arrived last week. The orange is a deep, rich glossy color with no foil. The non-metallic Pencil Wreaths are available in Royal Blue, Chocolate, Yellow, Orange, Pink, Hot Pink, Turquoise, Sky Blue, Seafoam Green, Red, Fresh Green, Purple and Lavender. They are all in stock and sell for $5.99. The 24" Work Wreath forms actually measure 15" (the largest of the two metal rings). Then when you secure your mesh, fabric, paper or whatever product you are using, you wind up with a wreath that measures 24" or larger.
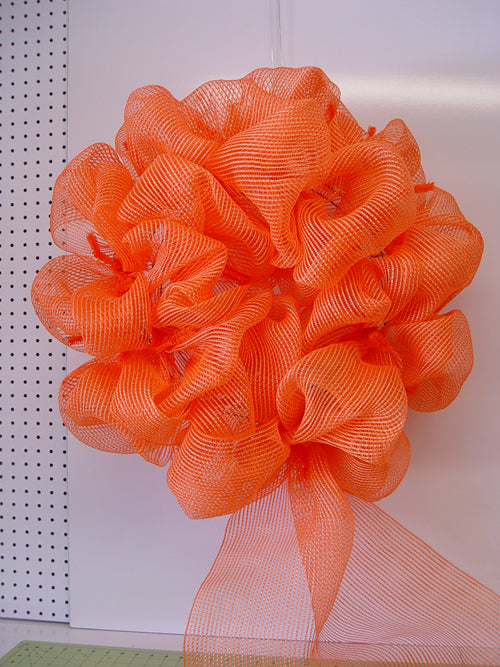
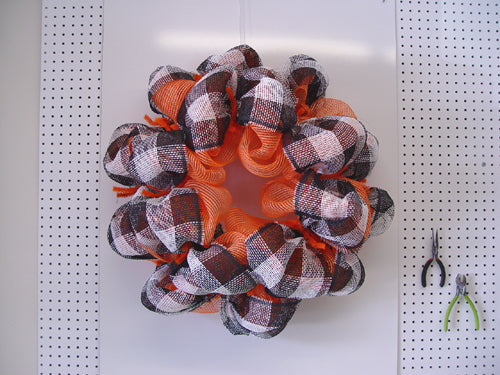
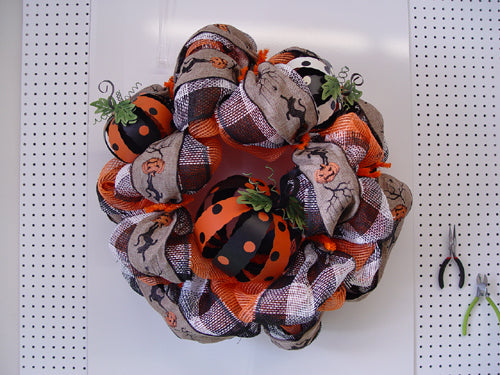
Our finished wreath above measures about 30" x 30" and has a depth of 12-13"
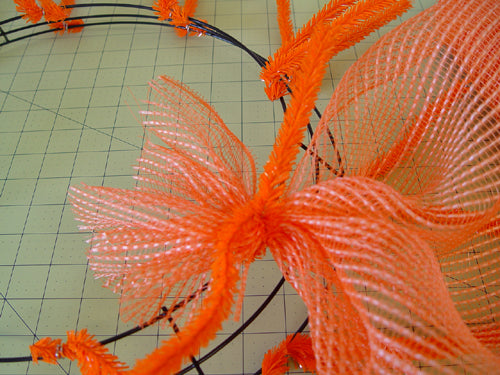
Lay your wreath form on a flat surface and smooth out the twists. For this wreath, we started on the inner ring. It doesn't really matter which ring you start on or which twist.
Grasp the mesh about 3-4 inches from the end and pinch it together. Lay the grasped mesh in one of the twists and secure it with a couple of turns. We're only using a couple of turns of the twists at this point, because we're going to be un-doing it later to add more layers. We'll give it 3-4 turns on the last layer for added security.
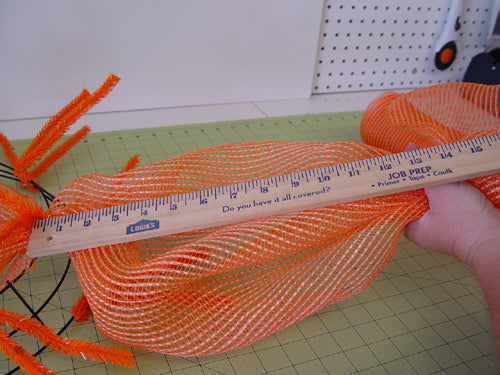
Next we measured about 14" for the first pouf. At times you might make your poufs a little smaller or larger, it's just personal perference. For us, the 14" has worked out better. Some folks may make their poufs a little smaller on the inner ring and a little larger on the outer ring...you just have to practice with it and settle on what works best for you. That's the good thing about working with Deco Poly Mesh® and Work Wreaths ...you can take them apart and start over.
Pinch the mesh together at the 14" mark and secure it in the next twist. You may want to put you hand under the mesh to fluff it out before you go own. Your pouf is made!
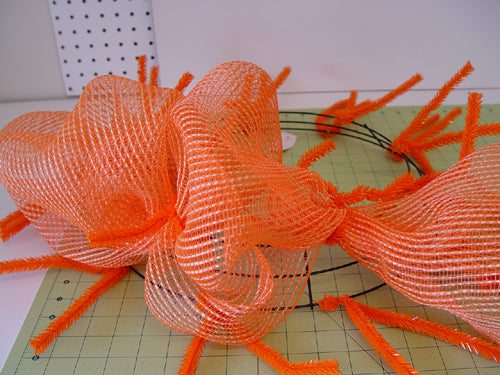
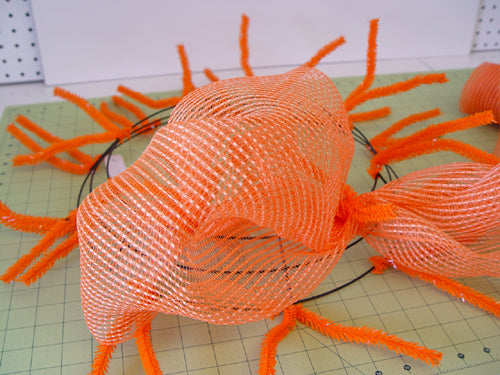
Just continue measuring, fluffing and securing the next pouf.....work around the inner ring. You never cut your mesh until you're all done with both rings.
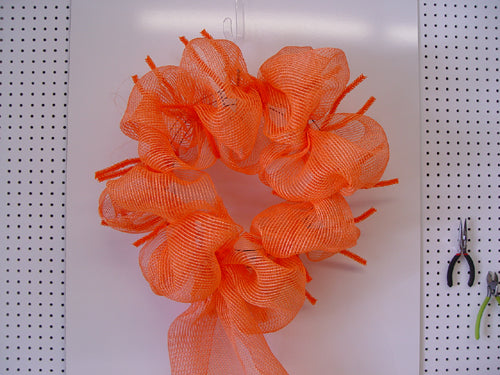
This is the wreath with the inner ring finished......doesn't look so great at this point, but don't despair......it's like making gravy......at first you think.....this isn't going to work.....and then it all comes together at the end)))
Once you've finished the inner ring, don't cut your mesh.....just pull it straight down to the closest twist on the outer ring and secure. Start measuring from that point and continue around your outer ring.
Now the inner and outer rings have been completed. It's always good to hang it up, step back and take a look. See if the poufs are fairly symmetrical. You can always adjust the mesh.
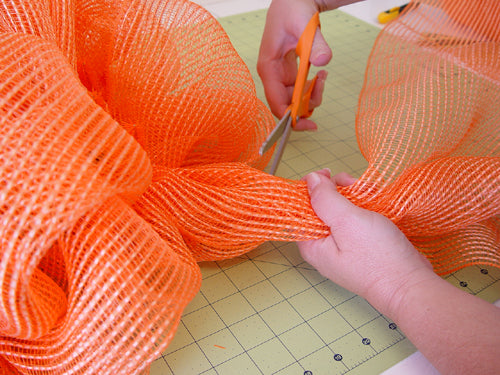
Now you're ready to cut your mesh from the roll. Grasp the mesh and cut leaving a tail of 4-5" We usually have 1 1/2' to 2 yards left on a roll. We did try an experiment once and calculated what size we could make our poufs and use up every inch of mesh and not be left this little bit on the roll. We made the inner poufs a little smaller than the outer poufs and did in fact use every inch! But, we just were not happy with the overall result....the poufs were a little thinned out and floppy. We wound up undoing the whole thing and going back to our 14" measure. The remnants are always good for adding a little contrast somewhere on other projects.....and when you get enough remnants they're great for making curly wreaths using the curly roll technique.
Take the cut end and weave it in and out the metal ring. This is a good time also to take a look at the back ofd your wreath and check for sharp edges where the twists are secured to the metal ring. You may have to bend some of them to the inside of the wreath and if you can't bend them, cover them with a little tape or something so they won't scratch your door or wall.
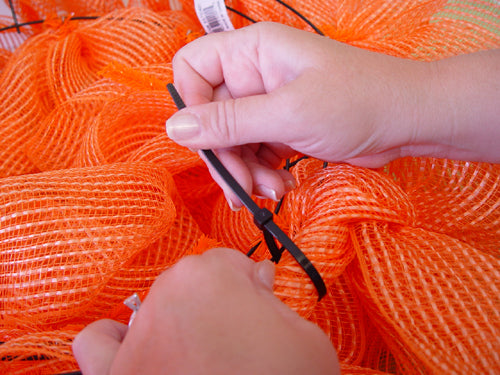
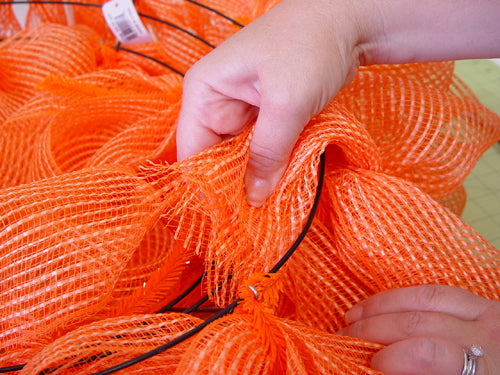
Keep a hand supply of plastic zip ties....they're great for attaching pieces to your wreath and in this case, securing the cut ends. Secure your starting point and your last end that you cut with zip ties. They really hold better than anything else we've ever tried. But, if you don't have any on hand, you can use pipe cleaners or floral wire.
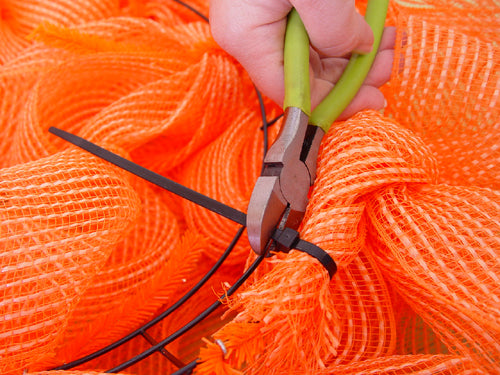
Snip off the end of the zip tie with some wire cutters and turn the cut side toward the inside. Save your scissors! Get an inexpensive pair of wire cutters and keep them on your table. And you know how it is.......YOURS will be the only pair around that everyone knows where they will be......it doesn't even help if you get pink ones or if you covered them in bling......the hubby will go for them everytime.....because he can't find his......am I right??
Now your first layer is complete and you're ready to move on!
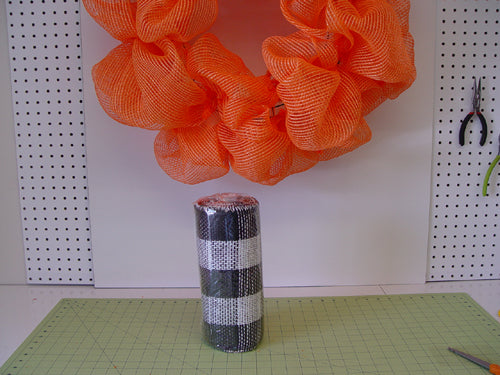
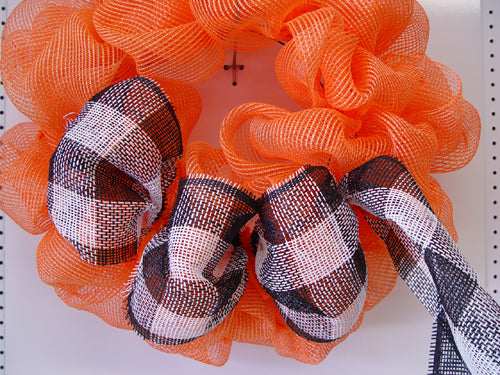
We chose the 10"
Black and White Paper Check. It's has a nice bold look and will be our second layer.
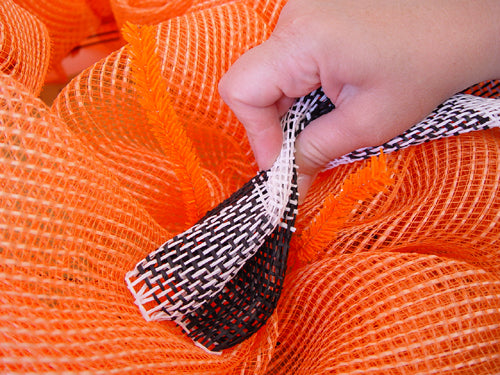
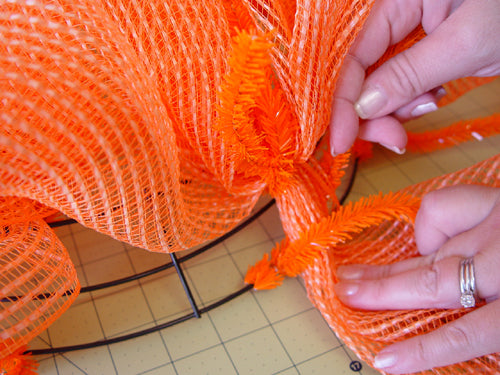
The layer of paper mesh is applied exactly as the first layer of orange. Just pick your starting point...we started on the inner ring again.
Open a twist, your orange pouf won't pop out or anything, and grasp the paper mesh 3-4 inches from the end and secure the twist back.
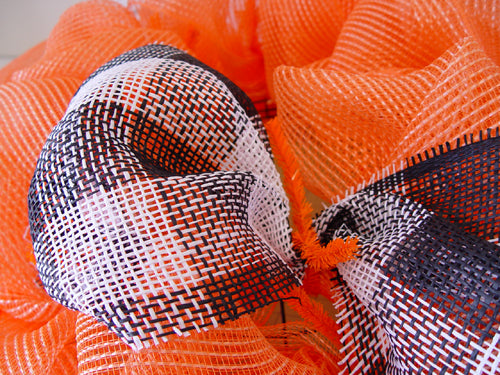
Now you have the orange and black/white paper secure in the same twist. Again, we're only giving it a couple of turns, because we still have more layers to add.
Continue measuring, grasping and securing in the next twist and just work yourself around the inner ring, drop down to the outer ring and continue. The ends are cut off and secured just like the orange mesh.
Hey....we could have just stopped right here and found some Harley Davidson embellishments and come away with a completely different look)))
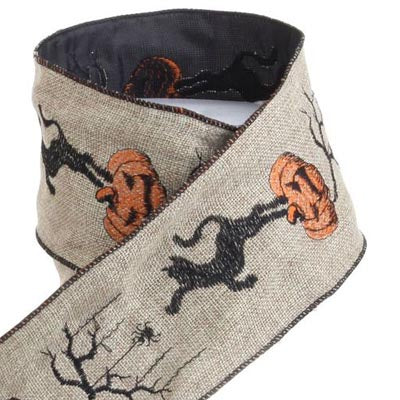
Next we chose a beautiful
RAZ embroidered Halloween ribbon. It's 4" in width and edges are wired, Most of the time when we add ribbon to our wreath we cut strips but this ribbon was too pretty to cut into strips and we wanted the pattern to be visible as much as possible.
To start the ribbon, we opened one of the twists and secured the ribbon with a couple of turns of the twists.
Our plan was to go into each twist with the ribbon, but the there is only 5 yards on a roll and we really didn't want to use two rolls because of the expense.
So....trial and error. The first time around, we found that the ribbon wouldn't go into each twist......so we took it apart and did make one cut in the 5 yard length. We didn't measure it out exactly, just did take the enter of the 5 yards and made a cut making one piece a little shorter than the other. We used the shorter piece on the inside and the longer piece on the outside.
We just positioned the ribbon on the wreath and secure it here and there in the twists.
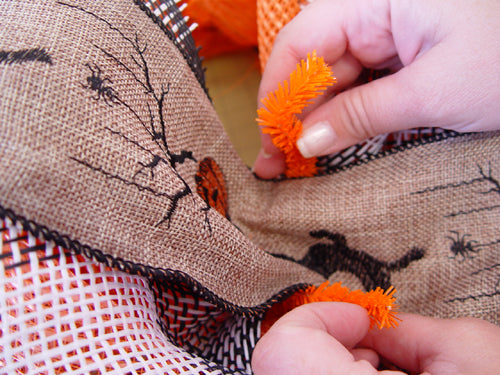
Next we decided on the positioning of the
metal pumpkins. At this point there are many options of items to use on the wreath.
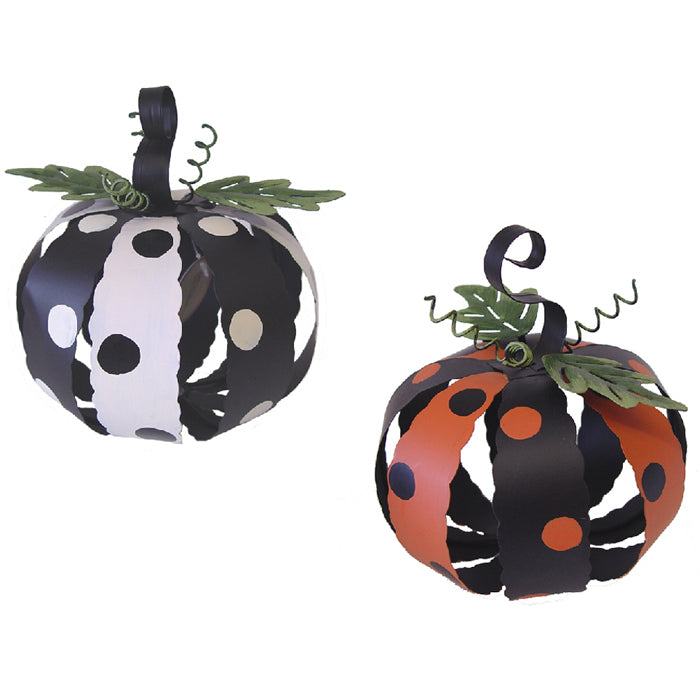
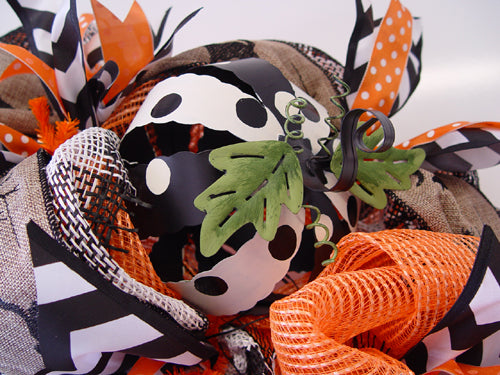
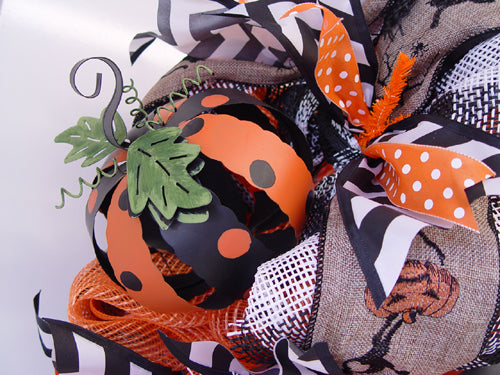
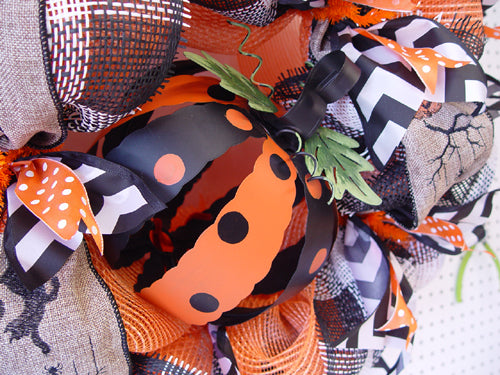
I really like the metal pumpkins we found at market this year! We sell them in sets of two....they come in a small size of 6" and a larger one at 8." For this wreath, we used the larger orange and black in the center and two of the smaller toward the top.
The wreath would have been fine with just one in the center too. And it is hard for an image to show how the pumpkins stand out on the wreath......in an image, they sort of get lost in the ribbons and mesh, but visually they really look great.
The metal pumpkins are one of those Halloween decorations that you can pull out year after year and do something different with it. They look good just sitting around....that's easy enough))) And they would make a nice centerpiece for your dining table.....they're made of metal so you could use them outside and they won't blow off your table. Love the simple colors....black/white; orange/black....and polka dots for whimsy.....whimsy never goes out of style)))
As far as attaching to the wreath, they were really easy to do. We used pipe cleaners. Now, if we were creating this wreath to sell, we would have secured with zip ties. But, our wreaths are only put together to do tutorial and showcase products. Once we're done.....most of the time we just take them apart to get them out of the way. We do keep some of the basic wreaths around and change them up. Sometimes you can use a basic wreath for several different occasions. This is especially nice when you're creating projects just for yourself.
It aways seems best to go with odd numbers when you're adding embellishments to your wreaths....this may not always be the case but works most of the time.
We just couldn't stop on our wreath until we added a bit more ribbon.....seems you can never have enough beautiful ribbon on a wreath.
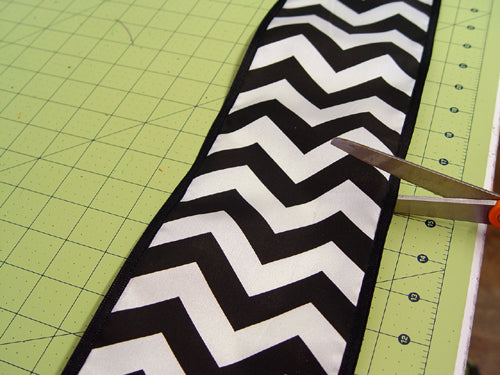
We cut 15" strips of this Black and White Chevron wire edge ribbon. It's 4" in width and you've probably seen us use it before))
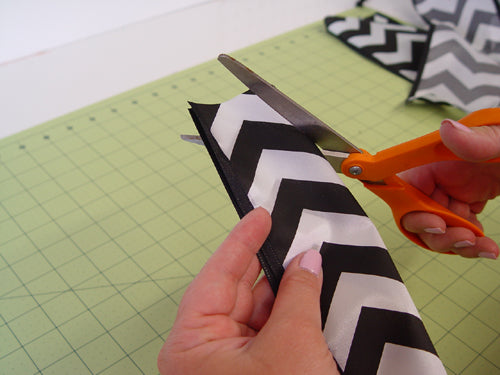
To make the chevron style tips, fold the ribbon in half and cut at an angle from the folded side.
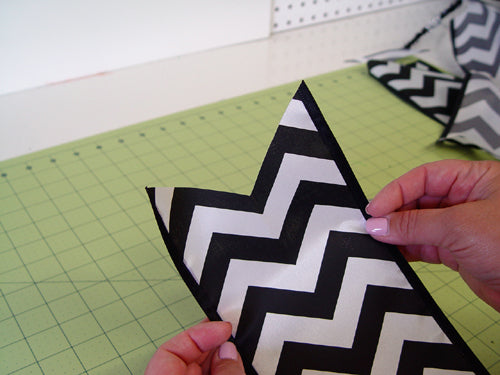
This fish-tail or chevron cut just gives a nice finish to your ribbon strips. We also used a new Orange and White Polka Dot that just came in last week. It was cut in the same manner.
Ribbons can be one of your most expensive items used in wreath making, but the good thing about them....most of the time you can get more than one project out of a roll.
To attached the ribbon strips, we laid the orange polka dot ribbon on top of the black/white chevron and pinched it together in the center. Open up your twists (leaving your orange, black/white paper and embroidered ribbon in place) and place this last layer of ribbon strips on top, twist to snugly together holding all the layers.
You're finished now so give it 3-4 twists.
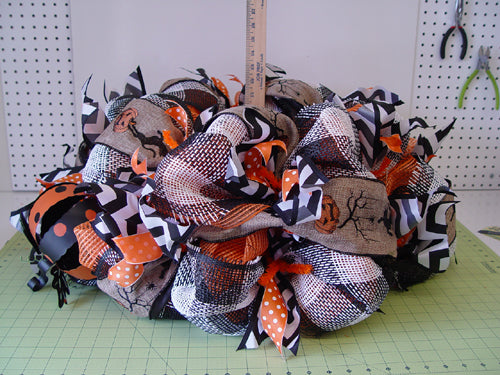
Here is a side view to give you an idea of the depth of the wreath. It measured at about 12-13". The height and width was about 30" All this on a 24" Work Wreath where the metal ring measures 15"
Here are some closeup views of the pumpkins.
This completes our Halloween Pumpkin Wreath tutorial. Hope you enjoyed it and please drop by our Trendy Tree Facebook page and "like" us if you haven't already.....follow our Tweets.....and check out our Pinterest Boards.
Happy Halloween Crafting!
