Note: Updated and Re-posted 6/2/15
New style Ruffle Wreath Deco Poly Mesh design.....or a first time try at a new style for us I might should say))) There may be plenty of wreaths out there using this style, but this is the first tutorial we have done using the style.
Craig Bachman Imports came out with a
video last week showing how to make a Ruffle Wreath. Watching their video will really help before making this wreath. Ours is just a bit different, but only in the amount of layers we used and the extra addition of ribbon strips.
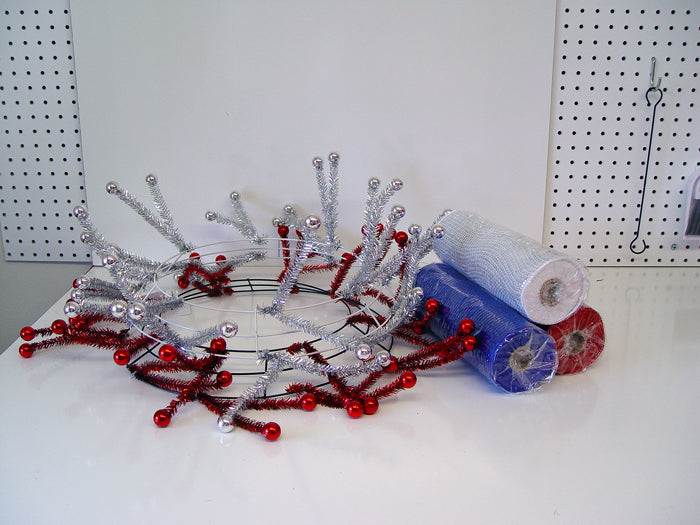
We chose to make our wreath using a
Pencil Ball Wreath instead of just a plain Pencil Wreath to add a bit more glitz. We were undecided about which color to use and opted for the
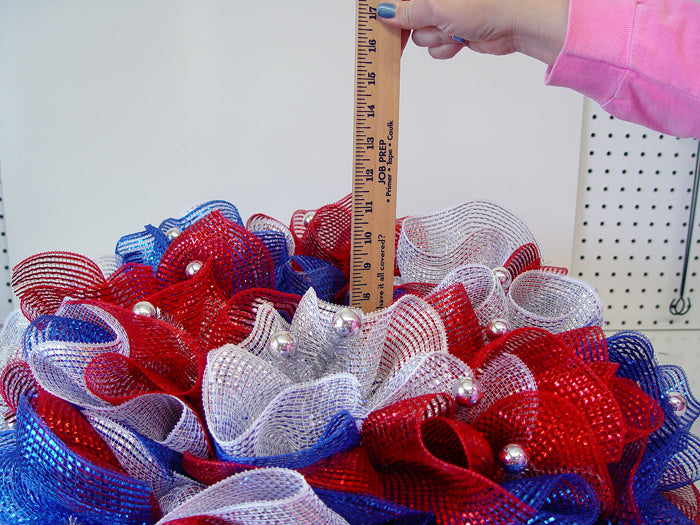
Silver Pencil Ball Wreath. The Pencil Ball wreaths cost a little more, but add a little extra with the shiny balls on the tips of the twists. This wreath is 24", same as other Pencil Wreaths. The actual metal frame is 15" at it's widest portion, but yields a 24" wreath or larger depending on the type mesh and type of method used to make the wreath.
(This wreath can be made with any 24" Work Wreath or Pencil Wreath.)
The Deco Poly Mesh used was the
Wide Foil style in the 10" width. We used
Red,
Royal Blue and
White with Silver Foil. The 10" rolls have 10 yards and sell for $6.99. I thought when we first started making the Ruffle Wreath that the overall finished wreath would be smaller than the typical wreath made with 21" wide mesh....but it measured a good 28" in width and height when done.
The only real difference between our wreath and the Craig Bachman Imports wreath in the video, was on their wreath they went around the inner and outer rings once with a "ruffle" and then did the inner ring a second time to add fullness.
We decided to count to see how many "ruffles" we could get from each roll so that we would use up the rolls instead of having short remnant left over.
We counted the twists on the wreath which were 18. The ruffles were to be cut in 20" lengths, so each 10 yard roll of mesh should have yielded exactly 18 ruffles of mesh. Thus we would have 54 ruffles....18 of each color. So we decided to give our wreath three layers of ruffles, alternating the colors.
(Note - since this first wreath, we have started making ruffles only 10" in length which works very well and takes less mesh.)
We use a 24" x 36" self healing
Omnigrid Cutting Mat and a
45mm Omnigrid Rotary Cutter (these are available at Amazon and we have included our affiliate links.)
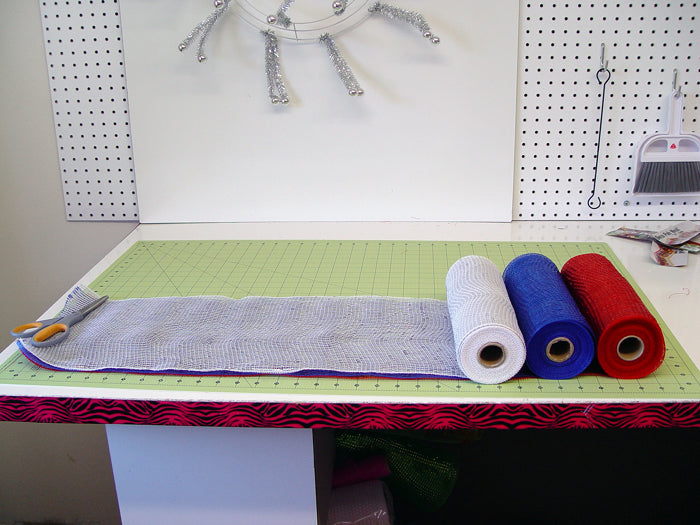
The mesh was spread out (all three colors layered on top of each other) and measured on the cutting table. Thanks to Julie Siomacco. Saw her do this in her free tutorial this weekend. Isn't it funny how we can see someone do something so simple.....and think....gosh, why didn't I think of that!
Note: Click here for crafting tools of cutters and mats.
Julie has written an
eBook (a downloadable PDF file) that teaches you step by step how to create beautiful Deco Poly Mesh wreaths. You may have seen it on our website. Just click
here to see more information. I purchased her book when it first came out and it's chocked full of excellent information, images, videos.....very well worth the price if you're interested in making nice wreaths. The information doesn't just stop with the wreath making, she shows you how to package your wreath for shipping and much much more info.
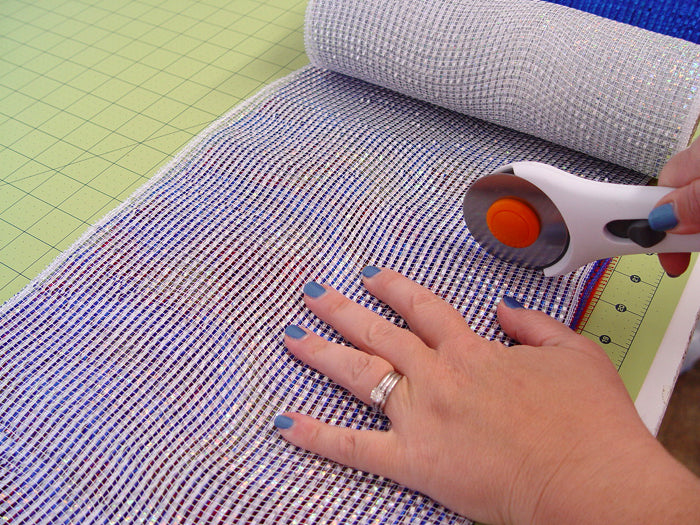
We cut the rolls 20" in length and just laid them to the side.
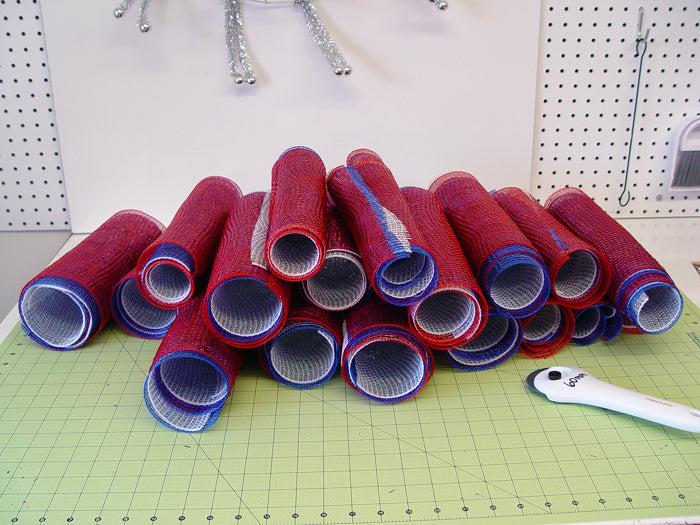
The three 10" x 10 yard rolls of Deco Poly Mesh yielded 18 rolls or ruffles of each color.
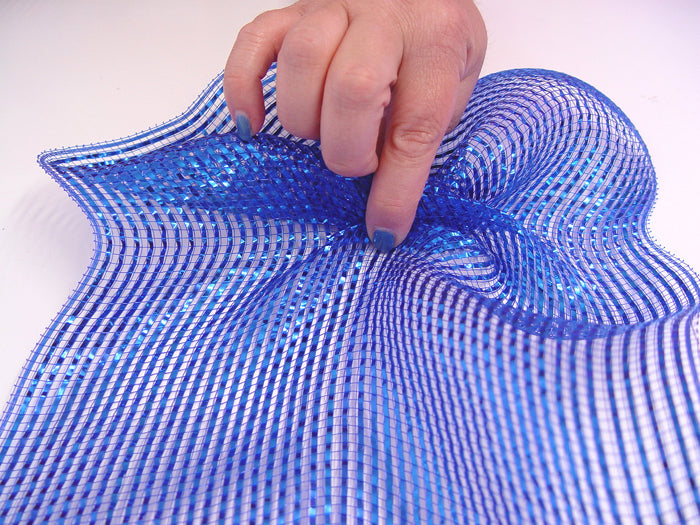
To make the ruffle just start at one end of the 20" cut length, flatten it out as best you can. It really helps to have another person, or just lay your scissors or something down on the opposite end of the mesh to hold it flat while you pinch pleat right up the center of the strip.

Just keep scrunching up the middle and keep it snug in your finger.
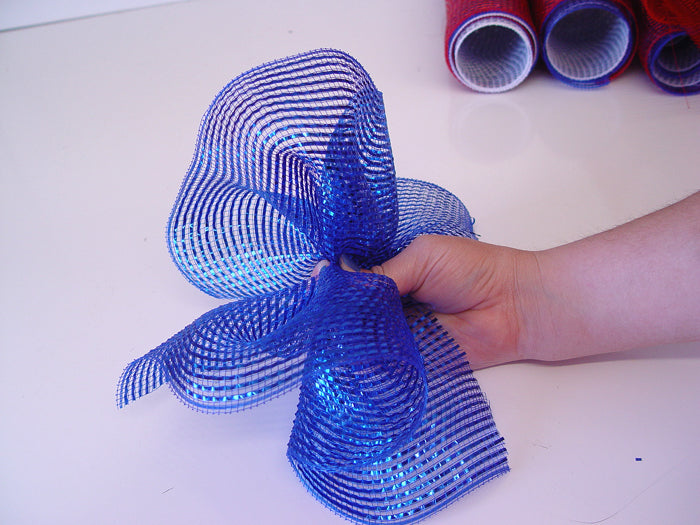
Hold it pinched in your fingers until you place it between the twists of the Pencil Ball Wreath.
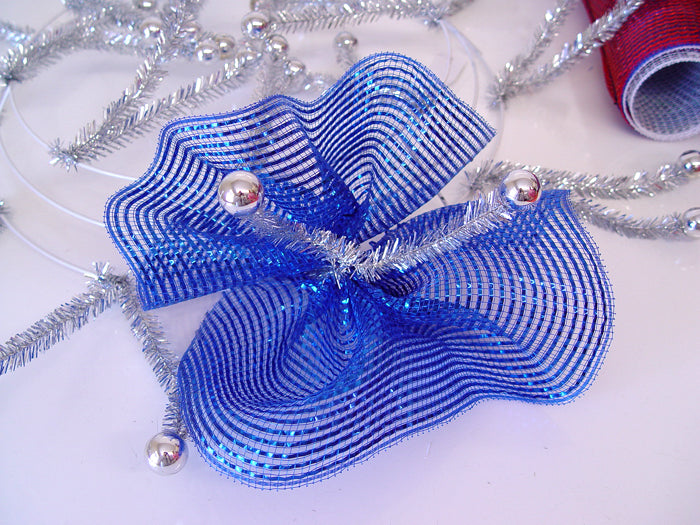
Just pick a place to start on the Pencil Ball Wreath and lay the pinched ruffle inside the twists and secure it with a couple of turns.
When working with the Pencil Ball Wreaths, always use the twist stem and not the balls for twisting. We had a couple to pull loose while we were working with the wreath, but they slipped back on without any problem. But, hindsight.....don't twist by the balls.....well....I guess that's a good practice to apply....whatever the occasion....... Anyway.....back to the wreath)))
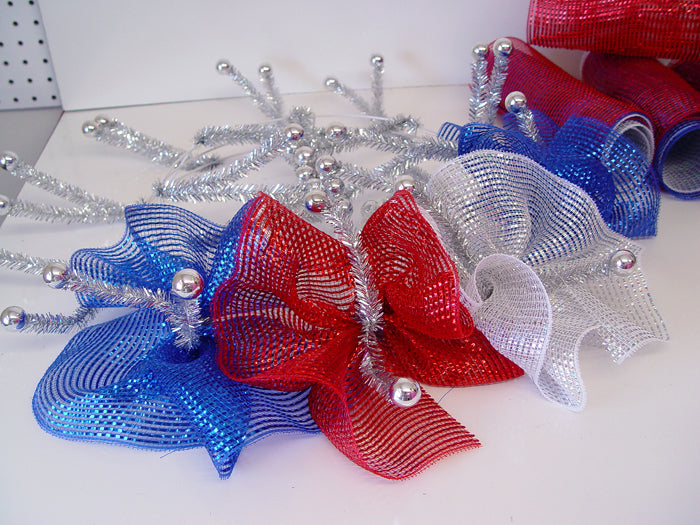
Just alternate your colors and continue working around the wreath.
This is the wreath with the one layer of ruffles applied to the outer ring.

This is the wreath with one layer of ruffles applied to the outer and inner ring. It's beginning to shape up and actually not bad right now as far as coverage.
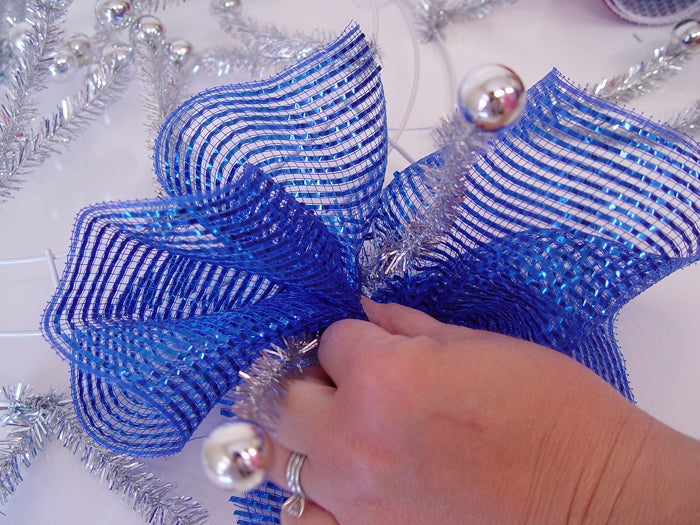
When starting the second layer of ruffles, just choose a twist and un-do it, making sure the first ruffle stays in place, it will.
Lay your next ruffle right down on top of the first, choosing a contrasting color and re-secure the twist with a couple of turns.....not by the balls remember)))
Because of the number of twists, working around the wreath in a red, white, blue pattern didn't necessarily come out evenly.....at some point we had to chose a different color.
This is the wreath with two layers of ruffles applied to both the outer and inner ring. Certainly we could have stopped here and been happy with the wreath with its fullness......but we had the remaining rolls so we decided to go ahead and use them.
The third layer of ruffles was applied same as the first two. Just choose a twist to start, un-do it and lay the third ruffle down on top of the first and second one. It's always best to un-do your twist and re-secure all the layers together. This yields a much neater finished product.
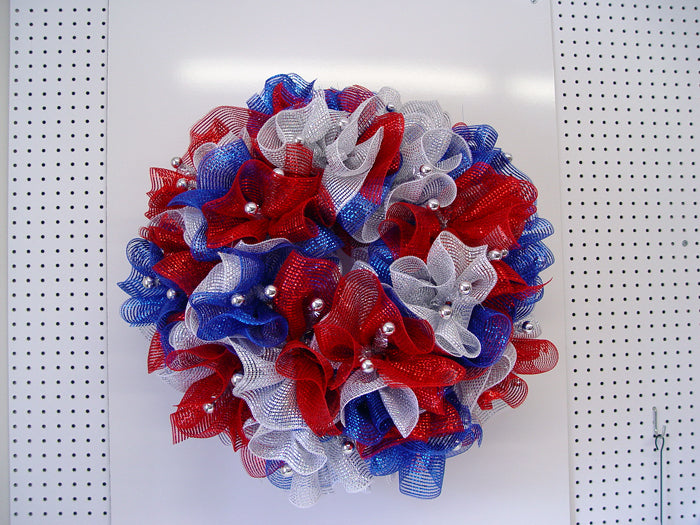
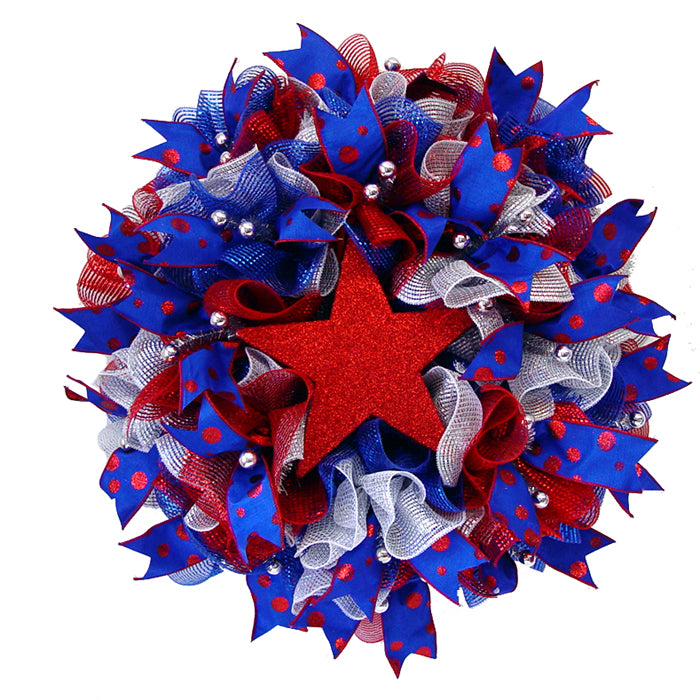
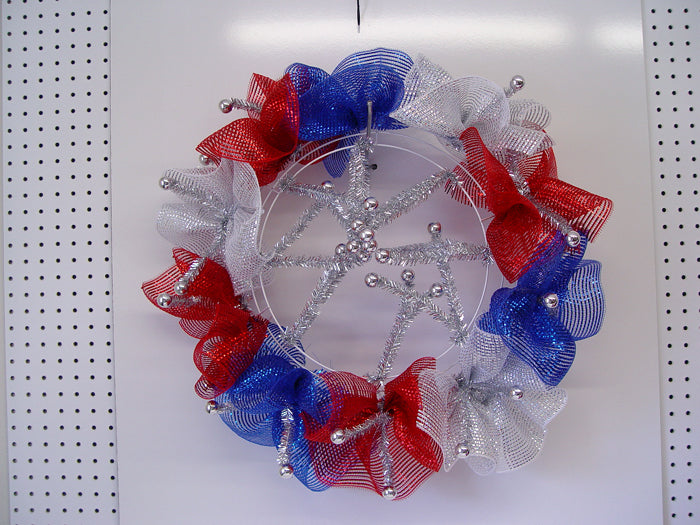
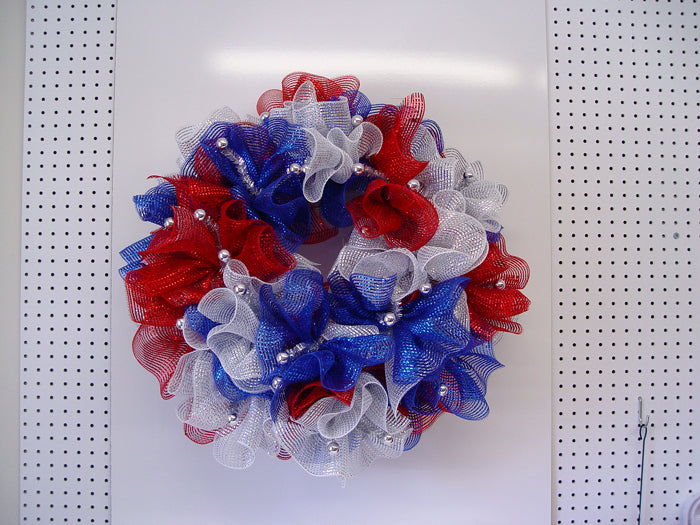
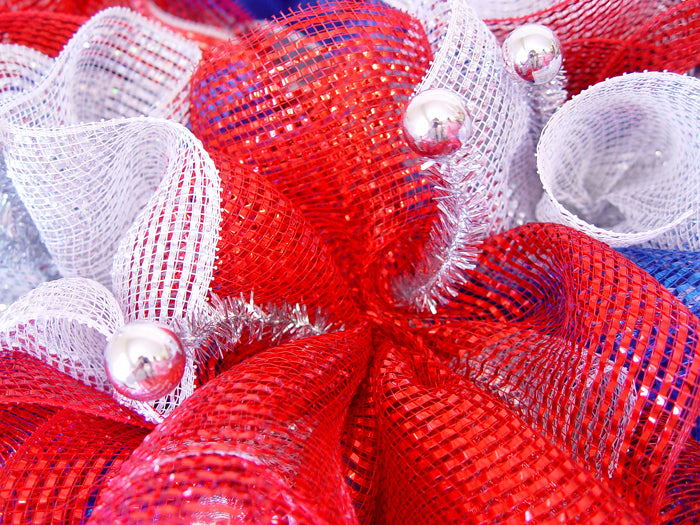
This is our wreath with three layers of ruffles on the outer and inner rings. Nice)))
You may be wondering why we went around the wreath three times when we could have just held three ruffles in the hand and secured in the twist one time and been done with it. And you could do that, but it takes extra hands!
Also when we finished the first layer.....it looked like the silver balls on the ends of the twists were going to stick out of the wreath too far.....but after the third layer was added, they seem just right.
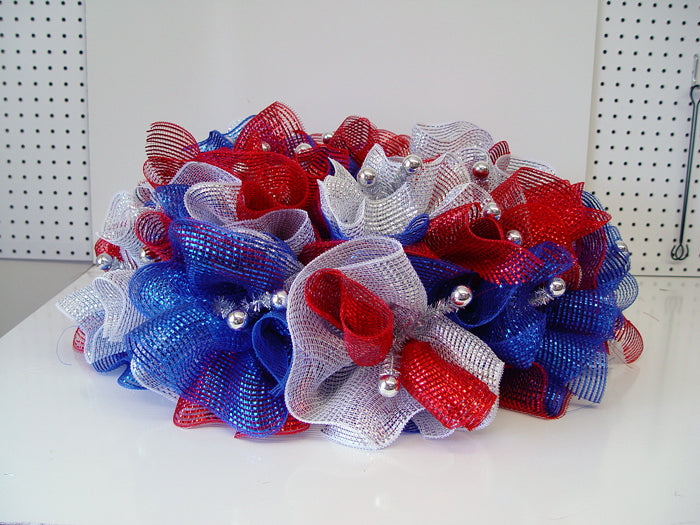
This is a side view of the wreath to give you an idea of the depth of the wreath.
There are so many options to use once you've completed the base wreath. The base wreath looks great without anything else actually.....or you could add some sprays.....a sign.....glittered words...a bow with some tails.
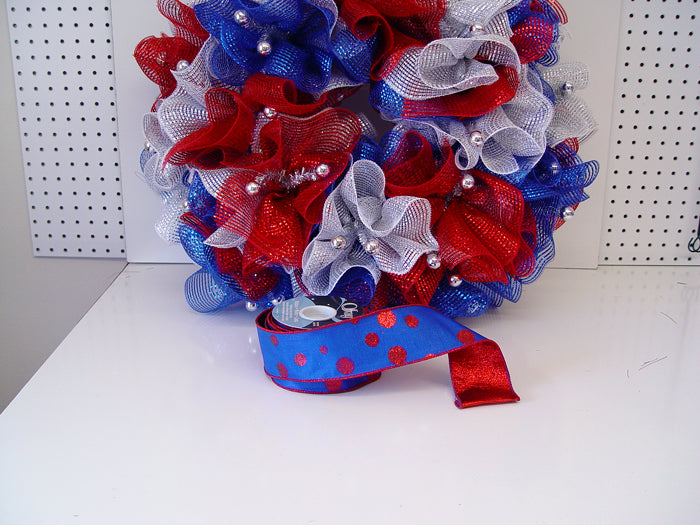
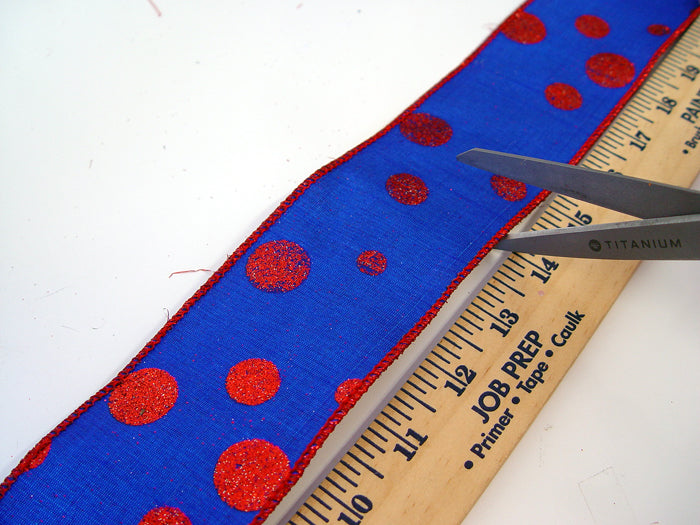
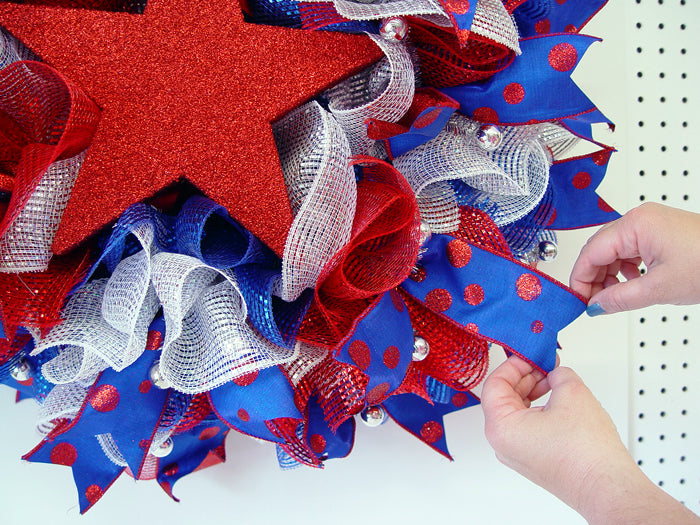
We chose to add some Royal Blue and Red Polka Dot (
This ribbon is sold out, but you can use other styles of patriotic ribbon.) wire edge ribbon. This ribbon is a very nice royal blue polished cotton fabric with red glittered polka dots on one side and red metallic on the bottom. It's 2.5" and 10 yards in length. You'll find this ribbon in our
Polka Dot section. Your choice of ribbon or ribbons can absolutely make the wreath. Sometimes it far better to use a more modest style of mesh or other material and use more expensive ribbons for a finishing touch.
We measured the depth of the wreath to determine how long we needed to cut our ribbon strips. If the depth of the wreath measure 7-8" you need ribbon strips at least 14" since they will be pinched in the middle and attached to the strips. You want the tips of the ribbons to stick out beyond the mesh a bit so they will be more visible.
It's always best to try the length of ribbon you think you'll need before cutting it.
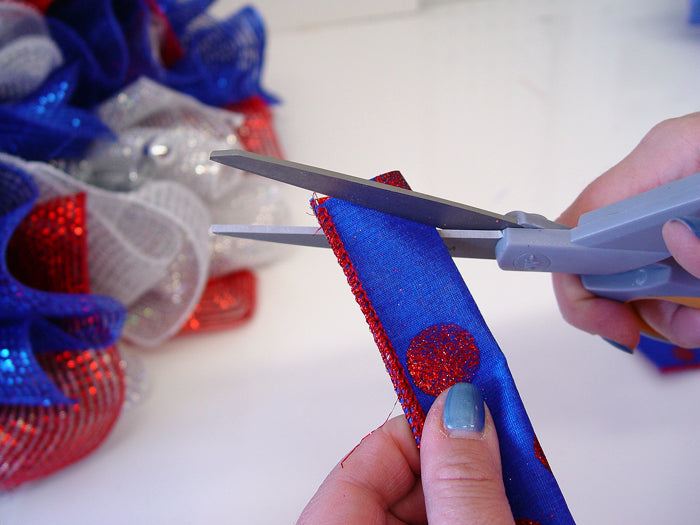
One the ribbon strips were cut, we folded the ribbon in half and made a cut across the folded side of the ribbon.
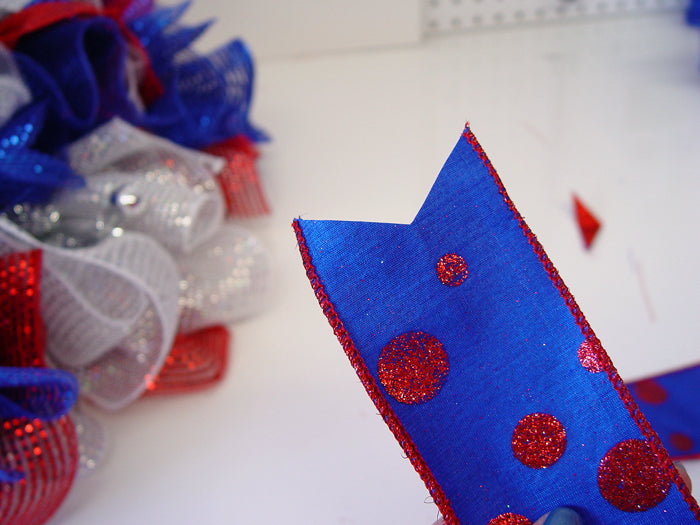
This cut gives a chevron or fishtail finish to the ribbons which is a nice look.
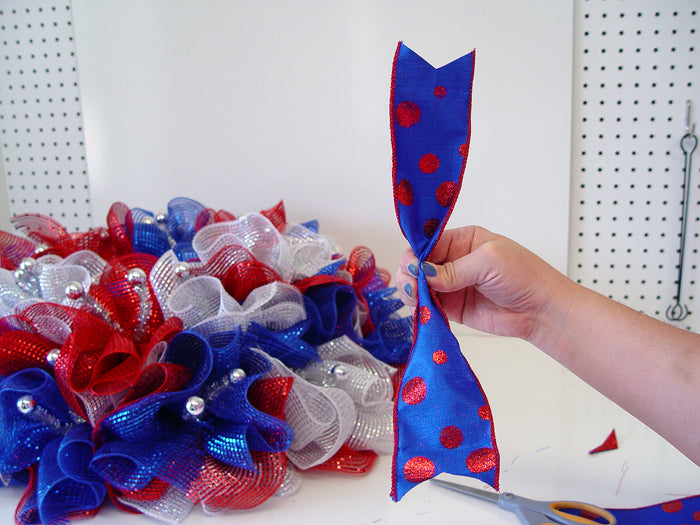
Pinch the ribbon in the center.
Choose one of the twists, un-do it and lay the pinched ribbon int the twist (now on top of three ruffles). Secure the twist with 3-4 turns this time since this is the last layer.....remember the balls....
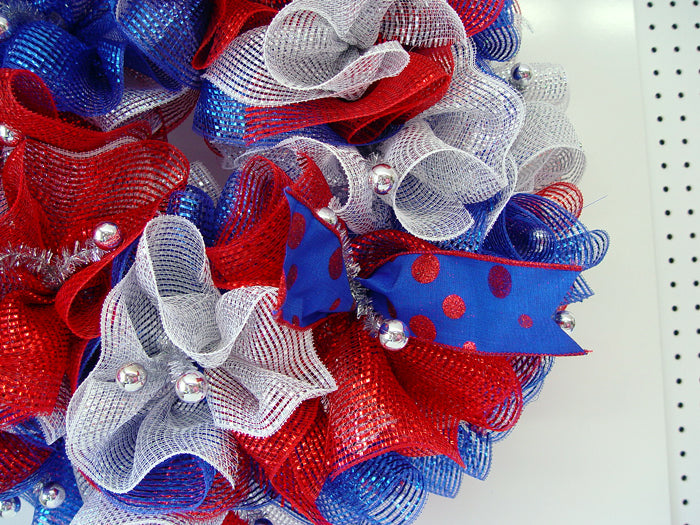
Continue adding ribbon. For this wreath, we added ribbon to each twist, but you don't necessarily have to. We also considered using two types of ribbon but elected to just use this one because it showed up so well.
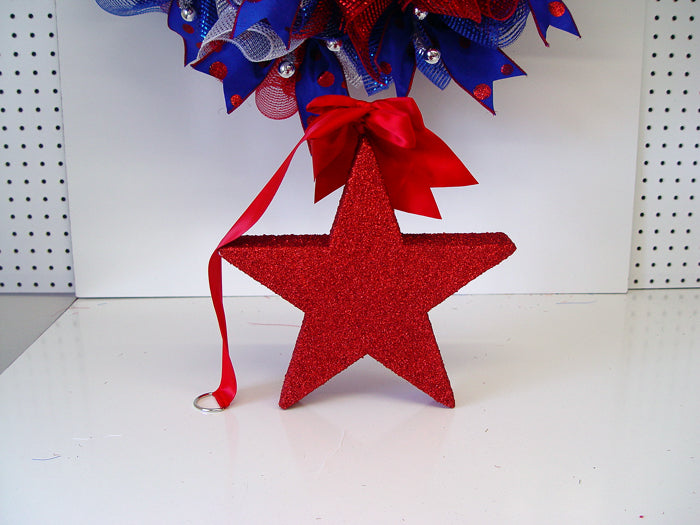
We found this large glittered star that is actually for our Christmas stock. It measures about 10.5" and 1.5" in depth.
(This star is sold out but you can use other types of signs or letters, etc) It has a ribbon with a ring for a hanger. We just placed it in the center of the wreath and wrapped the ribbon around the wreath frame a couple of times. Our wreaths are made for tutorials and if we decide to take this one home (I've called dibs already) the star would need to be secure more permanently and you could do this with a zip tie.
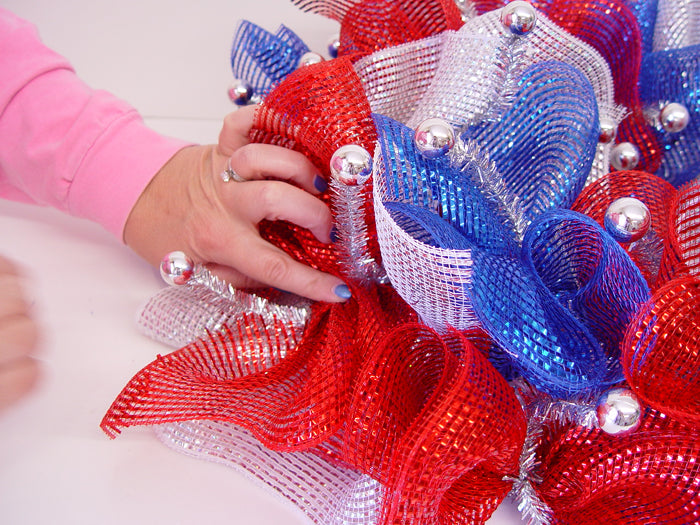
Once you're wreath is finished, hang it up and take a look. Fluff out the tips of the ribbon strips, cut any loose strings. Actually to have 54 pieces of mesh cut, we had practically no strings to cut which is pretty amazing. The more you handle Deco Poly Mesh, it will ravel, but this project went great with next to no raveling.
Note: Here's a new three-color mesh that would work great for this project too:

I love it.....love this style. The base wreath came out very regular without gaps or holes. No wire frame showed at all and the Pencil Wreath with Balls added a little more sparkle which will be great for Memorial Day or the Fourth of July. Hmmmmm.....and we can lose the star and add something that screams Hotty Toddy for our Rebel fans )))
Remember......no twisting by the balls......lol (sorry....it's the end of the day.....I'm tired.....and ready to call this one done! )