Deco Paper Mesh Autumn Wreath Tutorial
Supplies
XX7488W4 24" Work Wreath Burlap Color
RR800170 10" Deco Paper Mesh Light Burlap Color - 2 rolls
RR800256 10" Deco Paper Mesh Burgundy/Natural - 1 roll
FR628184 Autumn Spray
This Deco Paper Mesh autumn wreath can be made using a number of different colors of paper mesh and embellishments. We'll show you a few more options for decorating after we get the basic wreath made.
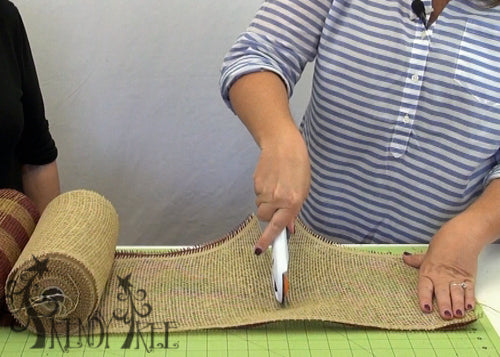
Cut Paper Mesh
First thing we did was to cut 10" lengths of the paper mesh. Strips of mesh were cut from both rolls at the same time.
We use a 24" x 36" self healing
Omnigrid Cutting Mat and a
45mm Omnigrid Rotary Cutter (these are available at Amazon and we have included our affiliate links.)
We tried out a new technique on this wreath and wasn't quite sure how many strips of mesh would be needed since on this wreath, we also attached a cluster of mesh on the middle wreath ring. We used almost two complete rolls of the light burlap color and part of the roll of the burgundy/natural.
To make our paper clusters, we took the 10" square mesh in it's natural curled up position, found the center and just pulled it gently downward and the smooth the rest of the square upward. Just like you would find the center of a napkin.

For our clusters, we used two Light Burlap pieces and one Burgundy/Natural. But you could use any sort of color combination or solid color as well.

We took three pieces to make one cluster. The cluster was placed in one of the twists on the Work Wreath and secured very tightly with 3-4 twists. It doesn't matter where you start on your Work Wreath or whether you start on the inner or outer ring.

Once the cluster was secured, it was pushed to where it was in an upward position. If you start on the inner ring, once that cluster has been secured, you can tuck the ends of the twist to the inside if you don't want them to show.

When you attach a cluster to the outer ring, take the tips of the twist and wrap them around the middle ring of the Work Wreath. You will have short ends to work with, but this gives you another twist to add another cluster of mesh to the middle ring. This results in a very full wreath.

Continue adding clusters to every twist around the wreath and to the twists you created around the middle ring.

Paper mesh ravels easily and you'll have to pull or snip strings when you're done. The raveling might have been a little more than using the ruffle technique, but not much. All poly mesh, burlap, or paper products ravel. Since this is paper mesh, the finished wreath should be used inside or in a very well protected area away from the weather.
Embellishment
The wreath can be embellished in any number of ways. We added an Autumn Spray to give some pops of color and to do this, we snipped off the branches of the spray and created a shorter cluster secured with a zip tie. Then the cluster was secured to the Work Wreath frame with another zip tie.

This image shows the one Pumpkin Gourd Autumn Spray that had been snipped and reconstructed into a shorter spray and two Fabric Owl Picks in the upper right corner.
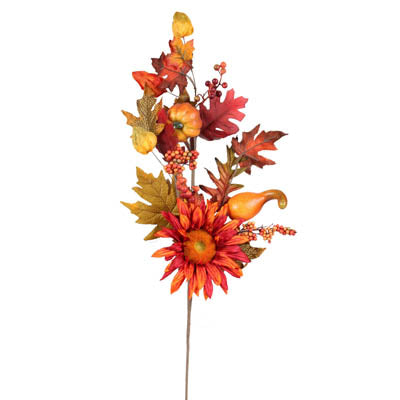
FR628184 Pumpkin Gourd Autumn Spray

3114-359 Fabric Owl Pick

This image shows a small Fall Canvas Sign that was positioned in the center of the wreath. It has a hanger on the back that can be secure to the Work Wreath frame with floral wire.
Here's an Autumn Burlap Wall Hanging that would also be a nice design for this wreath.
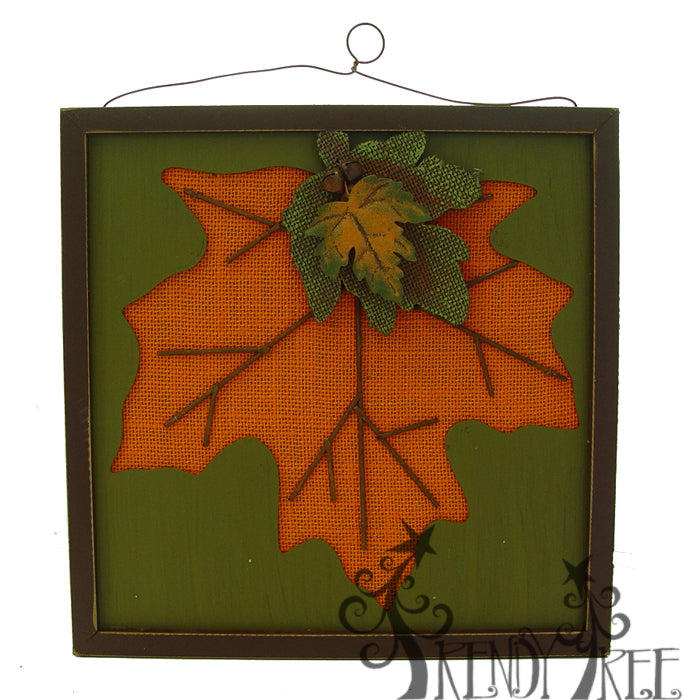
J6423 Autumn Wall Plaque

This image has the addition of a Cottonboll Spray which has a variety of textures in it - a rusty bell, piece of burlap, metal strip, and twig spray.

FH7596 Cottonboll Spray
The Cottonboll Spray is a shorter length which is perfect for wreaths without having to do any cutting or reconstructing.

This image has the addition of some Sunflower blooms (not something we have in stock, it was just on hand in our craft area). But it also has one of the bronze glittery Cornucopias we have in stock. The Cornucopias come as a set of two.

The larger Cornucopia would look nice sitting in the center of the wreath. We tried it there to see how it would look, but just failed to take a photo.

The last photo is my favorite)) We added a Mossy Bird Nest with tiny little pumpkins and fall leaves. The Mossy Nest comes in two sizes. We used the larger of the two in the center of the wreath below.

Moss Bird Nest - Large
Some additional red/orange leaves were tucked in that came from an Autumn Leaf Bush and the Brown Twig Vine is a plastic/wire product that you can snip into lengths, shape and easily attach to the Work Wreath frame.

Poly Twig Garland

This Autumn Paper Mesh wreath can be made in a variety of ways, with different colors of Paper mesh - Chocolate, Cream, Orange, Yellow, Burgundy......we like to give you several ideas for options because invariably we will sell out of the exact items used in the tutorials. There are many, many more decorations that can be used on this wreath. You can browse through our Autumn Signs collection or through the entire Autumn/Halloween section also for more sprays, picks, owls, squirrels, acorns and other items just perfect for fall.