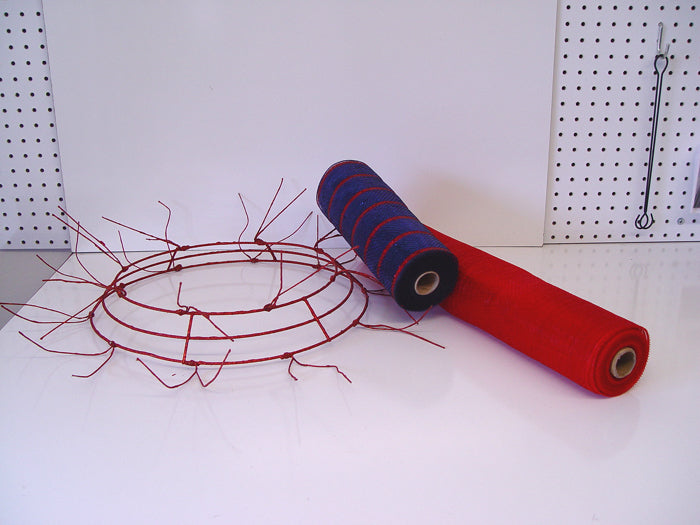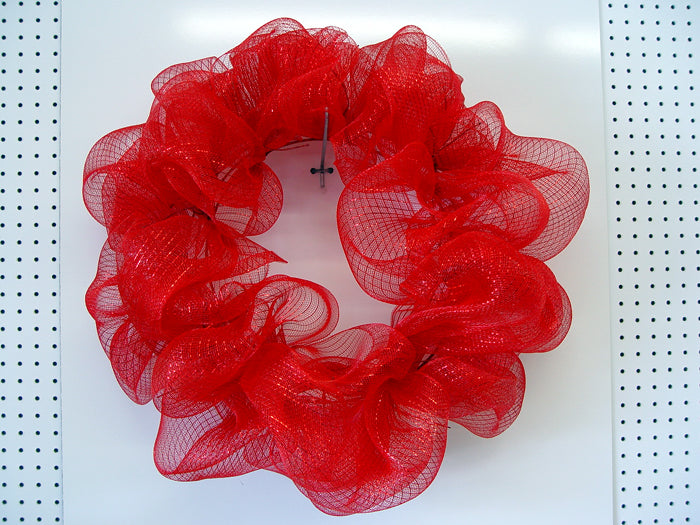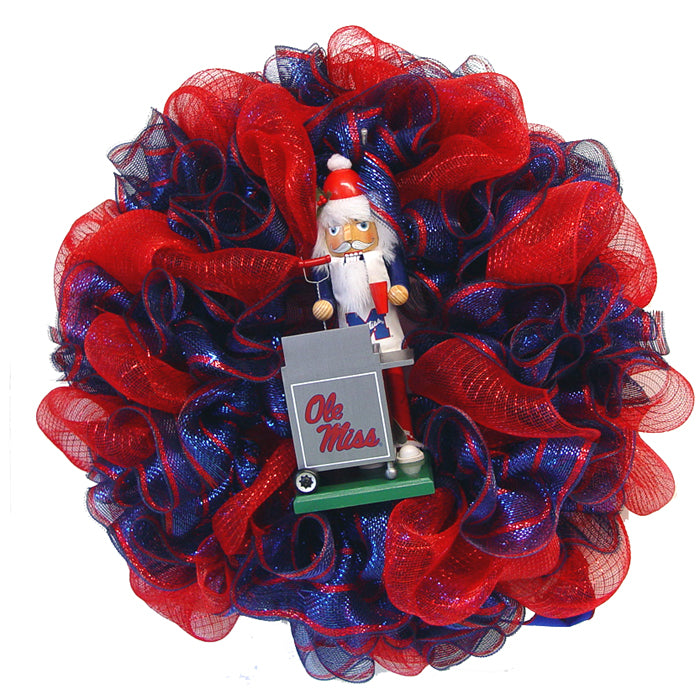
This is our "almost" finished Ole Miss Wreath with the Christmas Tailgater Nutcracker in the center. We have some Ole Miss Football Helmet ornaments arriving this summer that we could add to the wreath later.
We're showing you this project because......as in all creations.....sometimes you make a wreath and it doesn't turn out like you intended and you just have to simply start over. We're going to show you our "mess up" because that's the good thing with Deco Poly Mesh.....you can just take it apart and start over))

Supplies for this wreath included a
Red Glitter Twig Work Wreath which is similar to the brown/green Twig Wreath you may be familiar with. They are glittery and rough to touch, but your twists won't show at all when using this type of wreath. The Glitter Twig Wreaths are available in red, lime, gold and silver and we also have the Glitter Twig Garlands in the same colors.
The mesh was
Red Foil Deco Poly Mesh® in the 21" and at our new lower pricing is only $7.99 a roll. We also chose a new style deluxe metallic 10"
Navy with Royal Blue Foil and Red Stripe at $7.50 a roll. The more the foil, the higher the price. But we wanted to show you how great the less expensive foil mesh looks when combined with deluxe metallic. When you use more than one layer in your wreaths, you can choose from less expensive materials to use on the first layer many times and invest your resources in more expensive products that will go on top and be more visible.
Where we went wrong on our wreath was when we decided to use up every inch of the 10 yards of Deco Poly Mesh on the rolls. Typically, we wind up with a yard or two left from each project. Figuring this was a bit of a waste, even though, you can find lots of uses for those short ends.....we wanted to use it all this time. So we calculated the number of twists and the size we could make each pouf and were going to make them as large as we could using all the mesh. We would still be keeping the poufs in proportion we thought.
So, we decided 16" poufs for the inner ring and 22" poufs for the outer ring. We did in fact, use all the mesh just as planned. But we were not satisfied with end result. This doesn't mean that you can't use all the roll and I know many customers do and if we had continued to finish our wreath it may have worked out fine......but we elected to stop where we were, re-group and start over.

This was our wreath once the basic red foil mesh had been applied and we followed the same measurements to apply the navy foil stripe mesh. It just was too poufy and thinned out too much for the look we wanted. Again, had we finished it up, it might have worked fine, but we took it apart and started over.

So, we took the mesh back off the wreath, re-rolled it and straightened out the twigs.
Starting fresh, grasping at 3-4" from the end of the red foil mesh, place the first bunch of mesh in a twist and secure with a couple of turns.
We went back to our standard measure of 14" for the poufs. Measure the measure 14" - pinch mesh and lay in the next twist and secure with a couple of turns.
Continue around the wreath in this fashion until the inner ring has been completed. Drop down to the outer ring and continue with 14" poufs. As mentioned, poufs of 15-16" may work for you, there are no hard and fast rules)))
If you need to review how to apply basic mesh to a Work Wreath review this Blog Post:
Making a Wreath Base of Wide Foil Deco Poly Mesh on a Pencil Work Wreath.

Once the red foil mesh had been applied to both layers, we decided to use the ruffle technique for the navy blue and red striped mesh as the next layer.

Lengths were cut at 20" using a rotary cutter and cutting mat. Great tools for wreath making. Click
here for more information about these tools.

Once the 20" strips were cut, we scrunched or pinch pleated right down the middle of the mesh. Having the stripe on this mesh made it easier to stay in the center for sure.

Once you've worked you way through the length of the mesh, you have a ruffle. You may get some loose strings here and there that you can clip when finished.
Next just un-do on of the twists holding the red foil mesh and lay the pinched up ruffle right down on top of the red foil mesh. Re-secure the twist with 3-4 turns this time since this is the last layer for this wreath. Continue making the ruffles and add one to each twist on the wreath.

Here is our wreath once we had added the ruffles to each twist. It's very nice and full bodied.
We added a new
Tailgating Nutcracker that just came in as a focal piece for the center. He was secured with clear fishing line.

To secure the Nutcracker more permanently, you could use zip ties. This wreath would probably be used on an interior wall to protect the nutcracker. But the nutcracker is just a suggestion. The Deco Poly Mesh holds up very well outside, it will fade eventually, but it is water proof.

This
Ole Miss Plank is another new collegiate item that just arrived. It's a little large for the wreath, but we wanted to show it to you so you could see the size. It resembles wood, but is made of plastic with a decoupage finish.

We have a large Styrofoam Ole Miss Football coming in along with some helmet ornaments that would look great on this wreath.
Our
Collegiate Collection is growing and we're adding new products all the time. Right now you may be able to find items for your favorite team by looking under the state.
We'll likely add some ribbon strips to this wreath too once the "just right" ribbon comes in))) Ole Miss colors are red and navy.....not Royal Blue and most of the ribbon we had available was Royal Blue, so we'll wait))


