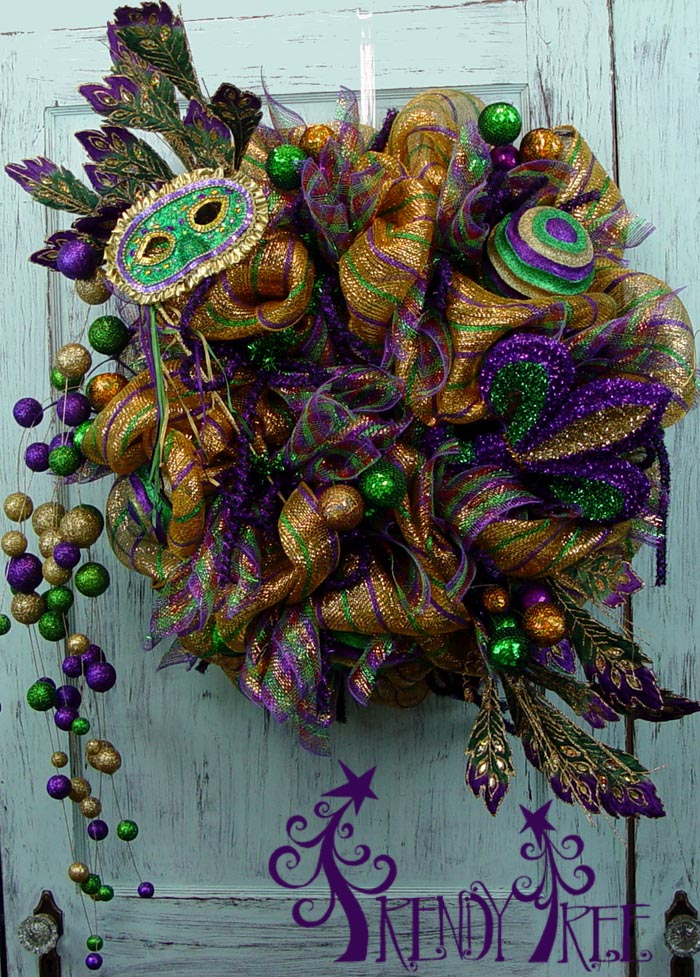
 Mardi Gras Wreath Tutorial (2015)
Supplies: (Click here for a quick list of supplies to purchase)
XX751106
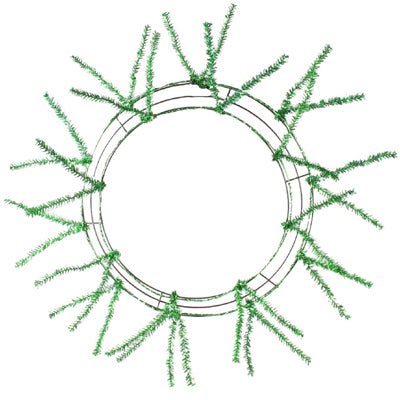
 24" Emerald Green Metallic Pencil Wreath
RE1034H2 21" Deluxe Foil Mardi Gras Mesh
MR81204 6" Deluxe Foil Mesh
XY4959LA Glittered Groovy Balls - 3
MZ1538T6 Sequin Mask
MZ1803TC Fleur De Lis
RE3542F2 Purple/Black Tinsel Tubing
XS546550 Sequin Ball Spray - 6
FH7499T6 Feather Spray - 6
HG3064MG Dangling Ball Spray - 3
Let's get started....put on some jazz)))
Start with the 21" mesh and gather end end together grasping at about 3-4 inches from the start of the roll. Choose one of the twists on the 24" pencil wreath and lay the mesh in the twist, close the twist with a couple of turns. No need to twist it too many times right now, as you'll be opening the twist back up later to add something else.

XX741806 24" Emerald Green Metallic Pencil Wreath
With mesh secured in the first twist (doesn't matter if you start on the inner or outer ring), tuck that raw edge into the inside of the wreath. We'll secure that raw end later.

RE10342 Deluxe Metallic Mardi Gras Mesh
Measure about 14" of mesh, gather and pinch in your hand, secure in the next twist. You have made your first pouf! You may need to fluff it up from the underneath with your hand. Continue working around the ring until you have completed all the poufs.
When you get back to your starting point, open that twist, keeping the first pouf in place and secure that last one in the same twist you first started on. Pull the mesh up snug and move up to the closest twist on the inner ring. Attach the mesh, continue to measure and attach making poufs all the way around the next ring.
When you have created your last pouf, if you have mesh left (it took the whole roll for this wreath), cut the end off leaving 4-5 inches. Tuck that end to the inside of the wreath and wrap around the wreath frame, secure it with a zip tie and snip off the end. Do the same thing with your beginning mesh.
Next, add some contrast. You can do this with assorted ribbons or other products.

MR81204 Deluxe Foil Mardi Gras Mesh
We chose another deluxe foil Mardi Gras mesh that is 6" in width and 20 yards on the roll. We cut strips of mesh 10-14" in length, pulled them gently on the diagonal and rolled the opposing corners together to make a curl of sorts. You want them to be pointy and as long as you can make them. We put them in cluster of three and also added a double loop with the purple/black Tinsel tubing.

RE3542F2 Purple/Black Tinsel Flex Tubing
Take the cluster and place one in each twist around the wreath. Open the twist and lay the cluster on top of your mesh, re-secure the twist now with 3-4 turns.
You don't have to put a contrast cluster in each twist....it just all depends on how you want to embellish your wreath.
Next we added to two larger focal pieces - the mask and the fleur de lis.

MZ1538T6 Sequin Mask

MZ1803TC Cut Foil Fleur De Lis
These were attached using the pencil twists. Typically, we attach larger pieces using zip ties and securing down to the work wreath frame, but this deluxe mesh was so bulky, to attach these pieces it was going to bury it in the mesh, so we had to secure closer to the outer edge of the wreath.
Next we secured the groovy plastic balls using metallic chenille stems and they were attached to the work wreath frame.

XY4959LA Glittered Groove Ball
Next we used several different styles of picks. Once these were placed, we flipped the wreath over and secure the picks to the frame using chenille stems or zip ties.

XS546550 Mardi Gras Sequin Ball Spray

FH7499T6 Velvet Feather Spray
The dangling ball sprays were placed in a bundle first along with some feather sprays and secure with a zip tie. Then the entire bundle was placed down in the wreath and secured again.

HG3064MG Mardi Gras Dangling Ball Spray
Overall the wreath measures about 36". Be sure to take a look at the back of your wreath when you're done and check for any sharp or rough edges that might need to be covered up.


