Here's a new Goofy Ghost tutorial for 2016.
SuppliesXX771627 Support Ribbon Work Wreath Form White
XB946-01 White Iridescent Snowball Mesh 21" x 10 yards - 2 Rolls
9722175 Spooky Eyeball Ornaments Set of 4 (used 2) Eyeball ornaments are sold out and picks are sold out, but you could use Styrofoam balls and paint them, or Christmas ornaments and paint them, or cut circles out of black and white foam craft paper or felt.
X414940-21 2.5" Candy Corn Ribbon This ribbon is sold out, but you could use Orange 2.5" Candy Corn Ribbon or another style of Halloween ribbon, or just a scarf, etc. A gauzy scarf would be neat))
238058 White Curly Glitter Branch - 3 This item is sold out, but XS9572 White Flocked Twig Pick might make a good substitution.
The Support Ribbon Work Wreath form was used, started at the top for the "head" of the ghost. These forms are available in white, yellow and pink.
The 21" mesh was cut into 15" lengths for curls. It took more than one roll, but less than two rolls to finish. But you have extra left over which is good in case you need to fill in any gaps or holes.
We use a 24" x 36" self healing Omnigrid Cutting Mat and a 45mm Omnigrid Rotary Cutter (these are available at Amazon and we have included our affiliate links.)
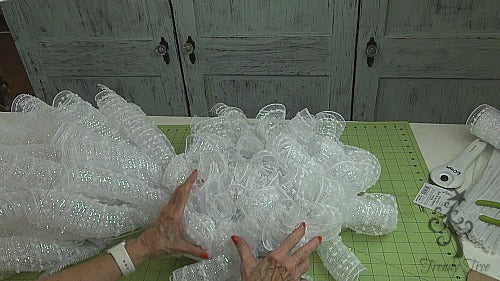
You will have some raveling of the mesh as with any mesh product whether is it poly paper or jute. To make your curl, just roll the mesh up from the cut side having a curl 21" in length. The typical way to make a "curl" is to pinch in the center and secure in your twist, but we are going to make these curls a littler shorter.
Fold the curled up mesh in half (keeping the curl intact) and pinch in the center. You will have a loop on one end and curls on the other.
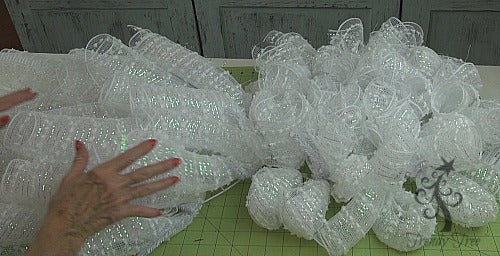
Secure the mesh to the wreath frame by starting on the inner ring, top portion of the frame. Secure the mesh with the loop end toward the outside and curls end to the inside. Place a clump of mesh in each twist around the inner ring.
Once the inner twists were completed, we applied mesh to the twists on the outer ring in the same fashion - loop end to outside, curls end to inside.
Once a clump of mesh was placed in each twist, we found the need to fill in some gaps with additional mesh.
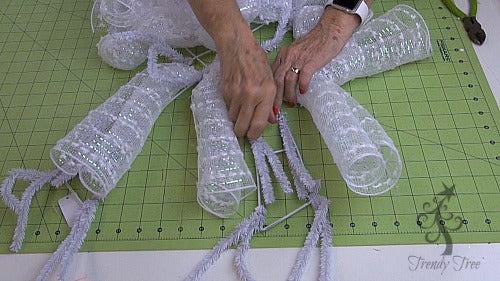
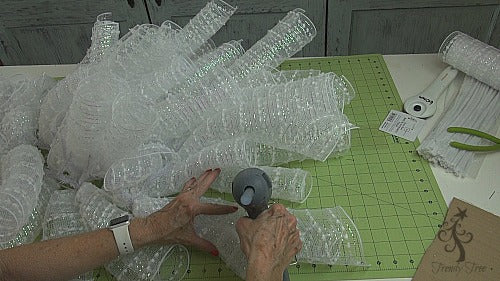
There are spaces between the twist so we made the same kind of clump of mesh and just laid a half piece of chenille stem on the clump, twisted it from the back to make a "pick."
The pick was slipped down over the metal ring in the gaps and secured from the back side. Just flip the wreath over and secure the chenille stem. If you wrap the ends of the chenille stem around the wire in either side, it will help prevent the clump from sliding around as much. It will still slide, but not as much.
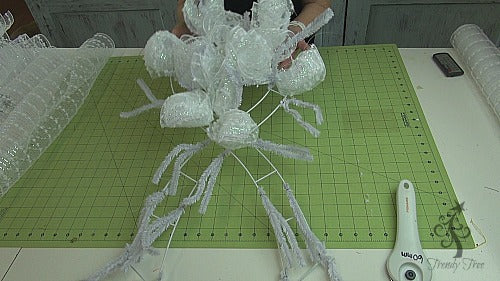
Once the "head" is finished, move down to the lower segment of the Support Wreath. We skipped the first twist on the left and right side of the lower portion. These twists were skipped to help form the "neck" of the ghost. Curls were made in the more traditional fashion of just rolling up the 21" mesh pieces (they also had been cut 15" in length) and just pinching in the center.
Attach the curls so they will face downward toward the bottom of the wreath. They will tend to fly out in all directions, but we'll work on that later.
The make the bottom of the ghost more irregular, we attached some curls about 4-5" from one end instead of in the middle.
Also we needed to fill in some extra space at the bottom between the left and right sides of the wreath form, so we made a bridge of sorts with a couple of chenille stems and just attached them across the bottom of the wreath between the limbs of the wreath.
This chenille stem attachment gave us a place to secure about three more curls. We attached those curls about 4-5" from the ends.
We still needed a little more fullness in the middle of the wreath, so we added some extra curls to the bifurcation of the wreath. This helped to fill in the center of the lower portion better. You can always just hang the wreath up, step back and take a look and fill in any extra gaps or spaces.
Next thing we did was to "tame" the wild curls. We did this by using a little hot glue and just pushed the curls together, applying the hot glue on the cut edges when possible because this would help with the fraying too.
We wanted the curls to go downward instead of flying out to the sides, so we attached a few and just worked around the bottom of the wreath getting it shaped.
After the bottom was shaped, we also worked on the "head." You can use clothespins to help hold the curls together while they cool.
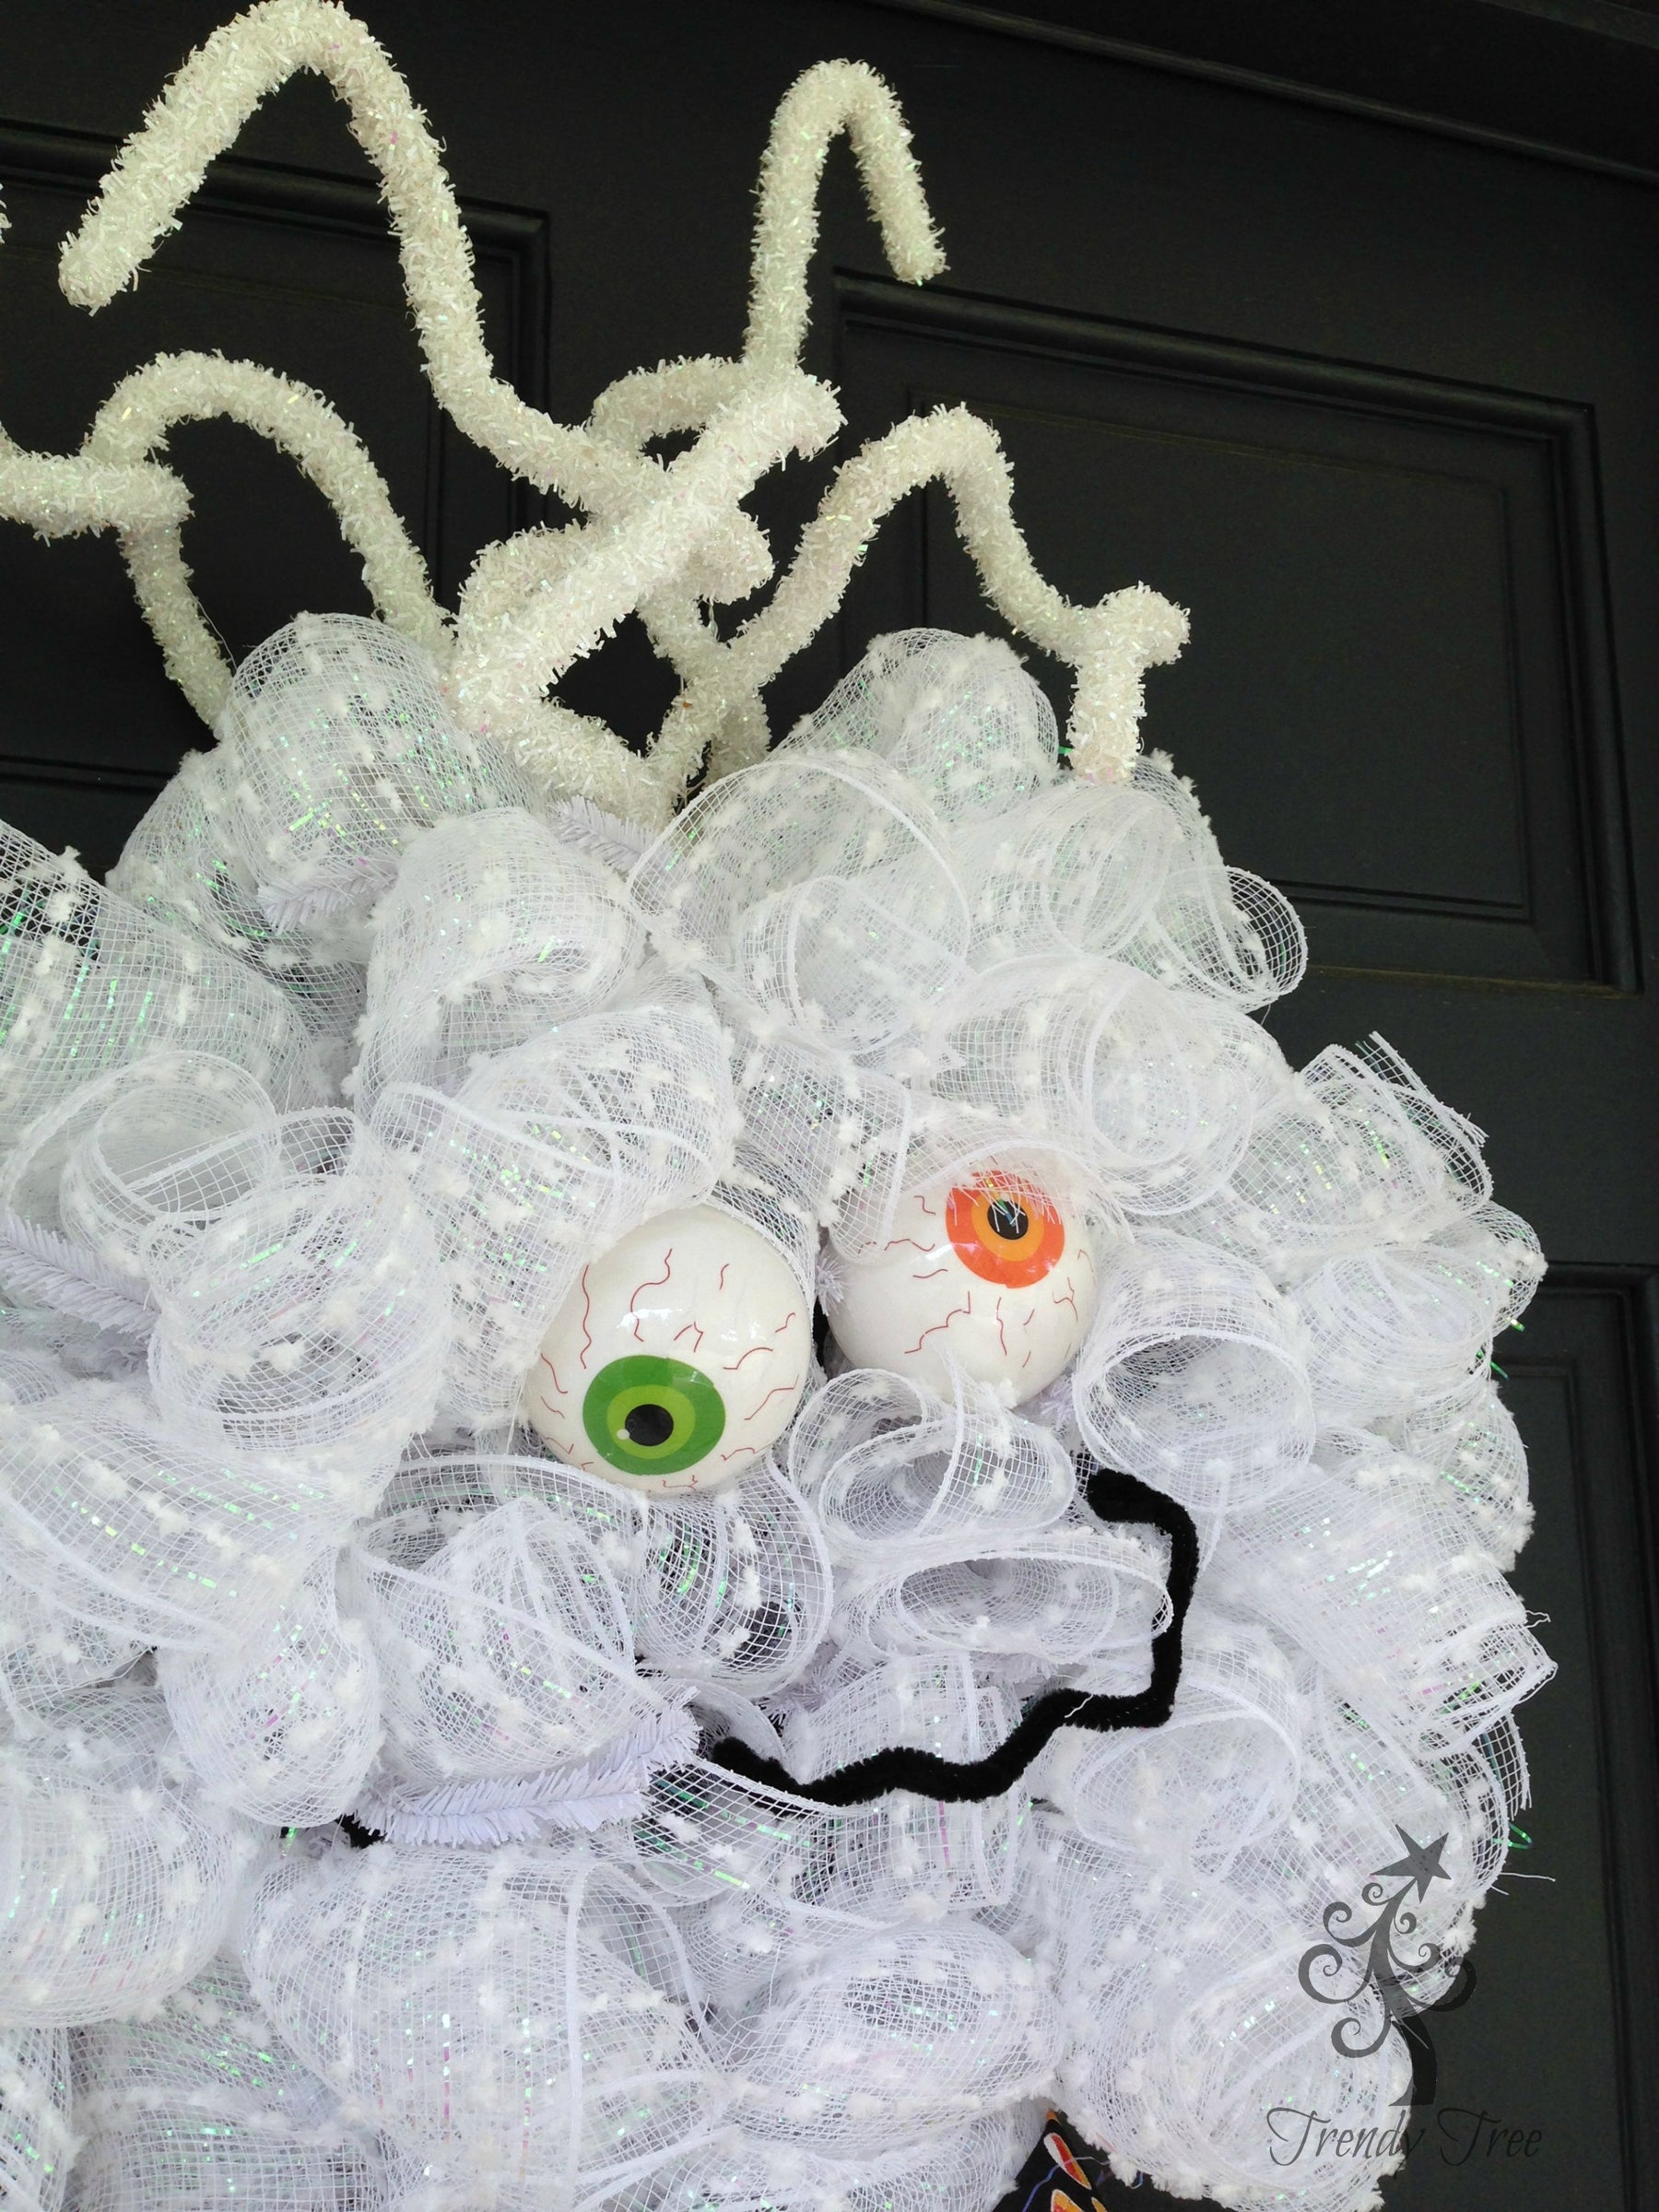
While the hot glue was cooling, we fashioned a funny shaped mouth out of three black chenille stems twisted together and then shaped like a mouth.
The eyes were made from Eyeball ornaments. They come 4 to a package and we used two with different color eyes. They have hangers since they are ornaments, but we just used hot glue on them. Practice positioning the eyes and mouth before you hot glue.
Once you have decided how you want to position the eyes and mouth, use a liberal amount of hot glue and secure.
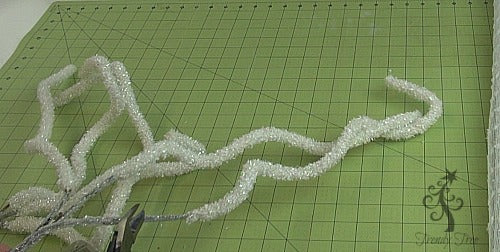
Next we used two white curly glitter branches to make "hair." Each spray had three curls, so the pieces were snipped off the spray and then bound back together with zip ties.
The curls were bound together with two zip ties (ends of zip ties snipped off ) and attached to the top of the wreath form with additional zip ties. Always check the back of your wreath especially when you have added something with chenille stems, wire or zip ties to make sure that you don't have any sharp edges that might scratch your wall or door.
After you have attached the "hair" you can hang the wreath on the wall or door and shape the hair as these sprays are wired.
Next we cut a piece of mesh about 15" and folded it lengthwise a couple of times and placed around the neck area, securing it to the wreath frame in the back with some chenille stems to give the neck a little more definition.
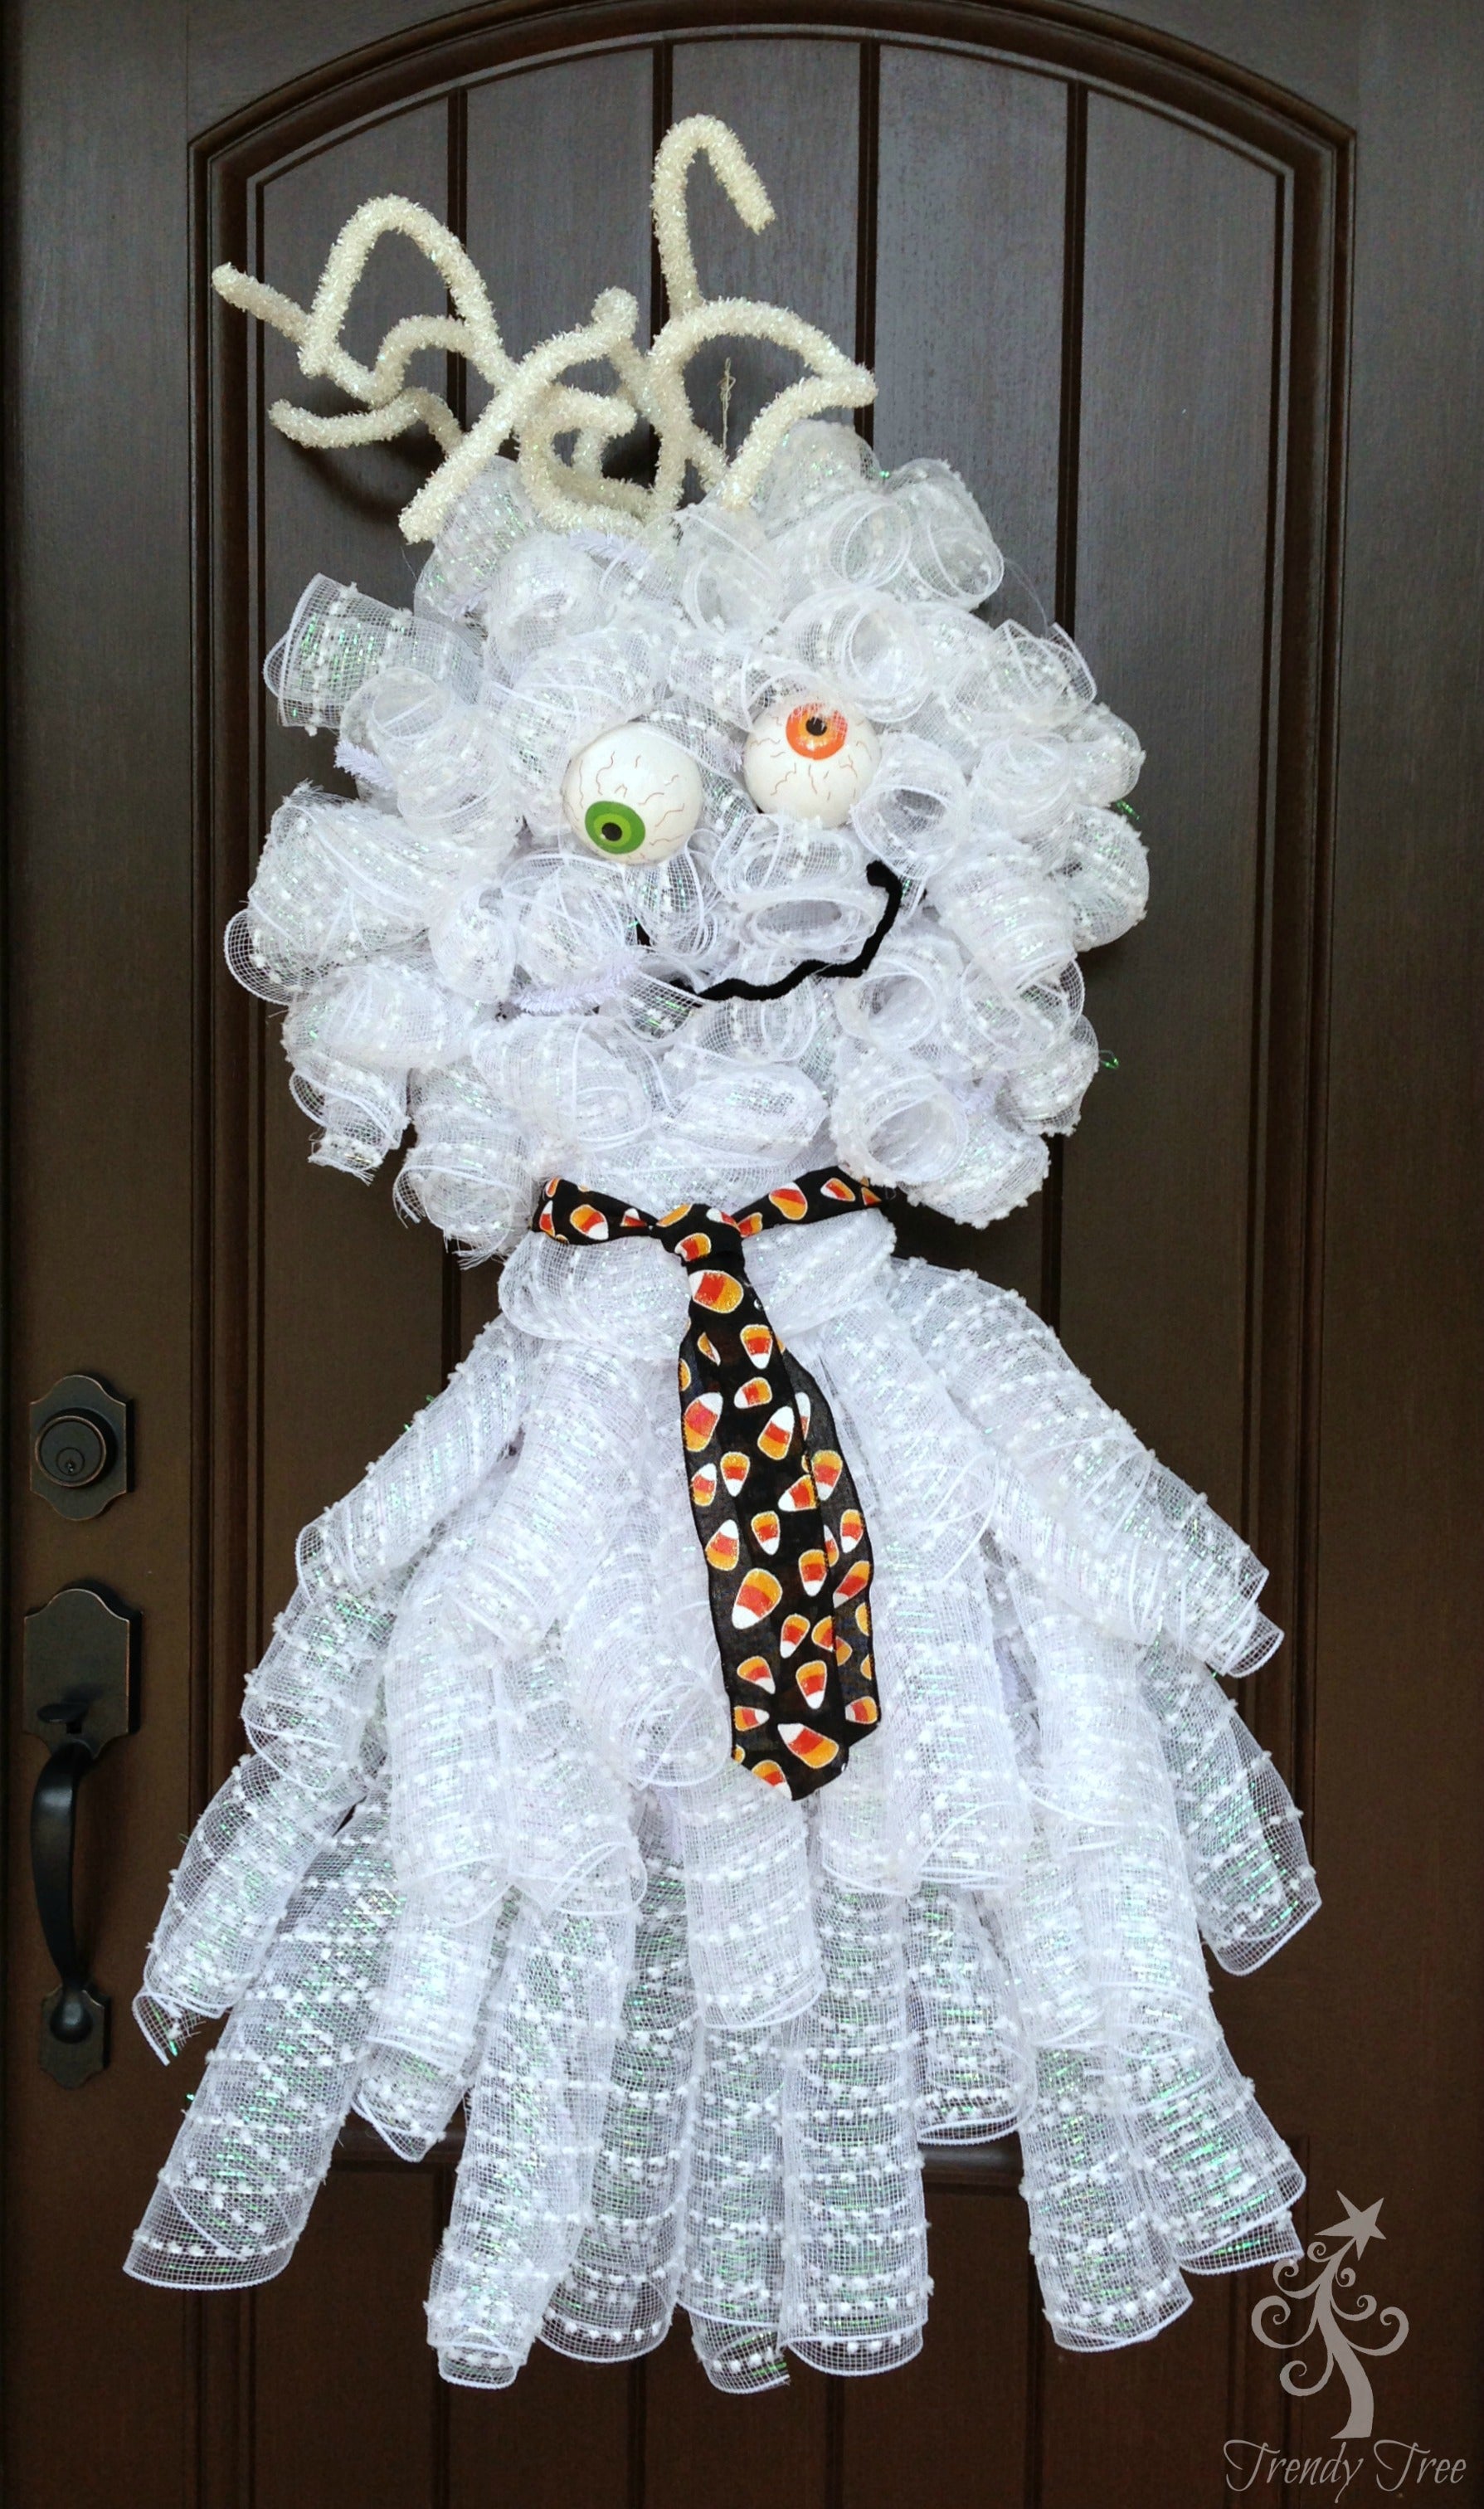
Then we took a piece of 2.5" Candy Corn ribbon and tied around the neck in a necktie fashion. Granted, my necktie knot doesn't look as nice as my husband's, but I could not get him to come to the shop and tie a tie around this ghost for me))
The finished length of the Goofy Ghost was about 44" and about 24" in width at the widest portion I believe. You can fashion a hanger out of a couple of zip ties and just secure to the back of the wreath frame. We mentioned in the video that we might spray the curls with Elmer's Craft Bond Spray Adhesive, but since we tamed the curls using hot glue, we didn't spray anything on this wreath.
We like experiment with Work Creation forms and using them for something "outside the box." If you have used the Support Ribbon Work Wreath for something else, we would love to hear from you! Just leave us a comment.
SaveSaveSaveSaveSaveSaveSaveSaveSaveSave