
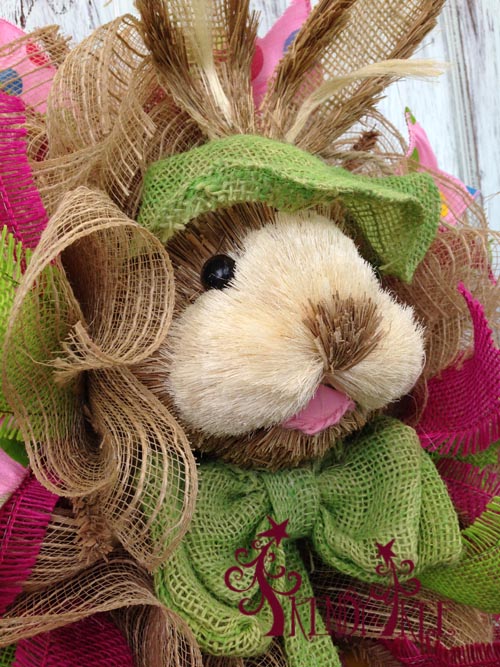
You can make this cute Bunny Wreath using the following materials and technique.
Individual Supplies:
XX1678W4 - 10" Burlap Pencil Wreath -
XB93210-15 - 10" Natural Poly Burlap Mesh 10" x 10 yd - will arrive week of 2/9/15
9724402 - Bunny Head
X310140-09 - 2.5" Lime Frayed Burlap Ribbon -
Sold out - no more coming in
X310140-28 - 2.5" Fuchsia Frayed Burlap Ribbon -
Sold Out - no more coming in
819416 - 2.5" Pink Polka Dot Ribbon -
Sold Out - no more coming in
2/1/15 Update - You can make this wreath using different mesh, different color Pencil Wreath and Ribbons.
To make the wreath we used the ruffle technique.
Cut the Natural Poly Burlap Mesh into 10" lengths. We use a 24" x 36" self healing
Omnigrid Cutting Mat and a
45mm Omnigrid Rotary Cutter (these are available at Amazon and we have included our affiliate links.)
To make the ruffle, just lay the mesh down and scrunch or gather up through the center of the mesh with the selvage or finished edges to the sides. Create three of these ruffles in a cluster and secure in one of the twist on the wreath. It doesn't matter if you start on the inner ring or outer ring. Add a cluster of 3 ruffles into each twist on the wreath. We only have the twist a couple of turns when securing the ruffles since we were going to add ribbon strips later.
One roll of 10" x 10 yard mesh, should yield about 30 ruffles. The 10" pencil wreath has about 12 twists...so it should take about 36 pieces of mesh. We wanted to try to complete this project just using one roll of mesh, so some of our clusters only had 2 ruffles instead of 3.
Next we secured the Bunny Head to the wreath by using a slender zip tie slipped through the burlap on the back of the head. This was then secured to the wreath frame, not too tightly, since it didn't want it to pull through the burlap and tear it.
Next we created ribbon strips by cutting lengths of ribbon 12". Edges were folded and a chevron cut done to finish the edges of the ribbon.
We just alternated the ribbons using a combination of fuchsia and lime in each twist and used the polka dot ribbon in maybe every other twist. The ribbon strips were layered for instance like a lime, fuchsia and polka dot on top.....next time we used a fuchsia, lime....and next a combination of all three.
To secure the ribbon strips, hold the cluster pinched in your hand and open a twist, making sure the mesh ruffles stay in place. Lay the cluster of ribbon strips down and re-secure the twist now with 3-4 turns.
You can add as much ribbon in as you like or use different colors, or different color of mesh. For this project, there was a good bit of ribbon left over from the rolls. Certainly enough to do another project like this or even more. We used less than half of the roll of each ribbon.
The finished wreath was about 21-23" Fluff your ribbons when you're done and make the ends stand out. It's easy for them to get flattened down when you're turning your wreath over or anything. Check the back of your wreath for any sharp wires. You can fashion a hanger out of floral wire, chenille stems or a zip tie.

The ears on the bunny head are wired, so you can bend them if you like.
 Save
Save
