
11/1/19 This candy cane tutorial is one of our more popular, but it was created several years ago and most all the specific products we used are now sold out. But you can still make this candy cane wreath and just choose different individual products. We'll give you some suggestions for substitutes.
Candy Cane Work Form
XX769927 24" White Pencil Candy Cane Wreath Form - 1
(You could also use other colors, they come in silver and red also).
Deco Mesh
XB94610-12 10" Red Metallic White Snowball Poly Mesh - 2 rolls
Suggested Substitutions: (There are many more you could use, here's just a couple)
XB101310-12 10" Red White Snowball Check Plaid
RY820549 10" Red White Snowball Tinsel Check
XB100510-12 10" Red White Thin Stripe Bold Foil
Ribbons
U306-1301 1.5" Crimson and White Polka Dot Ribbon (sold out)
RL182198 2.5" Lime Green White Chevron Ribbon - 1 (sold out)
X417604-12 4" Red Sheer Emerald Lime Green Chevron Stripe Ribbon - 1 (sold out)
X418009-12 1.5" Emerald Green Red Ladder Stripe Ribbon - 1 (sold out)
Suggested Substitutions (Just a few listed, browse through the Christmas ribbon)
X918109-12 1.5" Red White Polka Dot Fuzzy Edge
RX9149WW 2.5" White Lime Horizontal Stripe
F3217573 RAZ Emerald Green Pom Pom Spray - 1
F3406953 RAZ Snowball Spray - 2
F3406957 RAZ White Swirl Spray - 1
Prepare Candy Cane Form
The 24" Pencil Candy Cane Form is a KD piece which means it is shipped "knocked down." So, it is shipped in two pieces. There will be a small zip tie attached to the candy cane and you put the two pieces together and secure with the zip tie. There are about 17 twists around the candy cane form.

XX769927 24" White Pencil Candy Cane Wreath Form
Cut Mesh Strips

XB94610-12 Red Metallic and White Snowball Mesh 10"
The mesh we used was the Red and White Metallic Snowball mesh. It is 10" in width and 10 yards in length. We had thought at first, we might be able to do the project with one roll, but we did have to cut into the second roll to finish the candy cane.
We use a 24" x 36" self healing
Omnigrid Cutting Mat and a
45mm Omnigrid Rotary Cutter (these are available at Amazon and we have included our affiliate links.)
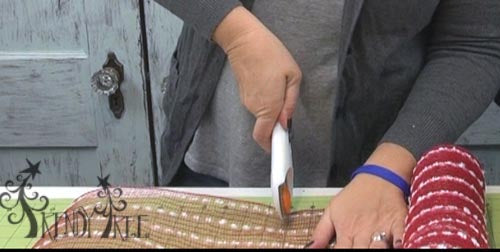
Cut strips of mesh 10" in length, which gives you a 10" square. There are about 17 twists on the Candy Cane and we used three curls in each twist, so we cut 51 strips.

Take the 10" x 10" square of mesh and let it roll up naturally making a curl. Pinch the curl in the center. Make a cluster of three curls.

Take the cluster of three curls and secure it in one of the twists on the candy cane form. It doesn't matter which one you start in.
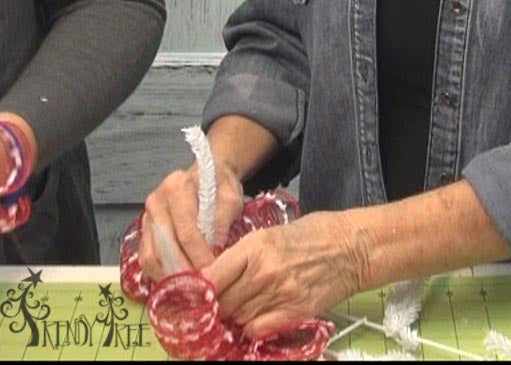
Just continue making curls, pinch and attach clusters of three. Work all the way around the candy cane, pushing the clusters toward the outside as you work your way around the form.

At this point in the image above, we had used all the curls cut from the first roll of mesh. We still had 5 twists to go, so we needed 15 more cuts. So the second roll of mesh had to be used. You might could get by with one roll by using two curls in some twists instead of three.....but you want the wreath to be nice and full. You can always use more than one color of mesh also. A good way to make one roll of the snowball mesh to work...would have been if we had had some solid red, or red metallic or white foil mesh that we could have used in some of the clusters as a bottom curl. This would be a great way of using up your scrap mesh. It's easy to collect up a lot of "short rolls" So the curly technique is a great way to use those short pieces.

This is the candy cane after we had completed placing clusters of three curls into each twist. Now we're ready to move on to some ribbon strips.
Cut Ribbon Strips
We chose 3-4 different Christmas style ribbons to use on our candy cane. They varied in width from 4" to 1.5" You can add as much ribbon as you like....you just can't ever have too much ribbon))

U306-1301 Crimson and White Polka Dot Ribbon 1.5"
This polka dot 1.5" ribbon was layered on top of some of the wider ribbons.

RL182198 Lime Green White Chevron 2.5"

X417604-12 Red Sheer Chevron Lime & Emerald Green 4"
Love the combination on this red sheer ribbon with the emerald and lime green chevron stripes. This ribbon is 4" in width so sometimes it was placed in a twist alone, or sometimes combined with narrower ribbon on top.

X418009-12 Red Lime Green Grass Metallic Ribbon 2.5"
This ladder stripe ribbon is another favorite. It has a fuzzy tinsel look. The website describes it as a grass ribbon. Great texture and color.

Ribbon strips were cut 12" in length and cuts were done to chevron the ends, or fish-mouth them. It's always good to to a ribbon strip test, to see how long your ribbon strips need to be. If they are too short, they will be buried in the mesh and you can't see them. Too long and they will look loose or floppy. It's best to cut one and test it before cutting up all your ribbon!

To chevron the ends of your ribbon, just fold it lengthwise and cut at an angle from the folded side.
We somewhat randomly applied our ribbon strips to the candy cane, but did try to alternate between using the 4" and 2.5" To attach the ribbon strips, pinch your strip in the center, both layers if you are using two layers of ribbon and sometimes we even used three layers of ribbon. Just pinch them all in the center, open up your twist and lay the ribbon strips down on top of the mesh. Re-secure the twist this time with 3-4 turns. It's important to open your twist and lay the ribbon down on top of the mesh and re-secure, otherwise, your ribbons will be sort of floating around on top of your candy cane and look loose.
We had ribbon left over from each roll, enough to use on another project.
Add Embellishments
You can add ornaments or sprays to your wreath at this point and change it up in many ways for a whole different look. We added three different sprays. But some tinsel ornament balls would have look good too.

F3217573 RAZ Emerald Green Pom Pom Spray
We used one of these RAZ Emerald Green Pom Pom spray. I think adding even one or two more would look good.

These are large pom pom sprays, so the pom poms were cut off as individual pieces and attached to the candy cane wreath form with zip ties. Just position your pieces like this on your candy cane to get an idea of placement, then secure with a zip tie and make sure the sharp ends are tucked to the inside so they won't scratch your door or wall.

F3406953 RAZ Snowball Spray
The RAZ Snowball spray was also cut into more manageable pieces. We used two of the sprays on this candy cane.
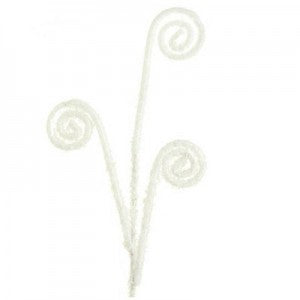
F3406957 RAZ Snowy Swirl Spray
We used one of the RAZ Snowy Swirl spray and cut it also into pieces. It's hard to see this image, on my screen anyway!

After you have attached your sprays, flip to candy cane over to the back and snip off all the zip tie ends, check for anything sharp sticking out and either tuck those ends to the inside or wrap around your candy cane form.

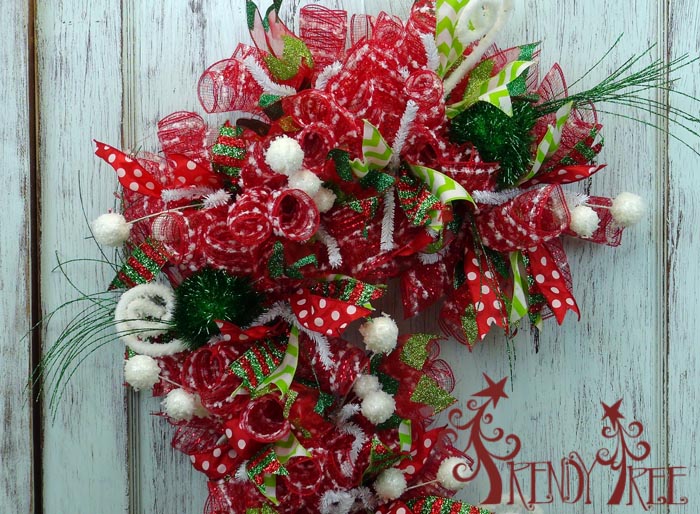
Your finished candy cane measures about 36" in length and 24" at the widest part. Have fun making your candy cane....it's really easy to do! Don't be afraid to mix up your colors and use up those scraps! Now that I think about it....we should have added some cool white
LED battery lights! Battery lights are a perfect addition to a door wreath.....so cords to worry about, no timers.....we have
LED battery lights that have built in timers....just turn them on and they will burn for 6 hours, shut off and come back on 18 hours later at the same time every day.
And we could have added some of the new
Tinsel Flex Tubing! Some dark green loops, red or silver would have looked nice too.......I always think of other things after we've finished a project...don't you!
 Save
Save


