This is a wreath supply kit that we made available for purchase. Our customers have asked for more wreath kits and sometimes we have the kits ready for have difficulty getting the time to do a complete tutorial! So, folks have said.....just create the kits.....so here we are.
You can watch the replace of the Facebook Live we did 5/25/18 here. It's not a tutorial, we just showed the products in the kit.
Purchase Kit: 2018 Watermelon Wreath Supply Kit
This wreath kit contains the following:
MM9097 - Watermelon Sign - 1
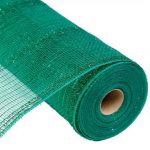
RY840106 - 10" Emerald Tinsel Foil - 1
RY840130 - 10" Lime Tinsel Foil - 1
RG0143909 - 2.5" Lime Watercolor - 1
RG0165102 - 1.5" Black Swiss Dots - 1
RG01223C2 - 2.5" Watermelon - 1
RG1632 - 1.5" Bumblebee - 1
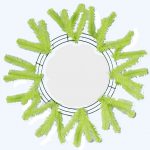
XX748837 - 24" Lime Work Wreath - 1
Suggestions for Completion:
Mesh: We had chosen the lime green and emerald tinsel foil mesh mesh for two reasons. We like the glitter look of the tinsel

foil mesh and we chose the 10" width since we had planned to make a ruffle wreath for this project.

To make a ruffle wreath, you can use 10" mesh and cut into strips for ruffles. We would suggest cutting 15" strips for ruffles of the lime and the emerald. Put two ruffles in each twist, and alternated them. Use an emerald with lime on top in a twist, and in the next twist use lime on the bottom and emerald on the top.
Or you could make one 30" ruffle in the emerald and go all the way around the outer ring and make a 30" lime ruffle to go all around the inner ring. The 30" results in less raveling since you have fewer cut edges. All mesh ravels and you will still have to clip some strings. If you decide to do emerald on the outer ring, you will come up a little short on emerald mesh, so you'll have to fill in with some lime. In that case, just make the last few ruffles 15" and put the emerald on top and use a 15" lime ruffle on the bottom in each of the last 2-3 twist.
Or just make 15" ruffles and pick them up randomly!
If you do 30" ruffles, apply one ruffle to each twist. Again the 30" is the quickest method I think and you could just alternate t hem also. Doesn't matter if you start on the outer ring of the wreath form or the inner, just do whichever one works best for you.
Wreath: The wreath for this project was a 24" pencil wreath. Our 24" pencil wreaths measure 15" across the widest ring, but

with the addition of mesh, ribbons, etc, you wind up with a wreath that measures 24" in width or greater.
It will not take quite all of the two rolls of 10" mesh, but it will take more than one.
Ribbon: Next you can do your ribbons. There are four rolls of ribbon in this kit and you can use as

much or as little as you like. The ribbons are 2.5" and 1.5" You can cut ribbon strips and just attach a cluster of assorted ribbon in each twist. To do this, cut a

test strip of ribbon before you start cutting up your ribbon to make sure your length is right. You might start with a 12" strip (use a scrap ribbon) and see how that works. Depending on how you like your strips, it might need to be smaller or larger. Just find the size that suits you best.
You can make a cluster using a strip from each style or ribbon and add it to the twist on top of your ruffle.
I like to open up the twist, put the ribbon cluster in, and close the twist again securing everything together. You may want to dovetail or chevron, the ends of your ribbon or just cut at an angle.

If you choose to do ribbons strips, we usually add them to each twist around the wreath's inner and

outer ring. You will still have some ribbon left over after this, enough to make a bow.
You might rather make bows with your ribbon and not do strips....it's just a matter of preference. Or you might want to use two of the styles of ribbon for ribbon strips.....and make bows out of the other. Just experiment and see what you like.
There are many different ways of making bows and we have several tutorials showing those. Just browse those at the top of the website. A simple loop bow is sometimes the easiest to do.
Sign: The watermelon sign is made of metal and has one hanger on the back. You may have to secure in more than one place to

keep it from slipping around.
You can use a metal punch to make another hole if needed. Just attach with some floral wire or chenille stem to the work wreath frame. Be careful not to pull the wreath in too deeply or it will get lost in the mesh.
Check the back of your wreath when finished for any sharp edges and clip strings. All mesh ravels so some strings will be generated. Some of these individual items are available on the website, links have been provided to those items.
Hope this helps and look forward to see more kits real soon!


 This is a wreath supply kit that we made available for purchase. Our customers have asked for more wreath kits and sometimes we have the kits ready for have difficulty getting the time to do a complete tutorial! So, folks have said.....just create the kits.....so here we are.
You can watch the replace of the Facebook Live we did 5/25/18 here. It's not a tutorial, we just showed the products in the kit.
Purchase Kit:


 outer ring. You will still have some ribbon left over after this, enough to make a bow.
You might rather make bows with your ribbon and not do strips....it's just a matter of preference. Or you might want to use two of the styles of ribbon for ribbon strips.....and make bows out of the other. Just experiment and see what you like.
There are many different ways of making bows and we have several tutorials showing those. Just browse those at the top of the website. A simple loop bow is sometimes the easiest to do.
Sign: The watermelon sign is made of metal and has one hanger on the back. You may have to secure in more than one place to
  keep it from slipping around.
You can use a metal punch to make another hole if needed. Just attach with some floral wire or chenille stem to the work wreath frame. Be careful not to pull the wreath in too deeply or it will get lost in the mesh.
Check the back of your wreath when finished for any sharp edges and clip strings. All mesh ravels so some strings will be generated. Some of these individual items are available on the website, links have been provided to those items.
Hope this helps and look forward to see more kits real soon!