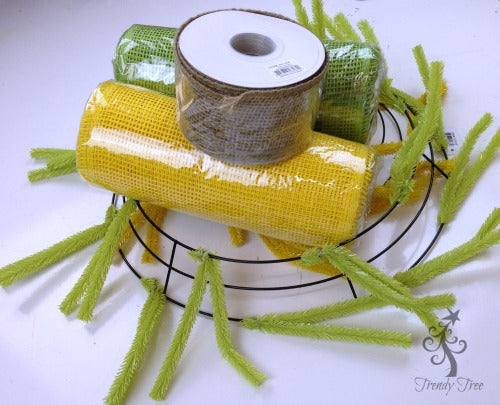
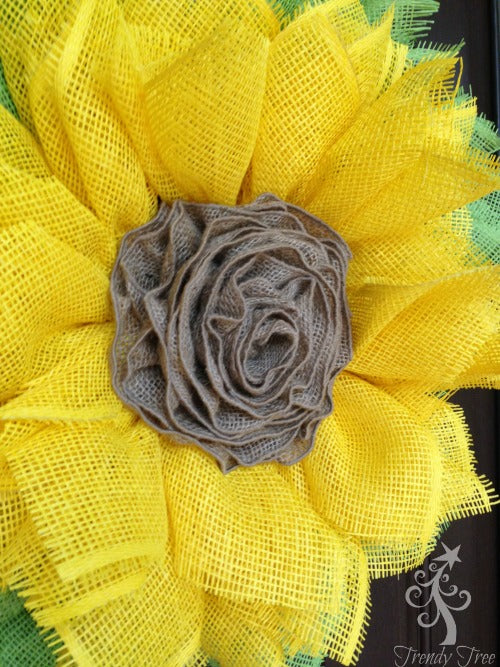
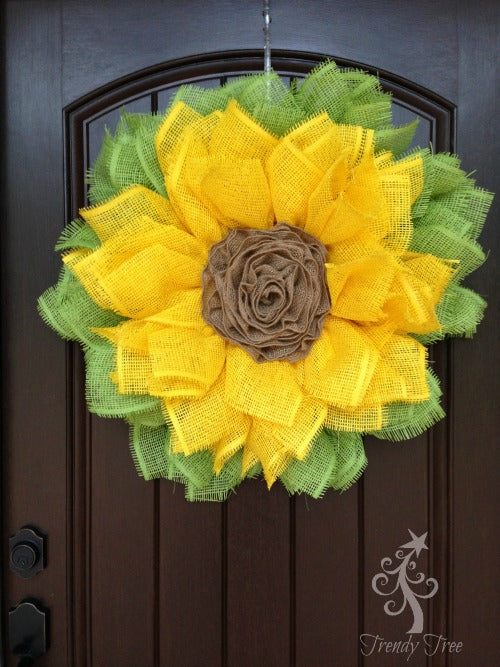
We've updated our sunflower wreath using a stacked wreath method and added a burlap ribbon rose for the center. Using the stacked wreath method results in a wider, deeper wreath than just using the 10" Pencil Work Wreath alone.
Supplies:XX750455 24" Pencil Wreath Fresh Green (other colors can be used, evergreen, lime, white, cream)
XX167829 10" Pencil Wreath Yellow (other colors can be used i.e. fresh green, cream, white)
RR800129 Yellow Paper Mesh 10" x 10 yards
RR800133 Lime Green Paper Mesh 10" x 10 yards
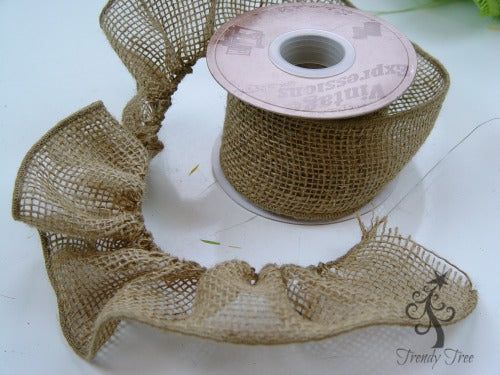
RA1368 Loose Weave Natural Burlap Ribbon 2.5" x 10 yards SOLD OUT
A wreath kit containing the above supplies will be available in a limited number. (SOLD OUT)
Some of the individual supplies may also be available on the website. The tutorial will be left up even after kits or supplies are sold out since you can use this tutorial and select alternate colors of paper mesh, wreaths, ribbons etc. You could also make this wreath using yellow poly burlap and lime green poly burlap.
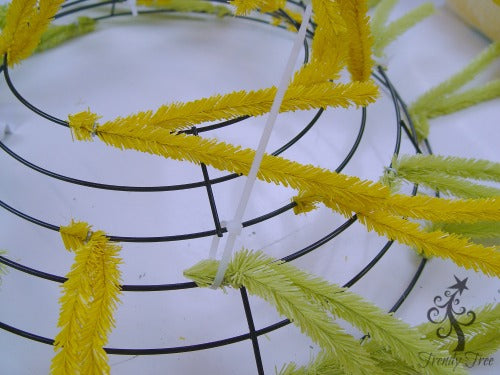
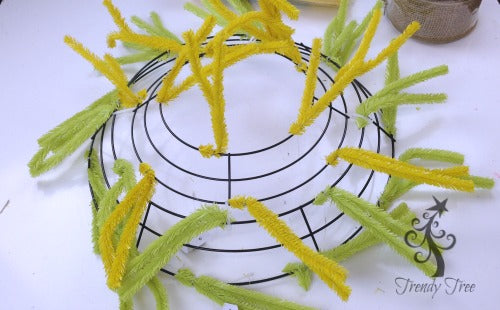
First step in this tutorial was to stack the wreath forms. We chose a 24" Fresh Green Pencil Wreath. Please note that the 24" wreaths whether they be Work Wreaths or Pencil Wreaths, actually measure 15" across the metal frames. With the addition of mesh, materials, ribbons, etc, you generally finish with a wreath that measures 24" to 28" in width.
The 10" Yellow Pencil Wreath, actually measures 10" across the largest metal ring. The 10" wreath was stacked on top of the 24" wreath and secured with zip ties in the areas of the straight post.
You could also connect using chenille stems or floral wire. Snip the end of the zip ties with a wire cutter (using your scissors will dull them).
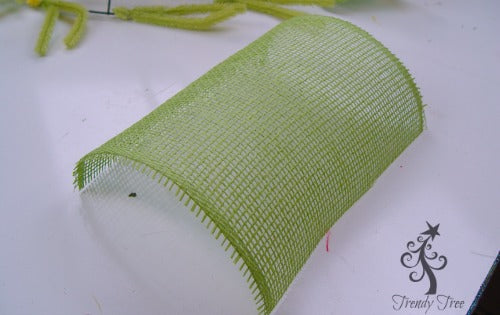
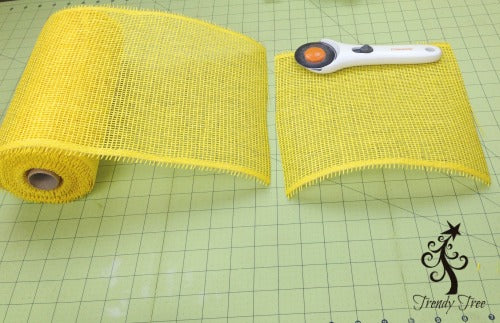
Next step was to cut the lime green paper mesh into 10" lengths. The paper mesh is already 10" in width, so you'll have a 10" x 10" piece. There are 18 twists on a 24" wreath and we're going to make two petals for each twist, so you will need 36 pieces. Generally, you can get 36 pieces off a 10 yard roll, but you might have 35 or 37. It will not be noticeable if you only have 35 pieces.
Please note that paper mesh (as with any woven product whether it be poly or paper) will ravel. Paper mesh or poly mesh does not have a very tight weave and raveling is just a consequence of that. We are asked quite frequently is there anything you can do to lessen raveling. The only suggestions we have for you is to make as few cuts in the paper mesh as possible and handle as little as possible. It is not recommended that you use a 21" product, split in half, then cut your 10" x 10" pieces.
You may want to clip strings as you go along or just wait until the end. It is better to clip strings rather than pull them out, because by pulling them out you may encourage another string to become loose. As you work with the wreath even after you're completely done, as you hang the wreath, move it around etc, you will generate some loose strings. So just plan on clipping some strings)))
We use a 24" x 36" self healing Omnigrid Cutting Mat and a 45mm Omnigrid Rotary Cutter (these are available at Amazon and we have included our affiliate links.)
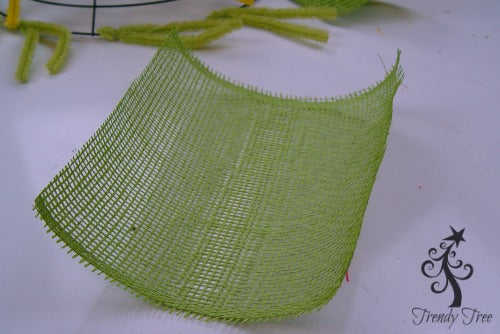
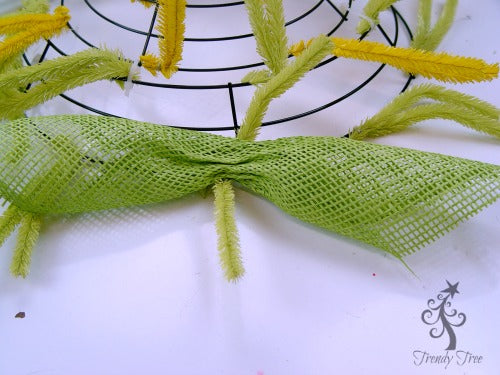
Paper mesh as it comes off the roll, will naturally have a tendency to curl under.
Flip the paper over so it cups upward.
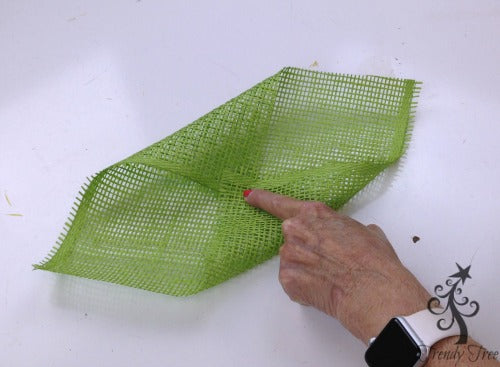
To make your petal, take opposing corners and bring to center.
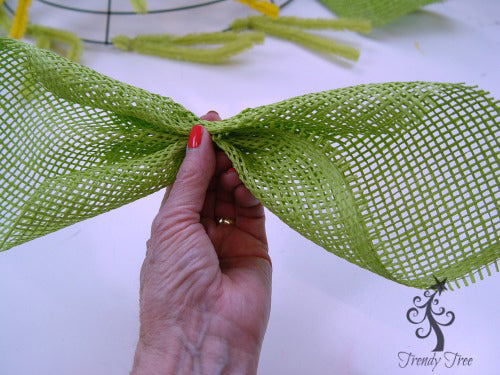
Pinch the petal in the center.
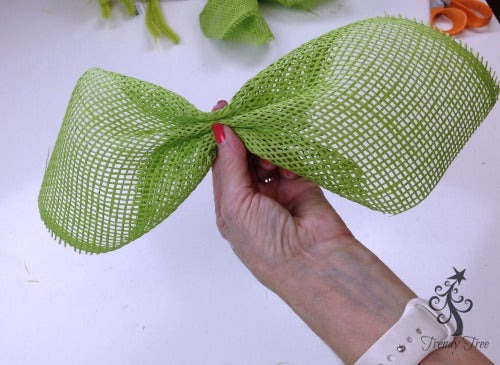
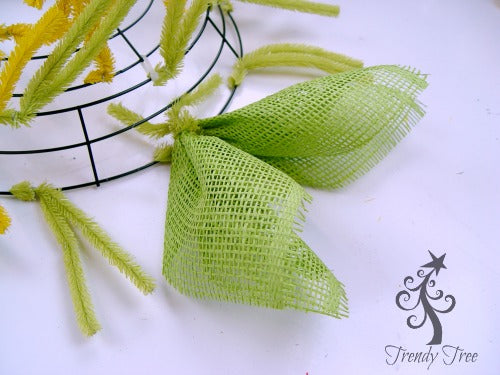
Turn the petal over so the corners that you brought together will now be facing down. This is the position you want to secure your petal in the twist.
Secure the petal in one of the twist starting on the outer ring of the green pencil wreath.
Secure petal with just 1-2 twists because you will be coming back to add another layer. Push the petal toward the outside into a "V" shape.
Place two petals in each twist. You can continue working around the ring doing one layer at a time, or place two petals in each twist as you go. Just remember to push the petals out toward the outside.
If you have placed your petals in the twist one at a time, it is important to open the twist and lay the second petal down on top of the first. Then just re-secure the twist with 3-4 turns. Tuck the ends of the twist toward the inside of the wreath.
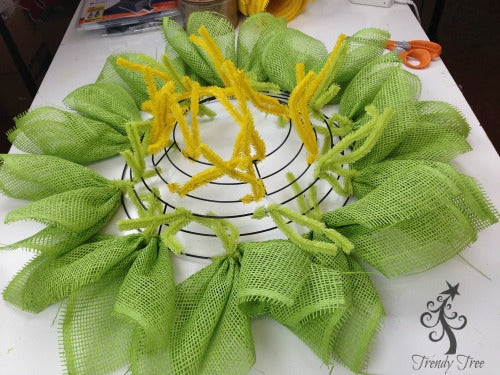
Continue working around the outer ring. Here's what you wreath should look like with two layers of petals in each twist.
Next, add two layers of petals to the inner ring of the green 24" pencil wreath.
Next start with your yellow petal layer. Yellow paper is cut the same size, 10" in length and petals are made the same way.
We haven't noticed that cutting with a rotary cutter makes any difference in the raveling, but a rotary cutter and cutting mat does make the process quicker.
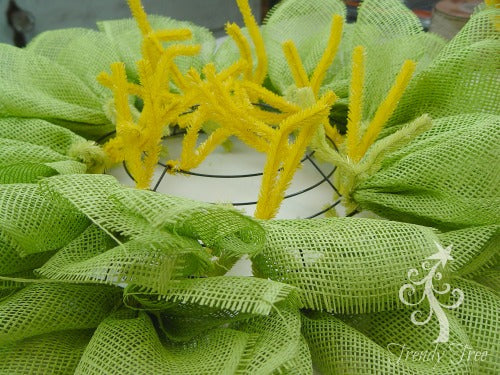
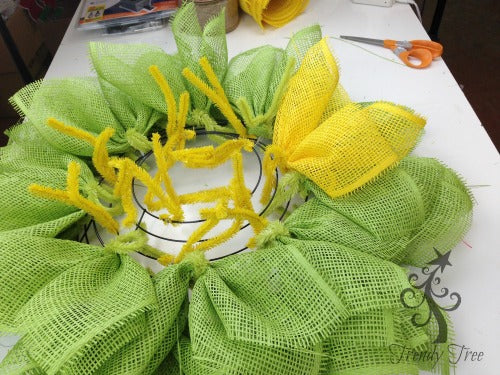
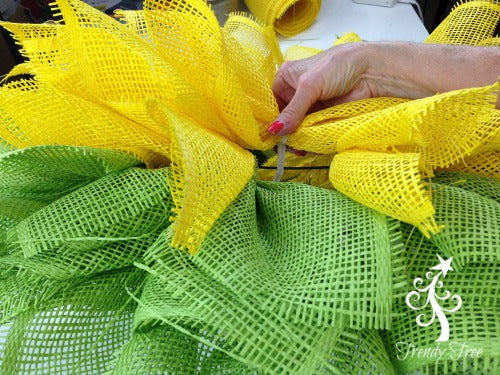
Make the yellow petals in the same fashion as the green, be sure to push them toward the outside once secured. Place two petals in each twist starting on the outer ring of the 10" yellow pencil wreath.
The 10" yellow pencil wreath as 12 ties. So you will need 24 pieces to have two petals in each twist. You will have some paper left over. I hate having product left over from a project! It's usually not enough to do anything else with and just winds up wasted. So for this wreath, you can add in some extra yellow petals for fullness.
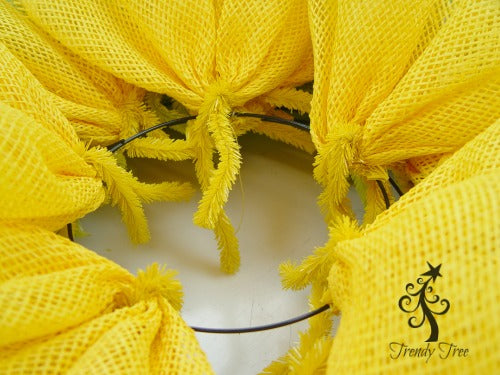
Continue working around the wreath placing two petals in each twist. You will see on the inner ring where you could fill in with some extra petals.
In the gaps between the twists, you can add some extra petals. We added about three extra clusters of two petals to the inner ring.
Make a "petal pick" by making two petals in the same fashion, cut a chenille stem in half (use wire cutters) and place the chenille stem over the top of the petals.
Bring the ends to the back of the petals and twist a couple of times.
Place the petal cluster in the area you want to add the extra petals and reach under from the back of the wreath and twist the chenille stem ends together. It's best not to turn the wreath over to secure the petal pick so you want flatten down your petals.
You're all done with the paper petals!
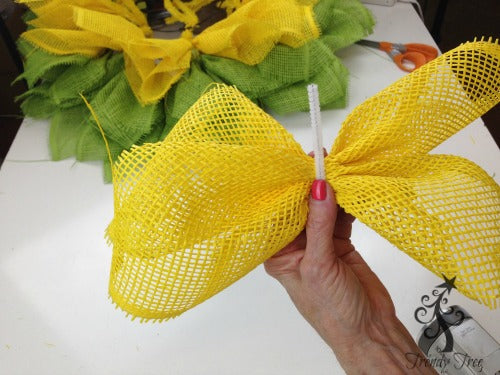
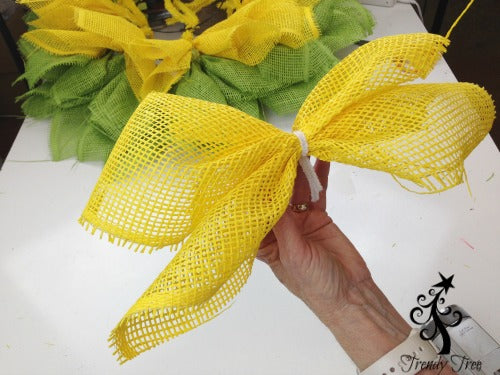
Next your ready to make your burlap ribbon rose for the center. This burlap ribbon rose is made the same way smaller roses or flowers are made out of wire edge ribbon. Essentially, one side of the wire is pulled on to gather up the ribbon. Then the ribbon is wound up, secured by wrapping wire around the end and used as a flower.
Here's a link to an older tutorial we did showing how to make ribbon flowers. Tutorial for Candle Wrapper Using Camo Ribbon Flowers
The large burlap flower is made the same, but since it is so large (about 9") we felt that securing the ribbon edges together with a needle and sewing thread would make it more secure.
This roll of 2.5" x 10 yards is more than enough for one large ribbon rose. Burlap is thick and harder to work with though compared to sheer ribbons. So it will take a little time to gather the ribbon.
To gather the ribbon, since the burlap is a very loosely woven product, it will help if you hold the wire edge of the ribbon in your left hand and gently pull on the wire the right hand. Don't pull at the ribbon from the body of the ribbon or you can pull it apart or pull it off the wire. Just do gentle gathers. It can be a slow process))
We didn't measure the ribbon we used exactly, but we ended up with a piece (with gathers) of about 3 yards. So we probably started with 4-5 yards. You can gather your ribbon without cutting it, but having a piece cut is a little easier to work with since you can gather from either end of the ribbon. I would just probably cut at least 4.5 yards to start with.
If you wind up with too large a flower, you can always cut off a bit. The burlap ribbon is bulkier than satin or thinner ribbons, so if you haven't made ribbon roses before, you might want to try practicing on some scrap ribbon first. Pull the gathers gently on the burlap ribbon, it is a very inexpensive loose weave burlap and frays easily.
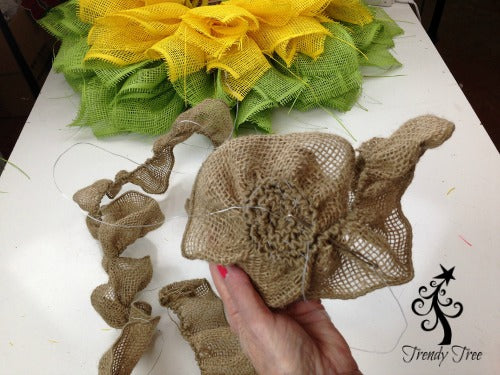
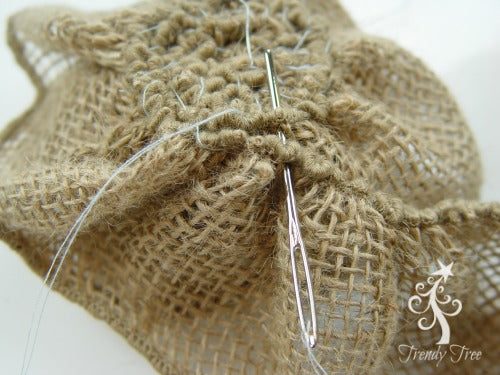
Once you have your ribbon gathered, fold the raw edge of the ribbon to the inside a couple of times and start rolling up the ribbon, lining up the wired edges. You roll up from the edge that you gathered. Roll it up fairly tightly and keep the edges even.
We used a blunt embroidery needle but you could use a regular large sewing needle. The burlap ribbon is such a loose weave no matter what kind of knot you tie to your sewing thread, it will pull out. So you'll have to make a few stitches to start with to keep it attached. Use double thread. We used regular sewing thread. Don't try to use sewing thread from one of those little sewing kits....it won't even hold a button on. With regular sewing thread it still broke a time or two anyway. Quilting thread would have been better, but I was out......well...let's see....how long has it been since I made a quilt....hmmmm....never! But if having to purchase thread just for this project, buy quilting thread.
It doesn't matter if your handiwork looks messy, the main thing you want to do is to make an overcast stitch connecting one layer of ribbon to the next. You're not making this for a grade in Home Ec)))
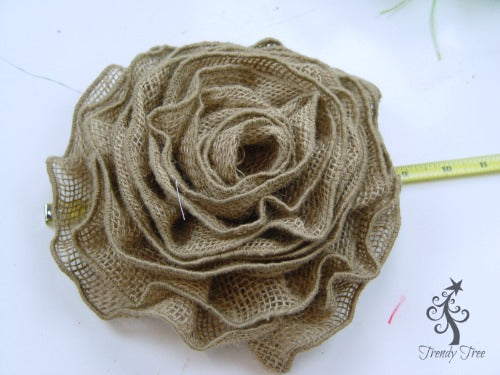
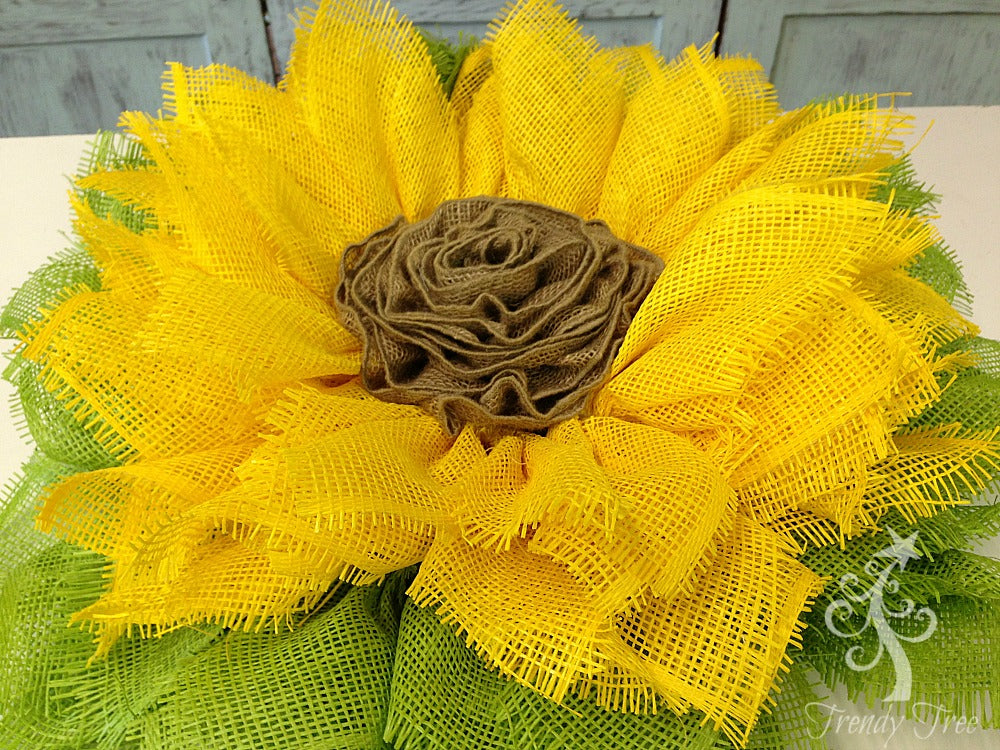
The finished burlap rose was about 9" in diameter.
As you're rolling up the ribbon, try to keep the wire you were pulling on to gather, up and out of the way of your stitches. The gathering wire will be exiting from your rose in the center. You'll need this piece of wire before you're finished.
It's hard to see the wires in this photo, but you'll have your beginning wire in the center and your ending wire on the outer edge. When reaching the end of the ribbon, fold that raw edge under a couple of times. Take the wire from the outer edge and bring it to the center and twist those wires together a few times so that you have two wires exiting from the center of the back of the rose.
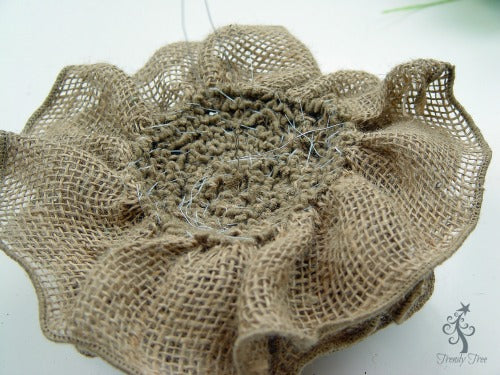
As you are rolling up your ribbon to make the rose, you might want to just see how it's going to fit in the center of your wreath. If you've made it too large it will be simple to make smaller and don't be frustrated if you have to re-roll the ribbon a couple of time to get it to your liking.
Once the size is correct, position the burlap rose in the center of the wreath. It's helpful at this point if you have someone to hold your wreath while you fiddle with the back of the rose. If it were a poly mesh wreath, I would say just flip it over and work from the back, but you don't want to crush your paper petals. If you have a wreath holder put it up on a table were you can hang your wreath and work from the back to secure the burlap rose.
Take the two wires exiting from the center of the rose and tie one in the 12 o'clock position and one in the 6 o'clock position to the wreath form. Attach the wires to the inner ring and secure around ring and a post if possible to help keep them from sliding around.
Take another couple of pieces of small floral wire and just slip through the edges of the ribbon and secure at 3 o'clock and 9 o'clock. Attach two to four more pieces of wire and your rose should be secure.
If you have difficulty making the burlap ribbon rose, you can always fill in your center with a large blossom from a floral spray, or make ruffle picks using a black or brown mesh product or make your center with another ribbon that is easier to work with than burlap like a satin or sheer. You could always use a solid black or brown ribbon for the center.
Next you are ready to clip strings. Check the back of your wreath for any sharp edges created by chenille stems, wire, zip ties etc. and make sure they are all pushed to the inside or covered up with tape if necessary. You can make a wreath hanger by using a couple of zip ties. If your ties are just medium sized, you will need to put two ties together for a hanger.
Update: We recently experimented with some products to see if they would help reduce raveling in paper mesh and we found that some really did quite well. Our preferred product was Elmer's Craft Bond Spray Adhesive. Watch the last portion of the video to see this spray adhesive added to the wreath.
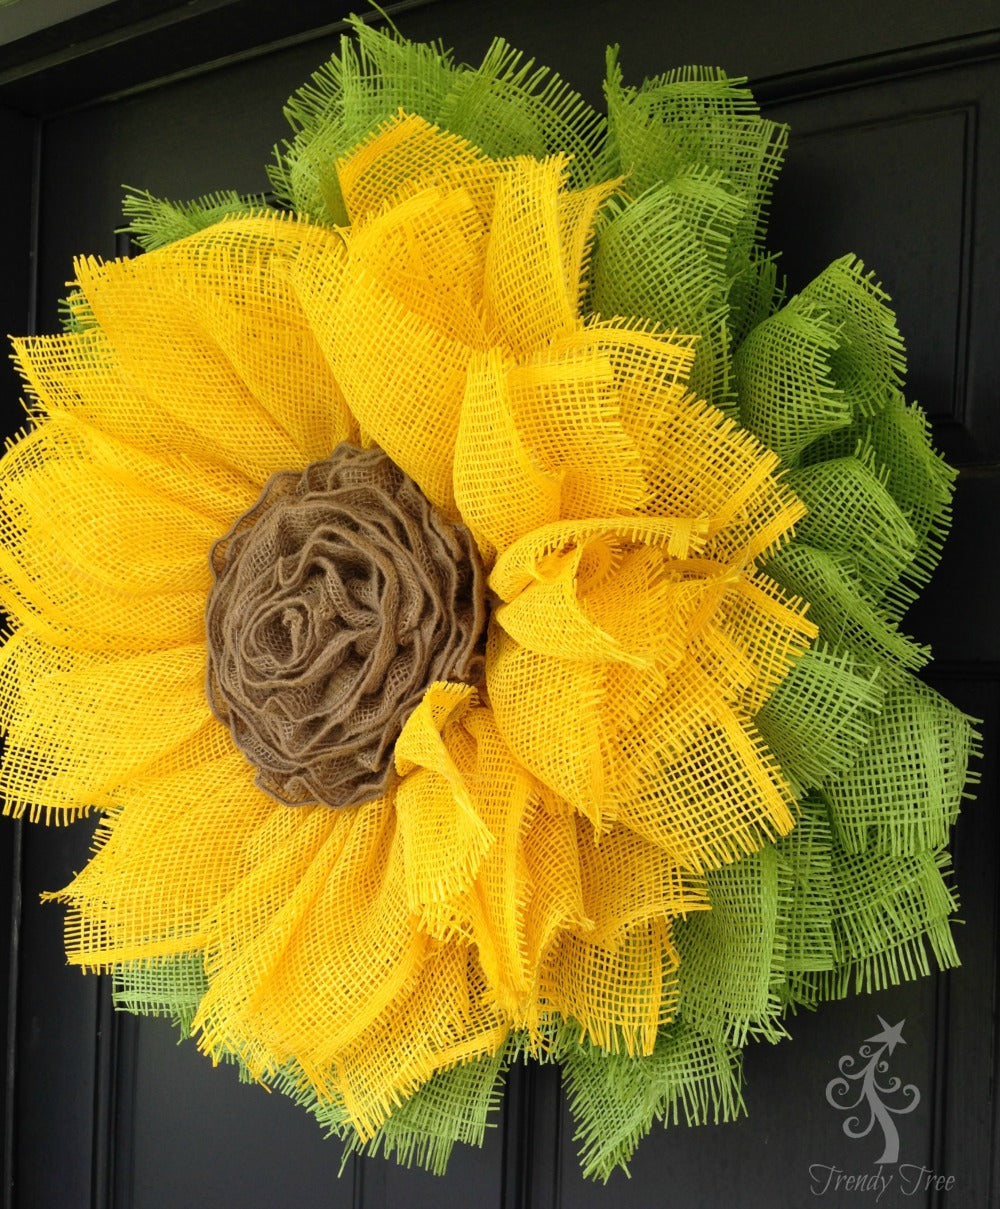
Once the wreath was completed, we sprayed each petal (especially the edges) with the spray adhesive. This is a messy step and it will get on your hands. You may want to do this outside. Spray each petal and lift gently to keep the petals from sticking together. They will be tacky quickly and once you have finished spraying you want to go back and gently separate the petals to keep them from sticking together. You may pull out some strings while doing this and you may need to gently reshape the petal. Let the wreath dry completely (we left our overnight). Then clips your strings, rather than pull them out. The spray adhesive did add some stiffness to the petals which was nice and did help in the reduction of raveling.
You might want to test this product or a similar product on a scrap of material before spraying your whole wreath and see how it works in your climate. For instance, we also tried a Loctite product and it never dried for us even after several days. We don't know if it was our climate, the product or what, but it just didn't work. Here's a link to the product test that we did: Can we Stop Paper Mesh from Raveling? Maybe!
Wreath After Spraying with Elmer's Craft Bond Spray Adhesive
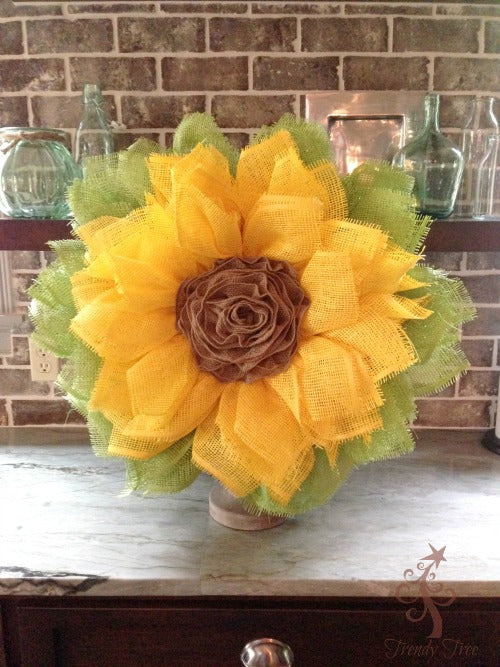
Don't have a tabletop wreath holder? In this image the wreath was set on a tall wooden candle holder for a quick fix.
Remember that this technique can be used with a variety of materials. Paper mesh comes in all sorts of colors as does ribbon. It doesn't have to be burlap ribbon and sheer ribbons are the easiest to work with when making a rose this large.
Customers frequently ask us if this project can be done using regular polypropylene mesh. The answer is yes it can, but it's not as dense as paper or poly mesh, so you might want to add more petals for better coverage, so you would need extra mesh. It can be made on a pencil wreath or regular work wreath. We usually like using a pencil wreath for this since the twist on the pencil wreath are much smaller than the twist on the regular work wreath.
The stacked wreath method gives you a larger, deeper wreath. This wreath measured about 28" in width.
SaveSaveSaveSaveSaveSaveSaveSave