Looking for an easy wreath to make? Well, we have one for you.
The original post for this wreath contained a link for a supply kit which has long sold out, but you can follow the instructions and just pick out different mesh, signs and ribbons.
24" Pencil wreaths at Trendy Tree measure 15" across the widest metal ring. Adding mesh, ribbons, etc, results in a wreath that measures 24" in width or greater. We chose a white pencil wreath for this tutorial, but you could also use a white work wreath, or silver.
Mesh
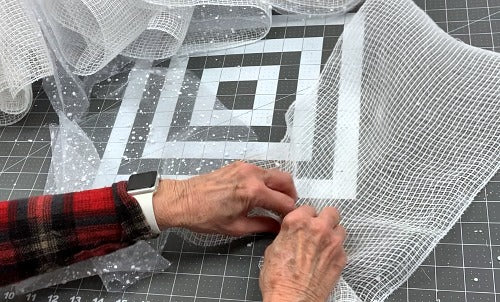
Two different styles of mesh was used on the Season's Greetings wreath. The base mesh was a new 10" white fabric mesh. Fabric mesh is made of polypropylene, but also has a Polyester fiber in it which gives a nice texture and greater density to the Deco mesh. We also used Snow mesh which is made of polypropylene and has a sprayed on pieces of white giving it a "snowed" look. It's very transparent and looks great on top of the white fabric mesh. Both rolls were 10 yards in length and we used all of both rolls in the wreath.
Ruffles
We used the ruffle technique because it's one of the easiest techniques for the beginner wreath maker. Our tutorials are geared toward beginner wreath makers and you will find them pretty basic and simple to make. Using a rotary cutter, cutting mat and mesh holder (sold by Susie's Wreath Shop), we cut 20" pieces of both styles of mesh. You should be able to get 18" pieces 20" in length from each roll, but you could come out a few inches short or have a few inches left over. Don't fret if you come out short. Just make your last ruffle with what you have and a few inches short will not show. Make a ruffle by scrunching up through the middle of the mesh and secure it in one of the twists on the outer ring of the pencil wreath. We placed a fabric mesh ruffle first, and then the snow mesh ruffle on top. You can lightly secure the fabric mesh ruffle in a twist while making the snow mesh ruffle. Just be sure to open up the twist, place the snow mesh ruffle on top of the fabric mesh ruffle and secure with 3-4 twists.
Sign
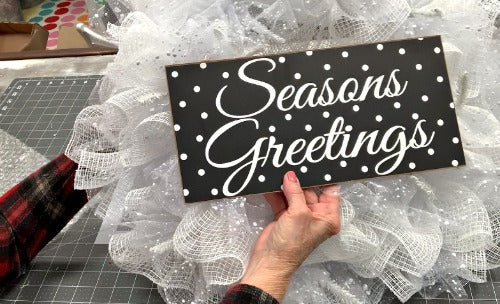
The Season's Greeting Wreath sign was made of MDF and about 12" in length. Because the sign had a burlap string for hanging, we had to staple chenille stems to the back of the sign. You'll need full length chenille stems because you want the sign to rest sort of on top of the mesh and not be buried down in the mesh. Secure the sign to the wreath frame. Find your position whether you want it in the center, bottom or off to the side.
Ribbon
You can add ribbon to a wreath in many different way. We opted to make three large bows using the E-Z Bowmaker. But, if you wanted a different look, you could always all ribbon strips, loops and tails or a combination of both. We made three large bows all the same and still had a good bit of ribbon left over. You don't have to use a bowmaker for your bows if you can tie them by hand. Sometimes we use a Bowdabra, Pro Bow or hand tied bows. We positioned two of the bows at the top toward the left and one at the bottom toward the right. Secure bows with chenille stems to the wreath frame.
Summary
Make a wreath hanger using a chenille stem, floral wire or zip tie. Check the back of the wreath for anything sharp that might scratch your door. Twist any long ends of chenille stems around the wreath form just to give the back a neater look. If you don't want the twists from the pencil wreath to show, you can tuck them toward the inside of the wreath. The overall width of the wreath was about 26-27." The snow mesh really gave the Season's Greetings Wreath a fresh airy look. The red, black and white ribbons contrast nicely with the black sign and white mesh. Thanks for visiting our blog, we really appreciate it! If you have any questions about the wreath or products, please leave a comment and we'll get back to you. Don't forget to subscribe to our YouTube Channel and follow us on social media. All the links are at the bottom of the page. Here's a few wreath tutorials you might want to check out too! Snowman with Top Hat Wreath TutorialSunflower Wreath Farmhouse Wreath Tutorial *Disclosure: (Jeannie Pence) The Trendy Tree blog and social media post may generate some income (Jeannie Pence) through affiliate links, sponsored post or general advertising. Trendy Tree only works with companies we trust and personally use. An affiliate link to a company or product may result in a small commission based on a click through or referral fee that is paid by the seller. The amount is not added to your expense. It is a form of advertising