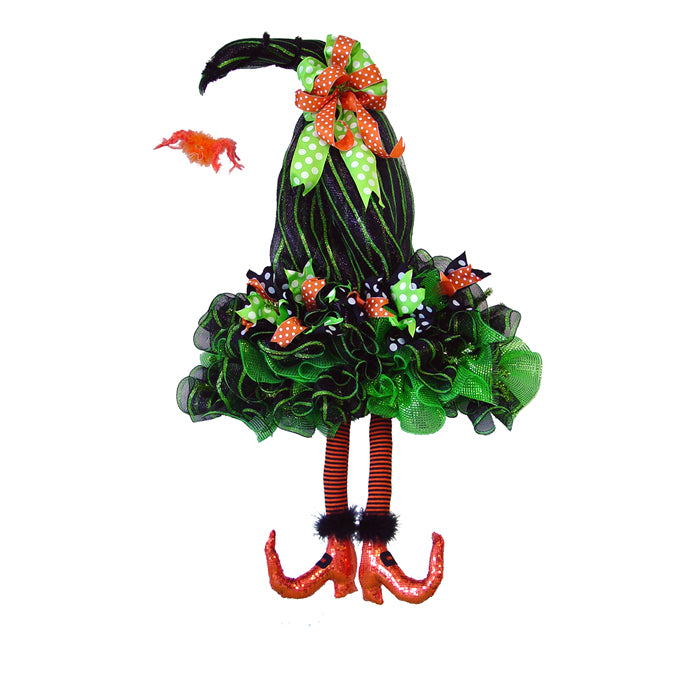
Whimsical witch hat made with Deco Poly Mesh®, two
Ribbon Pencil Rails, and some glitzy RAZ Witch legs. It was easy to make and you can do it too))) Lets get started with the tutorial.

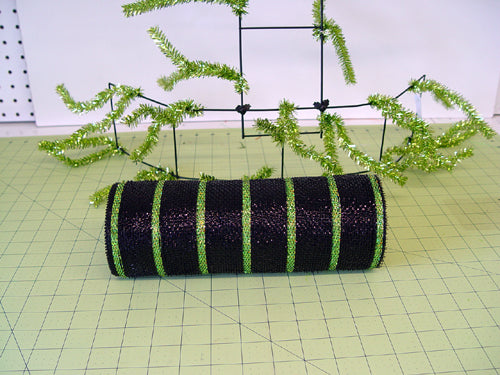
First thing we did is start with two of the new straight
Ribbon Pencil Rails pieces. We curved one slightly and found our center point, then left the other one straight and positioned it behind the curved and and centered it. It looks off center in the photo....think it was because I was standing off to the left. But we center it nicely before we secured them together with zip ties))
Note: We are out of the Lime Green, but have Gold and Silver in stock and Copper coming in week of 8/18/13.
We chose the
Metallic Lime Green.....it really wouldn't matter which color you used. The top one is just used for form and stability and we actually turned those twists to the inside of the rail out of the way.

The
Ribbon Rail that was used for the straight portion of the hat was positioned behind the curved rail and secured at the center point with zip ties. We used two ties at each corner point to keep the rail from sliding up and down once it was attached. Zip ties hold really well and you could still slide it some, but it was snug enough that it wasn't slipping up and down on its own.

The long ends of the zip ties were snipped off closely with wire cutters.

Next we needed a twist to be right in the center of the top of the
Ribbon Rail. If you've used the
Ribbon Rails before you know they come with 6 twists on one side and 5 on the other.
The twists are staggered in position around

the rail. So if you ever need to even things out a bit, you can just add another twist using a chenille stem or in our case, we used a piece of metallic pencil garland.
Metallic Pencil Garland comes in 25 ft rolls and several colors. It's only $2.25 a roll and comes in very handy.
Or....since we did not plan to use the twists on the top ribbon rail, we could have just cut one off and moved it to the center top.....but around here.....we make projects....tear them apart and use the pieces again for something else.

Here's the frame and now we're ready to start with our mesh.
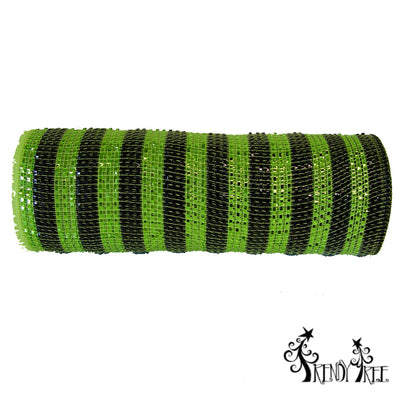
We chose this new style of Deluxe Foil in
Black with Thin Lime Green Stripes .
(Will be back in stock week of 8/18/13) It's 10" in width and 10 yards in length. For this project, you would actually need
TWO rolls and I'm sorry I didn't show two in the photo. Remember when I said.....we break projects apart and reuse them......we had some ruffles that we had made previously for a Halloween Mailbox Cover and we used those ruffles on this project. So, unless you have some assorted mesh from previous projects that you want to use for your ruffles....you would need another roll for your ruffle
Here's another suggestion for mesh that would work great with this project .
Lime with Black Stripe Wide Foil.
More arriving week of 8/18/13
RE1363JK

RE1363KA
Another hint that we learned from one of customers who has already created this little witch with outstanding results and she only used one roll of 10" mesh.
She made four of the 42" strips and shortened the ruffles to 12". By doing this, she was able to make the witch using 1 roll and actually had about a yard left over.
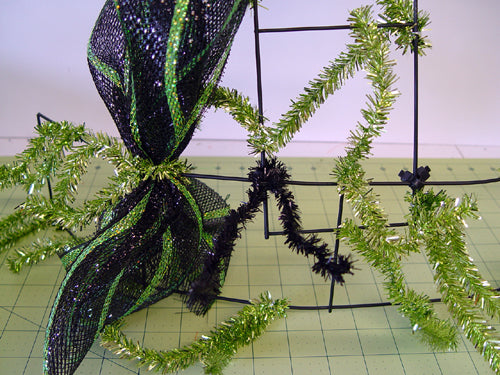
Cut your mesh in strips of about 42." We only cut 3-4 strips to start with since we really didn't know how many it was going to take.

Grasp the mesh, leaving a tail of about 15" and secure it in the center top twist of your rail. Pull the mesh straight down, not tightly, but you're not making a pouf either.

Secure it in the next to the last twist on the bottom rail (or second from the left in the photo). Push the tail to the inside of the rail.
Start each strip of mesh by securing in the top, same twist. Just open it each time and re-secure. Secure the bottom of the strip into the next twist on the curved rail and work around to the next to the last twist on the bottom right.
Sometimes my twists didn't work exactly where they needed to be, and if that happened we just made us another twist with the Metallic Pencil Garland.
You can see the black one is the one we added.

Just continue the same process until you have worked around to the next to the last twist on the curved rail. Don't worry about some gaps here and there right now. The gaps you see will be covered up with ruffles in the next step.

Here is where you will need that second roll of 10" mesh.....unless you have several short rolls of other 10" mesh in colors that would work. Cut strips of the 10" in 20" lengths. Pinch down the center of the mesh in a gathering motion to make a ruffle.

Hold the pinched ruffle in your hand and you're ready to start your ruffle on your witch hat!

We added the ruffles using a single layer at a time at first, the adding more to fill in here and there. We alternated with some black/lime stripe and some wide foil lime green that we had available. Position the ruffles to where the edges stick straight out as possible....making the brim of the hat.

This photo is not great....but sometimes to helped to have the hat at eye level so we could see where we needed to fill in the ruffles.....in this photo it looks a little too heavy in the green on the right side.

The ruffles are finished in this photo.

Now we are ready to do something with the top of the witch hat.

We smoothed the tails down and held them rather tightly and wrapped Black Metallic Pencil Garland around it. We wanted to be able to bend the tip of the hat over a bit and the wired garland helped that along a little.

There are many different ways to finish off the tip of the hat.....ribbon streamers....glittered balls....

We tied this cut little
RAZ Feathered Spider on with some clear fishing line to to the tip of the hat. The spiders come in an assortment of four spiders - orange, green, black, purple.
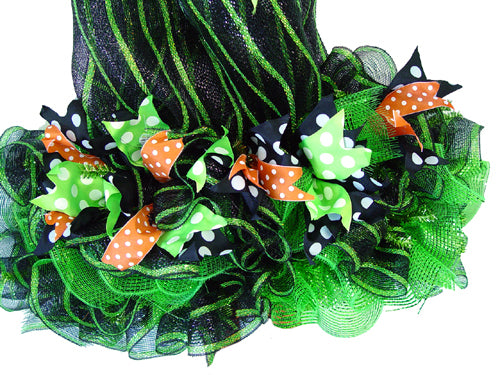
Next we added some assorted ribbon strips to the twists where the top portion of the hat was secured to the bottom rail. Just around that inner brim area to define it a little more.
Just cut your ribbon strips 12-15" in length, fold in half lenghwise and trim the ends at an angle cutting from the folded side of the ribbon. This give you a nice chevron or fishtail finish to your ribbons. We used wired ribbons for this in
Kiwi,
Orange and
Black Polka Dot. These ribbons ranged in 1.5" to 2.5" in width.
Most of these ribbons have sold out since the tutorial was posted, but we have others that would result in a similar look. Browse our
Halloween Ribbons.
To add the ribbon strips, undo your twist leaving the ruffles in place, position your ribbon with the face of the ribbon up and re-secure the twist, this time with 3-4 turns. I may not have mentioned earlier, but when we're adding layers to our project, we only give the twists a couple of turns when we know we will be opening them later to add more layers. On that final layer, give it 3-4 twists to secure tightly.
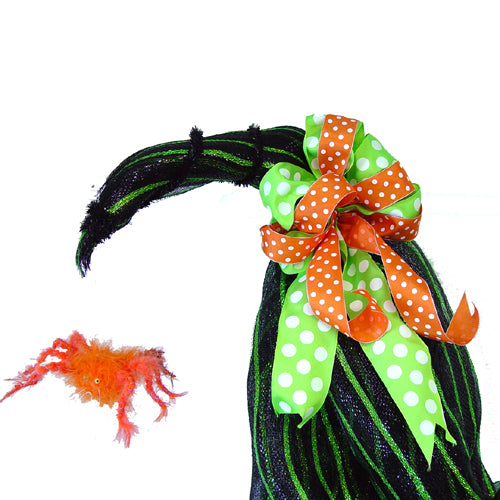
Next we made a small bow with matching ribbon for the top of the hat. This helped to cover up the very top of the ribbon rail too.

Here's the hat....all finished))) We could have stopped right here and had an adorable project. This hat would be great for your front door or wall hanging.....but we decided to add a little more whimsy and bling with
RAZ Witch Legs))

These Witch Legs from RAZ are about 7.5" in length (the stuffed portion) on a 10.5" stick. Honestly I can't tell if this is a stick or heavy wire. The "stick" is covered and I haven't tried to bend one in fear that it might just be a stick. So we left these straight. The nice thing about the legs with sticks.....you can just weave them up through your work frame and secure with zip ties.
The shoes are shiny and have a little bit of fuzzy material around the tops. They are available in Orange Shoes or Black Shoes. They're great for other decorating projects too. I'm sure you've seen them on Pinterest sicking out of a flower pot.....under pieces of furniture.

This image is the Witch Hat with Legs still on our craft table to give you an idea of the size. Sorry, but we don't have a beautiful door in our shop to takes images on! We need one))))
Overall the Witch Hat with Legs 42-44" in length and about 28" - 30" in width. The pegboard on the wall is a 4 ft tall.....this helps to show you the size.
This was a "first time" project and along the way you can always see something you could have done differently so I'll share those with you.
1. Should have shown you that it will take two rolls of 10" mesh. Or three if you want to use any contrasting color on your ruffles.
2. Wish we had sort of swirled the mesh in the top portion of the hat since we had chosen this nice stripe. A diagonal look would have been neat.
3. You might could get by with only one Ribbon Pencil rail and used something else for the top portion of the hat. All you need is something that will hold one twist with all your strips. Perhaps a core from a 21" roll of mesh. Would save you a few dollars and if you're only making it for yourself.....go for the savings! The extra Ribbon Pencil Rail does add some strength and stability however. But, I wouldn't be opposed to trying a core the next time....or a wooden dowel...
4. We still have too many green ruffles clustered in one place or two. Might have been better to have attempted to alter the patterns versus just randomly as we did. Remember....we take things apart and use again))) We just picked up ruffles here and there and added them. Next time.....we would add one style, then another and kept up with the pattern.
5. The top could have been finished off differently.....could have used some Flex Tubing....Glamour Rope.....could have suspended the little spider from ribbon instead of fishing line....lots of options with that.
Please drop by our Trendy Tree Facebook page and “like” us if you haven’t already…..follow our Tweets…..and check out our Pinterest Boards.
Hope you enjoyed the tutorial!
Happy Halloween!