
Tomato Cage Halloween Tree Tutorial
Supplies:
- 36" Tomato Cage (purchase at WalMart, Lowes, harware store, etc)
-
Needle Burst Garland - 2
-
RE134102 Black Wide Foil Deco Poly Mesh 10" - 3 rolls
-
497140 LED Lights 96 Light Strand
These are the supplies for the basic tree. Other items will be listed later.
Secure Tomato Cage
 Tomato cages come in several sizes and colors. We used a 36" one which has a diameter of about 12". Turn the tomato cage upside down for the tree shape. The first thing we did was to put a zip tie around the top stakes to hold them together.
If you have a tomato cage that has the stakes on each each, just turn them to the inside instead of cutting them off.
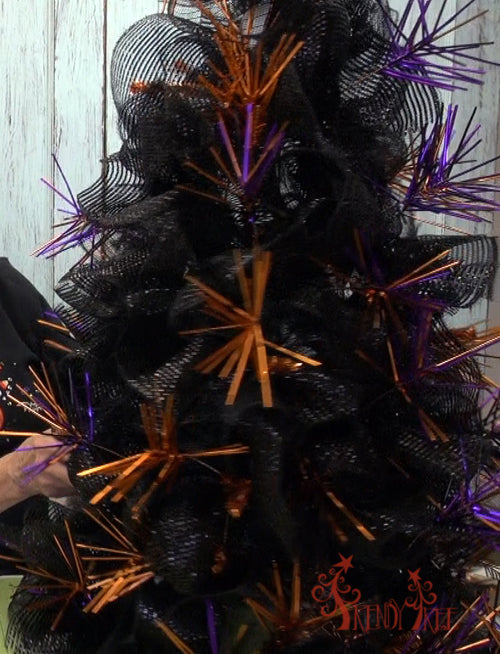
Needle Burst Garland
The Needle Burst Garlands give some extra bling to the tree with there bursts of tinsel. One side of the twist is a regular pencil twist and the other side as a burst of tinsel sprays. Also on this tomato cage tree, we used two garlands instead of one as we did on the last tutorial. This gave us more places to attach mesh so that we didn't have to fill in so many gaps with extra ruffles. Still, even with the attachment of two garlands, we still had to fill in a couple of places that needed ruffles where there were no twists.

XX757497 Needle Burst Garland
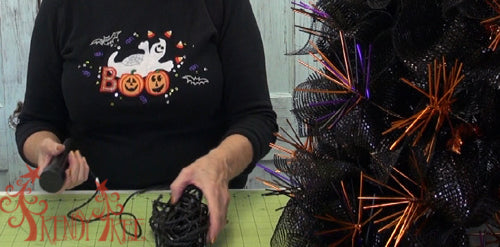
Next we took a Needle Burst Garland (first one was black, copper and purple) and attached it to the tomato cage started at the bottom and working up to the top in a horizontal fashion. Using the twist ties on the garland to attach to the tomato cage frame. In places where you really need to attach it, and there are no twists, just use a zip tie.

Attach garland starting at bottom

Cage after one garland attached horizontally
Next we chose a Copper Needle Burst Garland to place on the cage vertically.


Using the two garlands covered really well and I might could have wound the garland around better to covered all the areas....it just takes practice)))
Ruffle Technique
We covered this tree using the ruffle technique. The 10" Deco Poly Mesh was cut into 10" lengths. In this project we used a combination of Black Wide Foil Mesh and Black Metallic Mesh. The Black Metallic Mesh is just a little less expensive. The cage was covered in double layers of ruffles. We thought that by using the less expensive mesh for the bottom ruffle, this would cut down expensive a bit, but the coverage is so much better with Wide Foil Mesh, that we would recommend using Wide Foil Mesh for all the ruffles.

RE134102 Black Wide Foil Mesh
We started out with two rolls, but did have to use a third roll to finish. It didn't take all the third roll, but we did use some.

You can speed up the cutting process by cutting two layers of ruffles at a time or even more. We used a
rotary cutter and
cutting mat that really is helpful.
To make the ruffles, just take the 10" piece of mesh, turn it to where the edges are curling under, scrunch up through the middle with the selvage edges to the outside and pinch in the center.

Hold that ruffle and create another.

Take both ruffles pinched in the center and open one of the twists on the Needle Burst Garland and secure with just a couple of turns. It doesn't matter which twist you start on.

Continue working around the garland adding ruffles. On this project, we filled in with ruffles on the first garland, and then started filling in on the second garland. Sometimes we would skip a twist when it looked like the ruffles might be too close together. You just want to fill in the spaces, not necessarily put a ruffle in each twist.
When you're done, step back, take a look and fill in any holes or gaps with a cluster of ruffles you have made as a pick. To do this, just hold two ruffles, place a piece of a chenille stem or flora wire over the top of the ruffle and twist a couple of turns from the underneath side. Then place that ruffle over the wire of the tomato cage or where ever you need to fill in and twist the ends of the ruffle pick from the inside of the tree.
If you need to fill in a gap where there just isn't anything to attach to, add a piece of wire or chenille stem to the tomato cage frame and create a place where you can attach your ruffle pick. We had to add only a couple of ruffle picks when we were done.
Add LED Lights
We added a strand of 96 LED lights, cool white, on a black cord. These are great new lights that we have on our website now.
We have them in several sizes, cool white, warm white, and multicolor with black or transparent cords. They are indoor/outdoor and very durable. The battery boxes are heavy duty plastic and have a seal to keep moisture out.

49714 LED Battery Lights
We started at the top of the tree and attached the lights with a twist and just wound down and around the tree.

We had a couple of feet left over and this was tucked underneath the tree and the batter box secured with a zip tie. The lights have times and stay lit for 6 hours, off for 18 and have several different light functions.
 Decorate the Tree
Your tree can be decorated in any number of ways. We did the decorations twice to show you a few different ideas.

The topper was easily made for this tree using about 5 of the Halloween Pick. It's very glittery and has several different little Halloween shapes like skulls, ghost, bats, pumpkins, so with these sprays you really don't need anything else for the top.

HH7161 Halloween Spray
The balls were Cut Foil Balls in Copper and Lime Green, both in the 3" size. We also have the 4" size available and in several other colors.

3" Cut Foil Copper Glitter Ball Ornament

3" Cut Foil Lime Green Ball
The other ball ornaments used were from a collection of plastic Halloween Ball ornaments that come in sets of 4. We have a variety of styles available.


HH3769 Flocked Glitter Mice
We also used a set of Glittered Styrofoam mice ornaments that are new for this year. They are about 6-7" in size.

HH71146J Glitter Skull Green Eyes
The large Black Glittered Skulls have green eyes and we also have some with purple eyes.

The last addition we made to the tree was these cute Crooked Witch Legs! They are just so adorable, they just look cute placed most anywhere. They are stuffed witches legs on a stick, but these have a little bend at the knee for a crooked effect.

Checked Witch Legs
These little witch legs have been wildly popular this year....and we still have some in stock!
We then removed all the decorations and started over again!

The second time we started with a topper made of RAZ Halloween Lollipops in two different sizes.

H3306012 RAZ Halloween Lollipop 16" H3306013 RAZ Halloween Lollipop 19.5"
Next, the ornaments we used were RAZ Poison Bottle ornaments. They are made of glass, have a wire handle and decorated with a bit of ribbon. They measure about 6.5" and are sold in sets of two. They have vintage looking labels on the fronts.

H3303109 RAZ Poison Halloween Bottles

We made ribbon strips about 12-14" in length out of two different styles of black and white ribbon, using large polka dots and strips for contrast.

9094W*984-10F Black White Burlap Polka Dot Ribbon

X426140-01 Black White Stripe Jute
To attach ribbon strips, pinch in the center and open a twist tie, lay the ribbon strip down and re-secure the tie with a couple of turns.

We also made ribbon strips from this new 4" Chalkboard Ribbon which is all the rage right now. We have this in stock and several more styles coming in soon with different width and different edging.

RG158102 Chalkboard Ribbon
You can write on Chalkboard Ribbon with just ordinary chalk. And, you've heard us mention before, that we re-use our products for tutorials so as an experiment we took the ribbon strips that we had previously cut and had written Christmas words on, wiped this off with a damp cloth, let it dry and wrote on the ribbon again! So don't worry about mistakes)))
I think the Chalkboard Ribbon will be wonderful when decorating Christmas Trees and let you kids write some words on the ribbon. Great for birthday or other occasion too....It's a Boy! It's a Girl! Happy Birthday!
Well I hope this tutorial will give you some decorating ideas for your tomato cage. Sorry that the audio didn't work out in the video, but next time we'll be more careful and do a sound check before we start!
(post contains some Amazon affiliate links)

Happy Halloween!
Save


