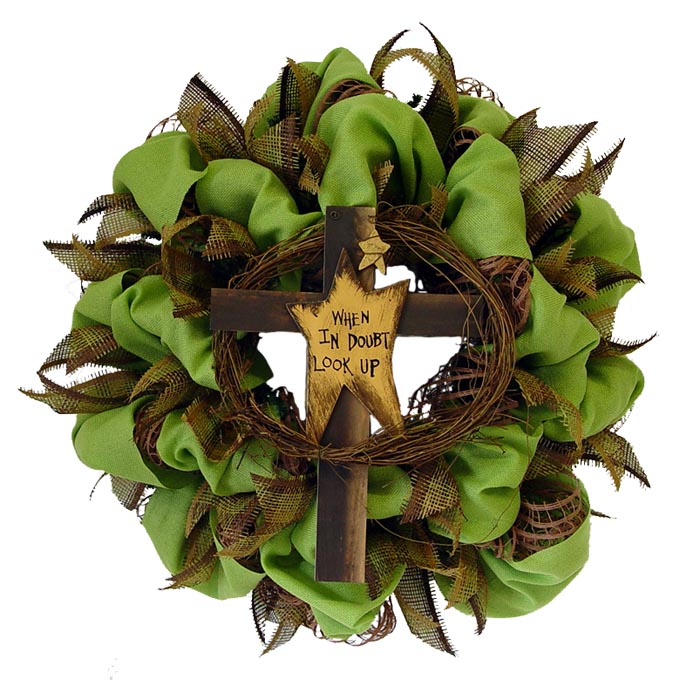
Rustic Wreath we made in the shop today mainly to show you some of our new signs that just came in this week. Lots of great signs that are perfect for cabin wreath, western, summer and fall style creations. We chose this rustic wooden cross with it's grapevine and gold metal star as a choice for this tutorial. Now lets get started)))
Supplies used were an
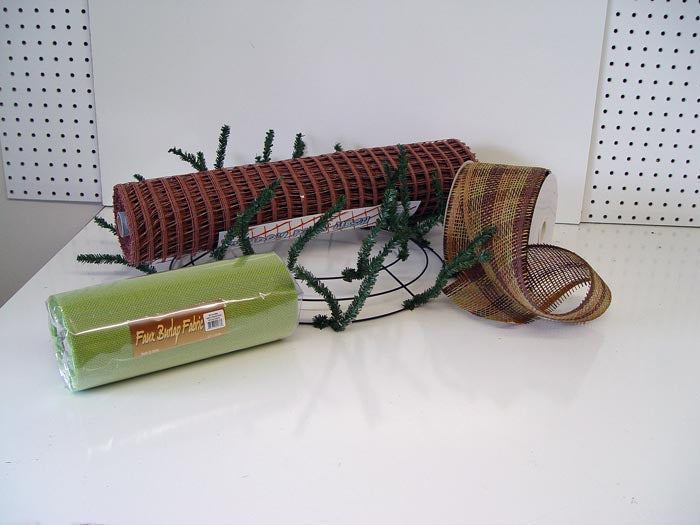
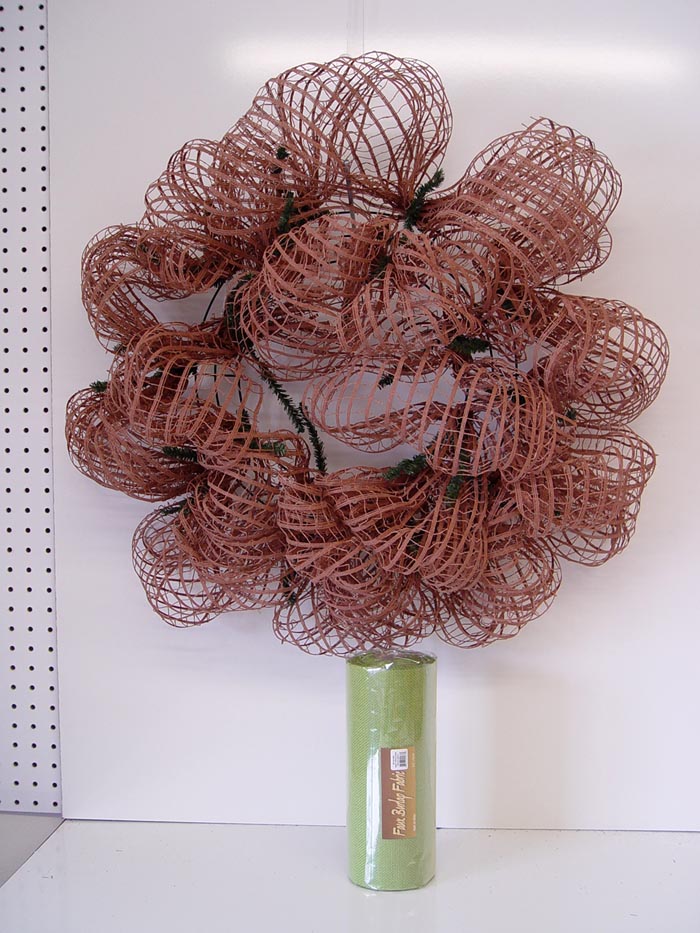
Evergreen Pencil Wreath,
Brown Cotton Windowpane Mesh and
Faux Burlap in Fresh Green.
The 24" Pencil Work Wreaths actually measure about 15" cross (the largest of the metal ring), but your finished wreath will be larger. This wreath measures about 28-29" in width and ht.
The
Cotton Windowpane mesh is a cotton product that contains a sizing or stiffening agent that gives it great body. It's a very open weave mesh. It is a cotton product so it's not made to endure the elements. This wreath also contains a paper product, so it would need to be used inside or on a door that had a great amount of protection from the weather.
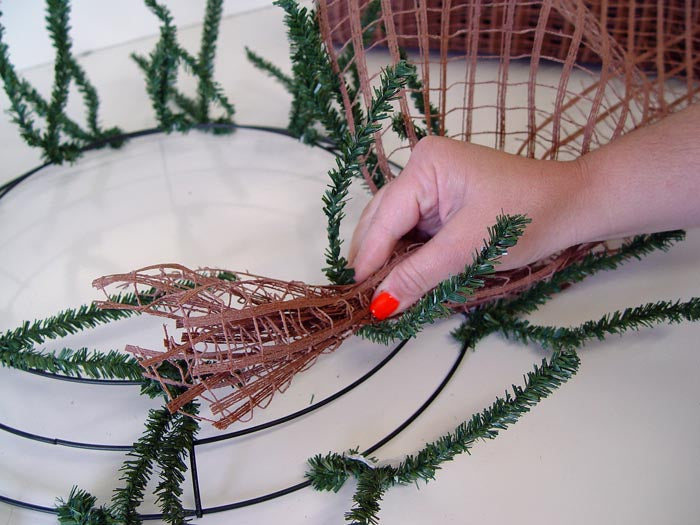
Grasp the Windowpane mesh about 3" or so from the end and place in the center of a pair of twist. It doesn't matter where you start, just pick one out and start. We generally start on the inner ring and complete those first, then drop down to the outer ring. Some folks go back in a zig zag pattern or up and down. You just have to practice to see which method you prefer. For me, it works better inner ring, then outer ring.
Just give the twists of couple of turns to secure then move on to the next one. It helps especially in the beginning if you measure your mesh.

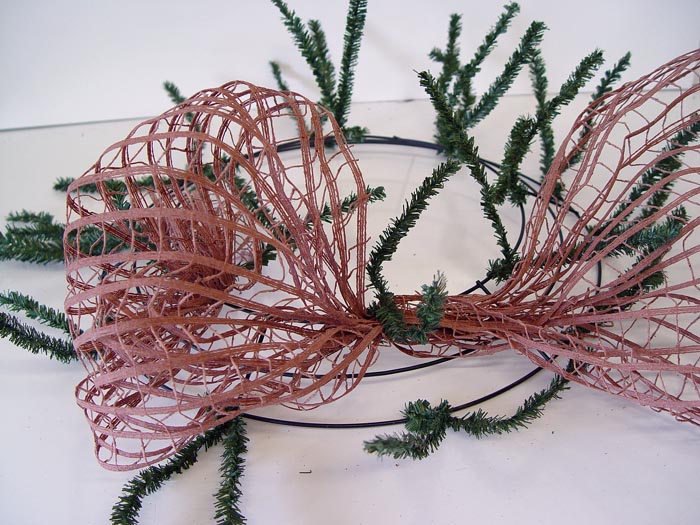
For this wreath we measured about 12-13" for the poufs. Generally one roll of 10 yard product will do a 24" wreath. Sometimes you have a little left over, but it's better to have a little extra than come up short unless you have more mesh available to piece in. In hindsight, we could have made these poufs 14-15" and still have had enough mesh to complete the wreath.
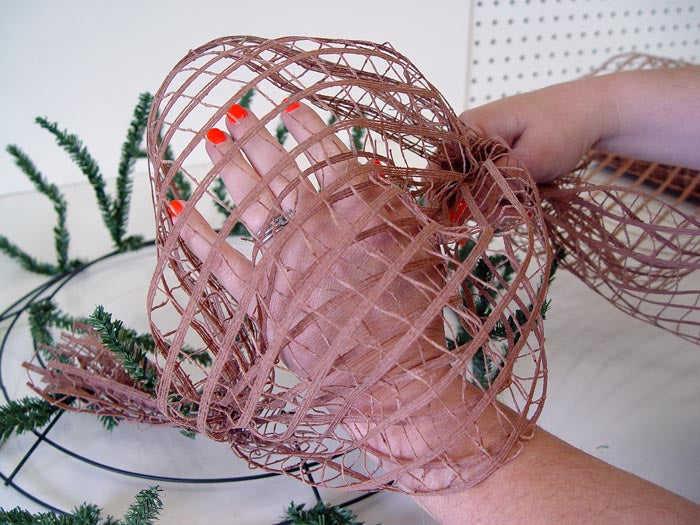
Pinch the mesh together to place in the next twist. It helps to put your hand under the mesh to fluff out the pouf and see that you are keeping them all about the same size.
Now your first pouf is made and you just measure, pinch and continue around the inner ring.
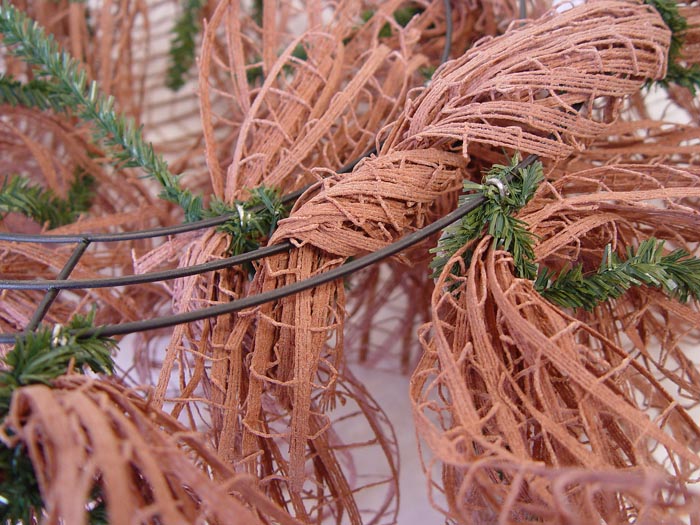
Once the inner ring is complete, just drop down and start on the outer ring, continue in the same manner.
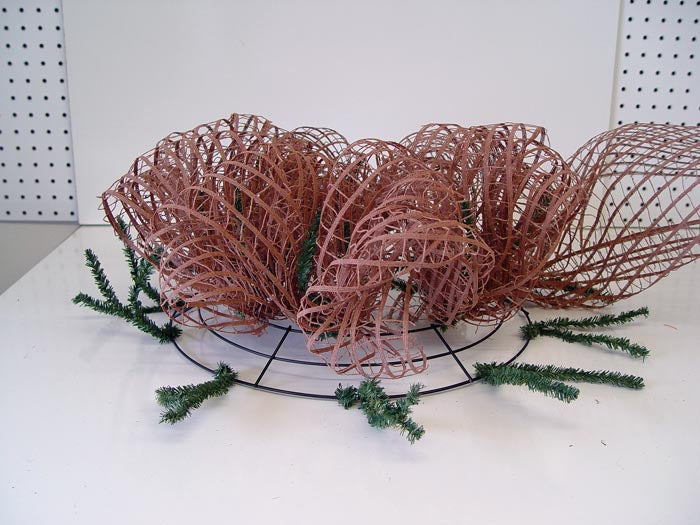
We're finished with the Windowpane mesh at this point and ready to cut it from the roll. It helps to hang the wreath up, step back and take a look to see if you need to do any readjusting or anything. Don't worry about the "see through" effect at this point because you have more layers to add. If the wreath looks a little thin in a spot you might turn the wreath and let that be the top or bottom, especially if you plan to put a bow or other embellishment in that area. If you have a gap that needs filling, you can cut a strip and make a pouf, wire it in with floral wire.
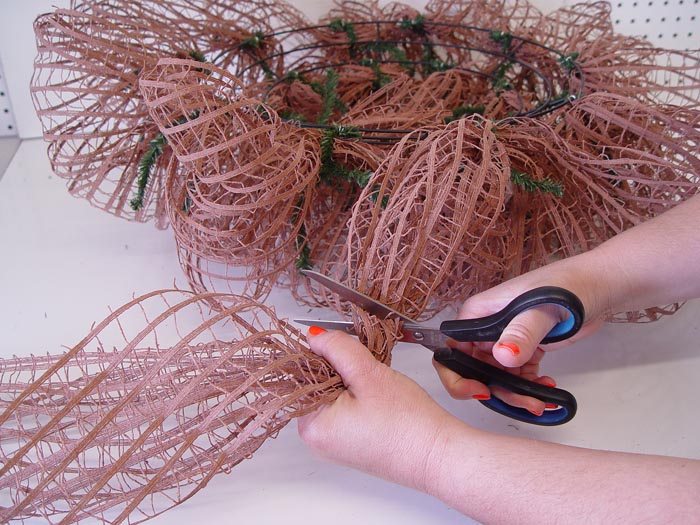
Cut the mesh away from the roll leaving a tail of 4" inches or so. You want it long enough to that you can weave it in and out the rings on the back side and no so short that it pops out and shows.
Ready now for the next layer of product, the
Fresh Green Faux Burlap. Faux Burlap is 100% Polyester and the Fresh Green is a bit lighter and brighter than Moss Green. It's measure 9.5" in width and 10 yards in length.
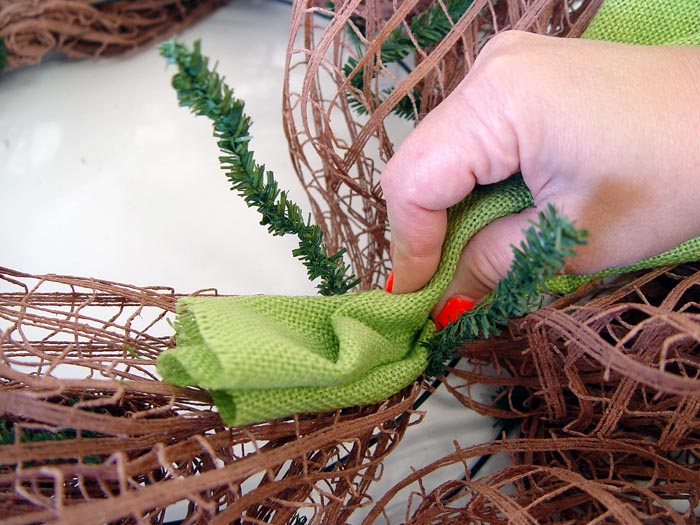
The Faux Burlap is attached to the Pencil Wreath in the same manner as the Windowpane. Just choose a starting point, undo the twist making sure the Windowpane mesh stays in place, pinch up the Faux Burlap and re-secure with the twist. Use the same measurement to make your poufs and continue around the inner ring, drop down to the outer ring and continue around the wreath.
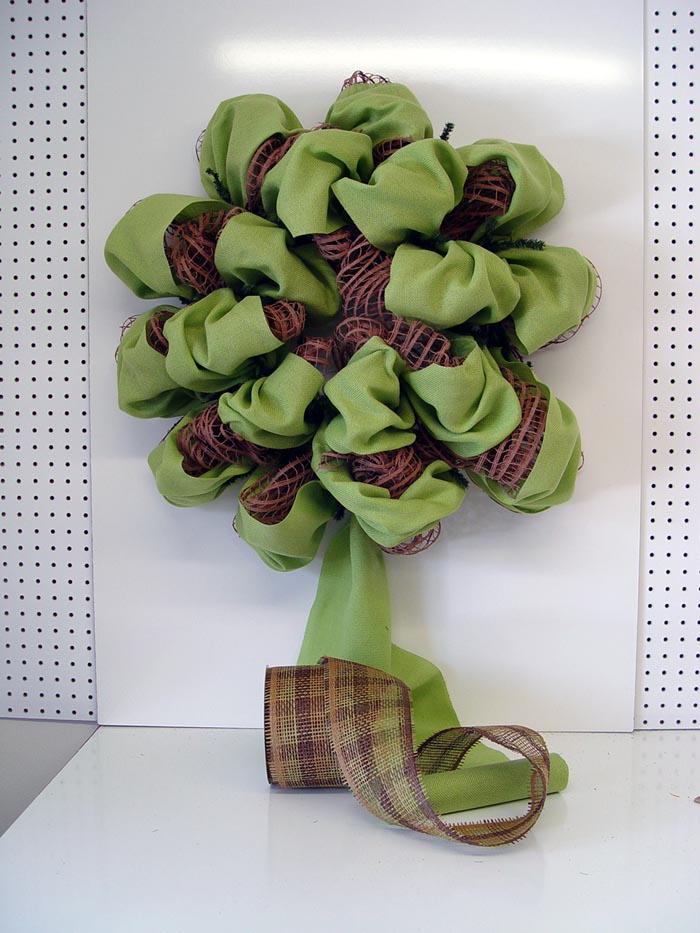
Now that we have gone around the wreath with the Faux Burlap, we chose our next layer a new 4" Plaid Paper Mesh in natural, chocolate and moss. This is a new pattern for this season and is available in 4", 10" and 21" widths. The new Paper Mesh products have a special coating sprayed on them that makes them more resistant to moisture, but they are still not really recommended for outdoor use. But many customers do use them in areas that are well protected from the weather with good result.
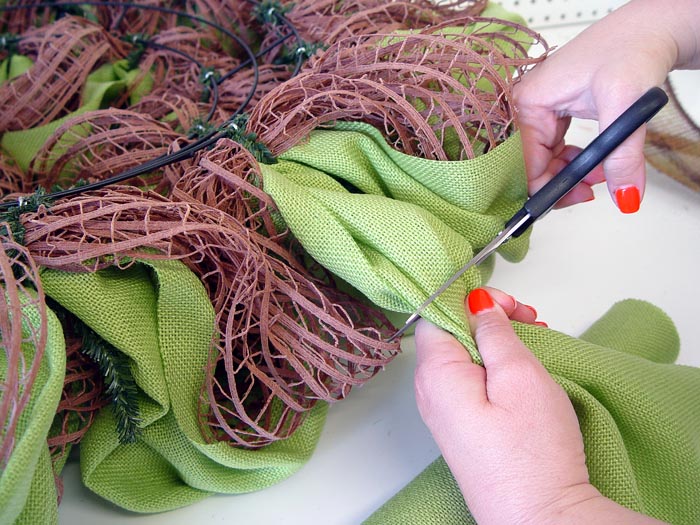
End off the Faux Burlap same as the Windowpane and tuck the raw edges into the inside back of the wreath, weaving in and out the rings. You can secure those raw edges with floral wire or pipe cleaners too.
There are different ways of applying your ribbon to the wreath. One way is to keep the ribbon intact and just open up the twists and go around the wreath attaching the ribbon in every twist, or skipping some, twisting or turning your ribbon....sort of a pattern of winding in and out the wreath and around. The good thing about this method is that if you take your projects apart (like we do) you can roll up the ribbon and use it in another project. You might make your project and use it for a few weeks, take it apart and make something else out of those materials. Others are making wreaths to sell and this isn't an issue.
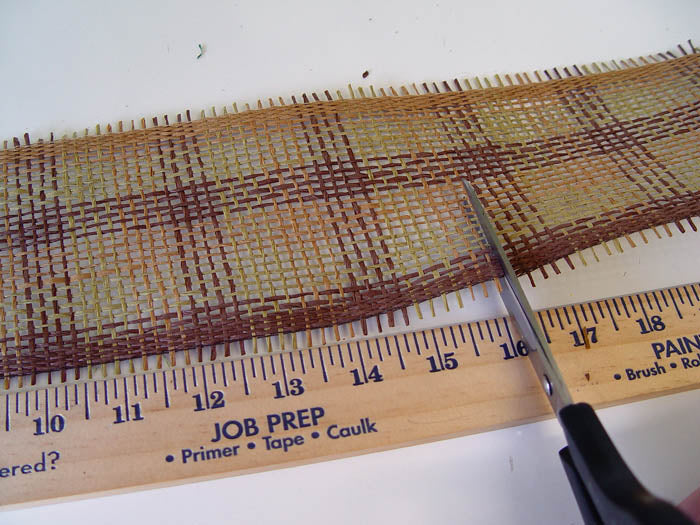
The method we chose was to cut the ribbon in strips to add as contrast color and texture. You do need to measure the strips before you start cutting them all))))
You want the strip to be long enough to stick out a bit, otherwise it won't be noticeable. These strips were about 16" or so. And it's always a good idea to do a bit of math depending on your ribbon to make sure to have sufficient length to go around your wreath. This 4" Paper Mesh contains 20 yards, so there was quite a bit left over. But many ribbons come in 5 yard or 10 yard rolls. Generally a 10 yard roll is sufficient to cover each twist on a 24" Work Wreath.
For this wreath, our plan was to apply the strips to each twist. You might not always do this, you might just use part of them....you might use multiple styles of ribbon...
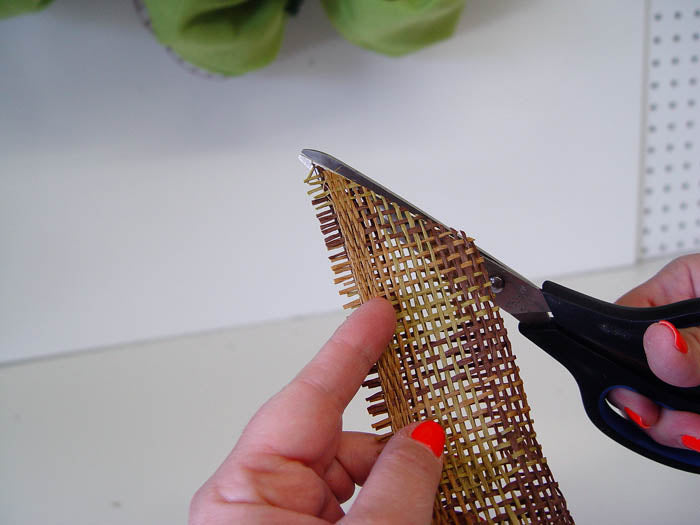
Once you've cut your piece, fold it in half and cut across the corner, starting at the folded edge to make a chevron style cut.
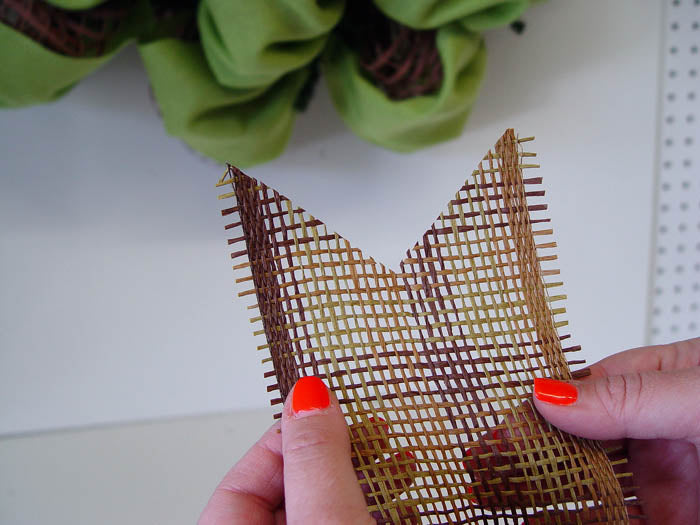
This is Paper Mesh of course and we were a little worried that it might ravel too much. All mesh/paper/burlap ravels and the more you handle it, the more it will ravel. But this did fine and we had very few loose strings at the end that had to be snipped.
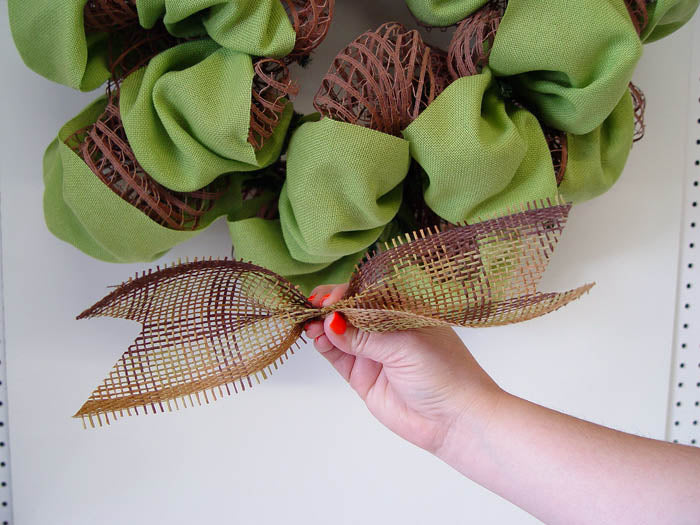
Pinch the Paper Mesh in the center like a bow.
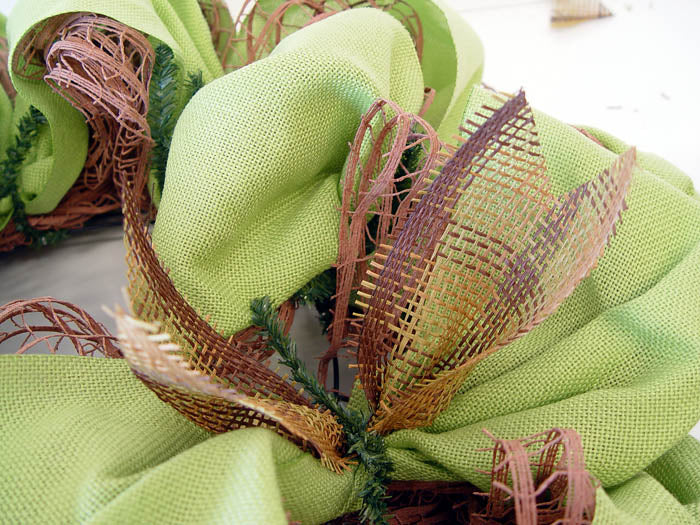
Open up a twist, and lay the pinched Paper Mesh down on top of the Faux Burlap and re-secure the twist with 2-3 turns. Now you have your Windowpane, Faux Burlap and Paper Ribbon all secured in the same twist all nice and neat. Continue around the wreath in the same manner.
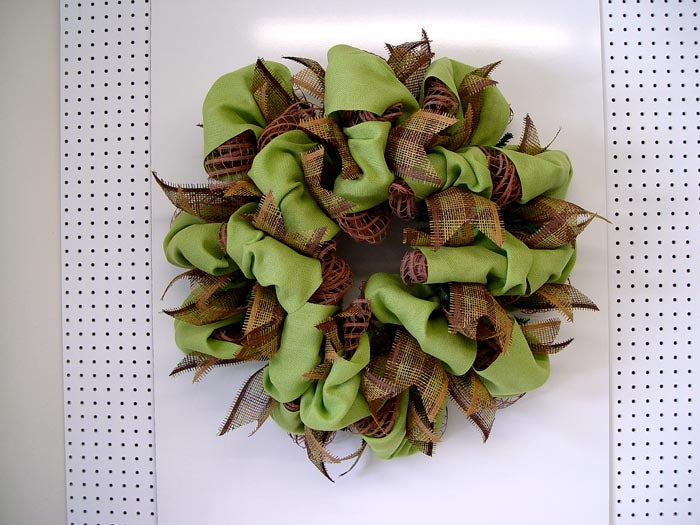
Now are wreath is ready for more embellishment. The center is almost full at this point. If you need to hang something in the center, just push the poufs back out of the way and wedge your item in there. There are different way of attaching signs to your wreath. Attaching to the Work Wreath frame with wire is probably the most secure way.
Lightweight items can be hot glued to the surface of the wreath. Same with balls or ornaments. Decide where you want to place them, then nestle them down deep in the wreath and secure with hot glue or you can use clear fishing line, pipe cleaners or fine floral wire to secure to the Work Wreath frame. We added some moss/twig balls for additional texture.
Here are a few of our new signs that just came in.
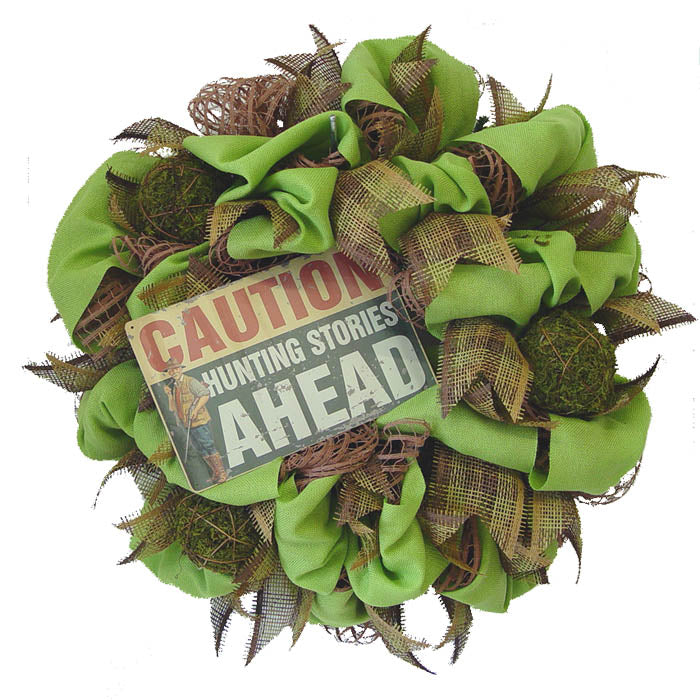 Caution - Hunting Stories Ahead - Tin sign
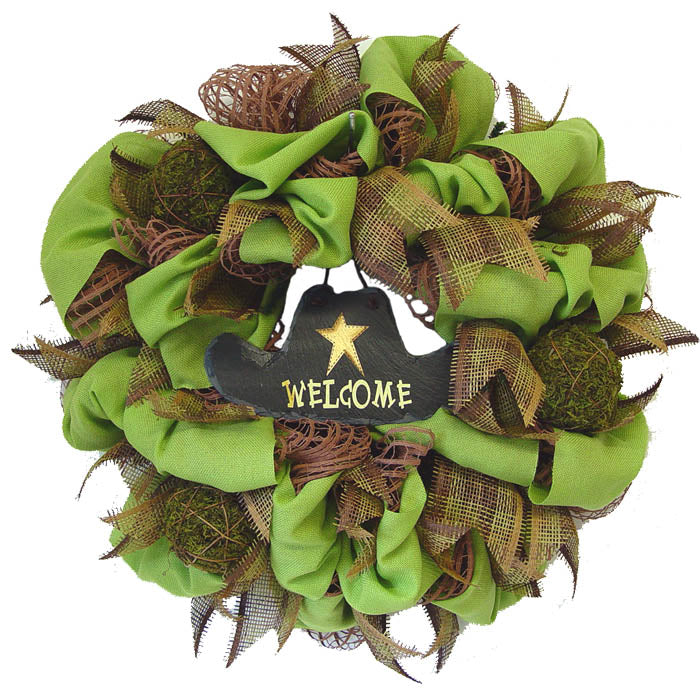 Cowboy Hat Shaped Slate Sign
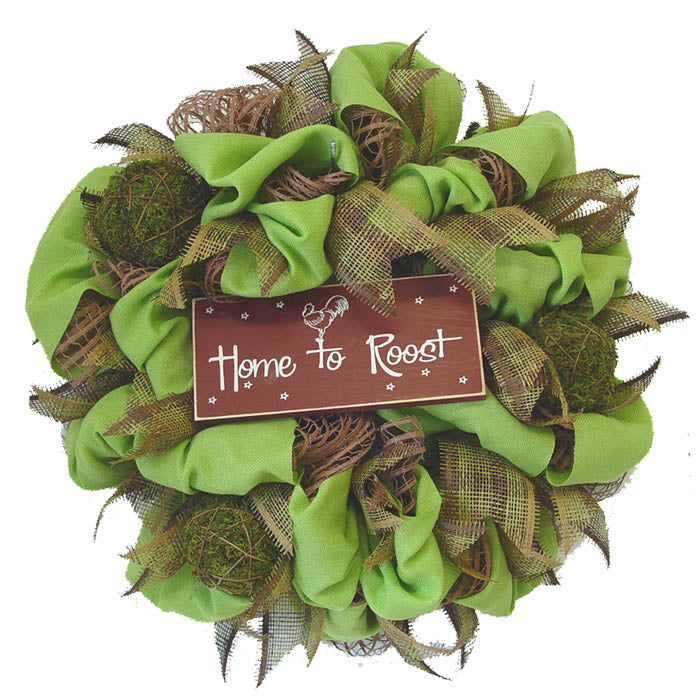 Home to Roost - Wooden Sign
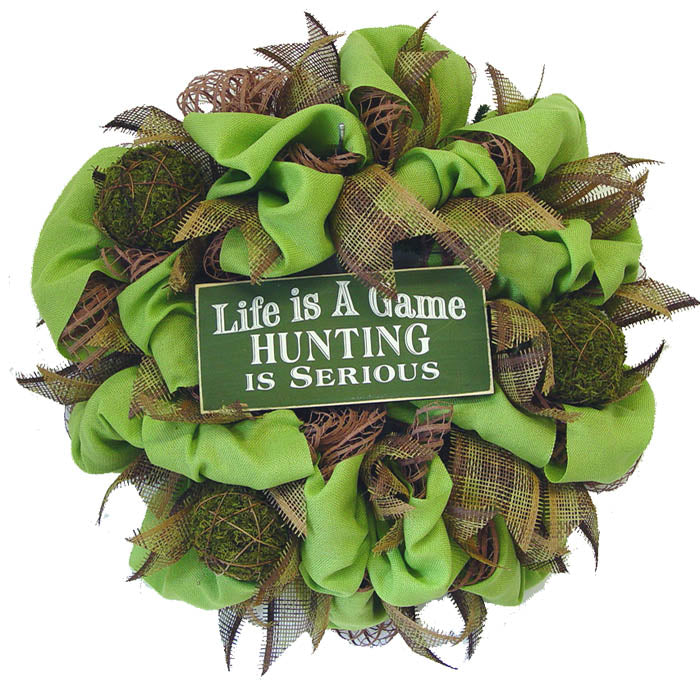 Life is a Game - Hunting is Serious - Wooden Sign
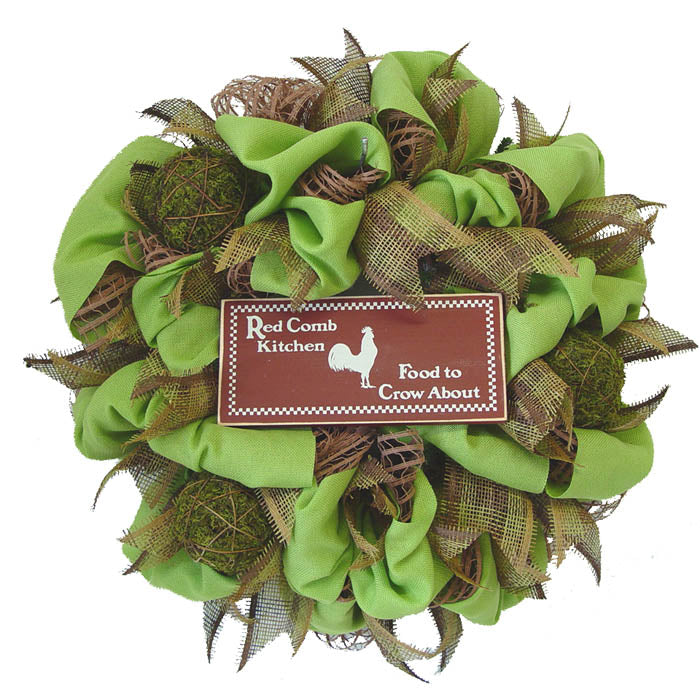
Red Comb Kitchen - Wooden Sign
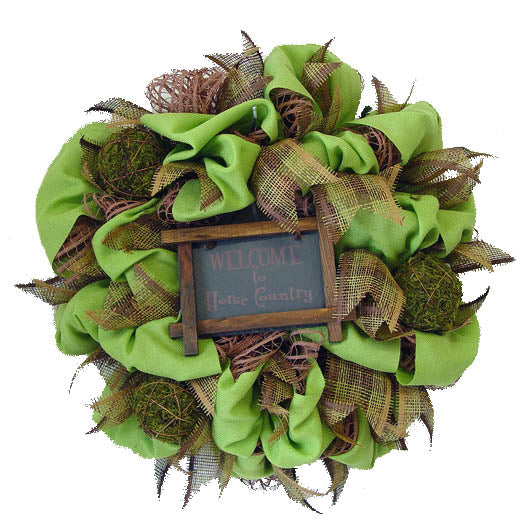
Welcome to Horse Country - Slate and Wood
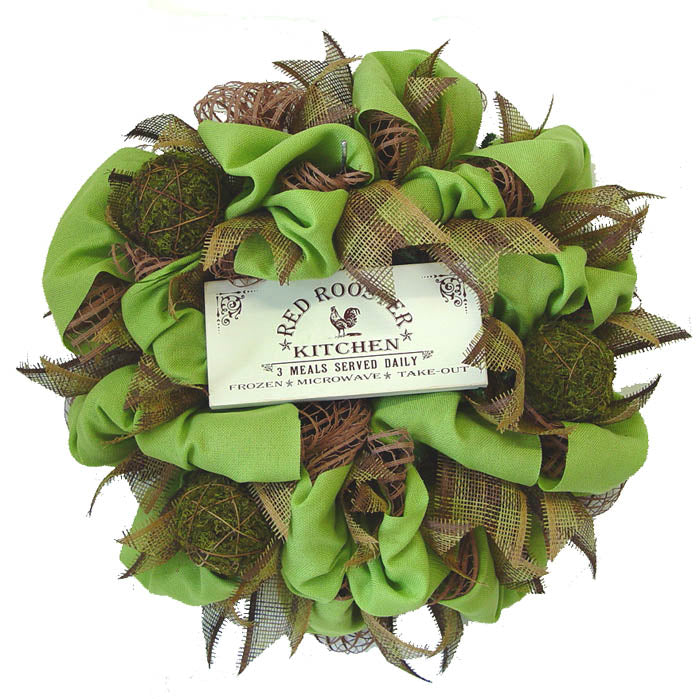
Red Rooster Kitchen - Wood Sign

Hunter's Retreat - Wood Sign
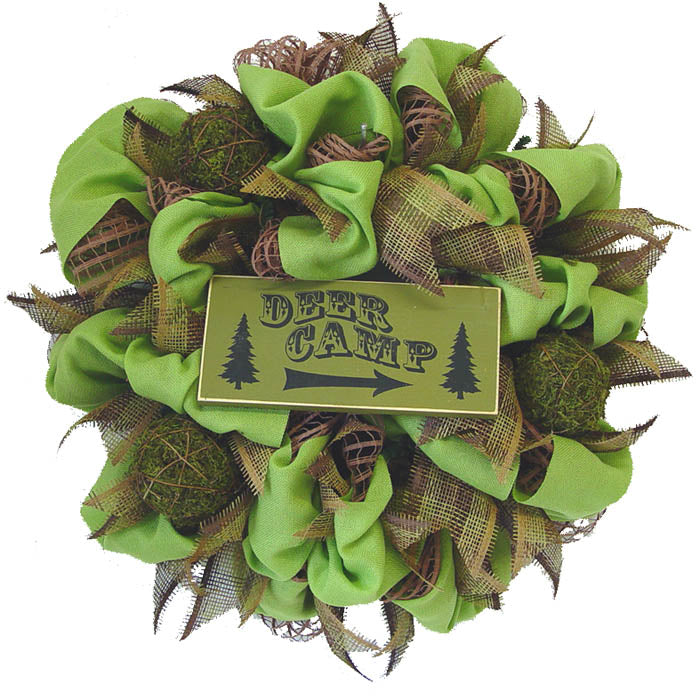
Deer Camp - Wooden Sign
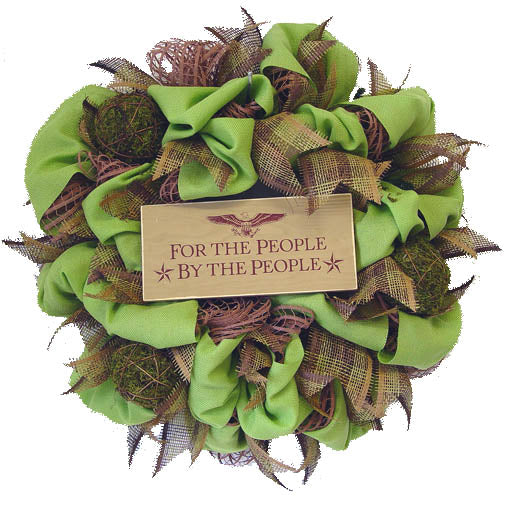
For the People By the People - Wood Sign
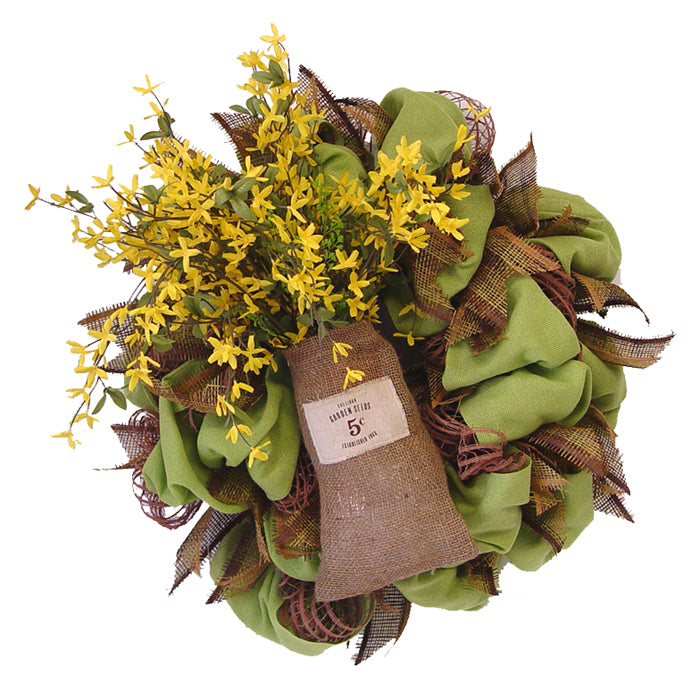
Burlap Garden Seed Bag