Quick Tip #6 Plan a Wreath Project using PicMonkey
Here's a brief tutorial on how we use PicMonkey to pull together ideas for projects.
PicMonkey is an online photo editor that is jam packed with tools and goodies for editing your photos. We've been using it for over a year now and just love it! It has a free editor, and a premium subscription for a few dollars a year. We use the premium subscription but it has free trial of the premium plan that you can play with for several days.
This isn't an advertising for PicMonkey, we just wanted to show you how we use it)) You can probably do the same thing with other photo editors too! (We've been using PicMonkey for years, and this post does contain our affiliate link. We just found out recently that we could even do this!)
When we start to pull together products for a wreath, it's not always as easy as it looks! You might think....well with thousands of products to choose from, we could put together any kind of wreath we want. It would seem so, but it really is difficult))
We start with a primary embellishment and build around that.
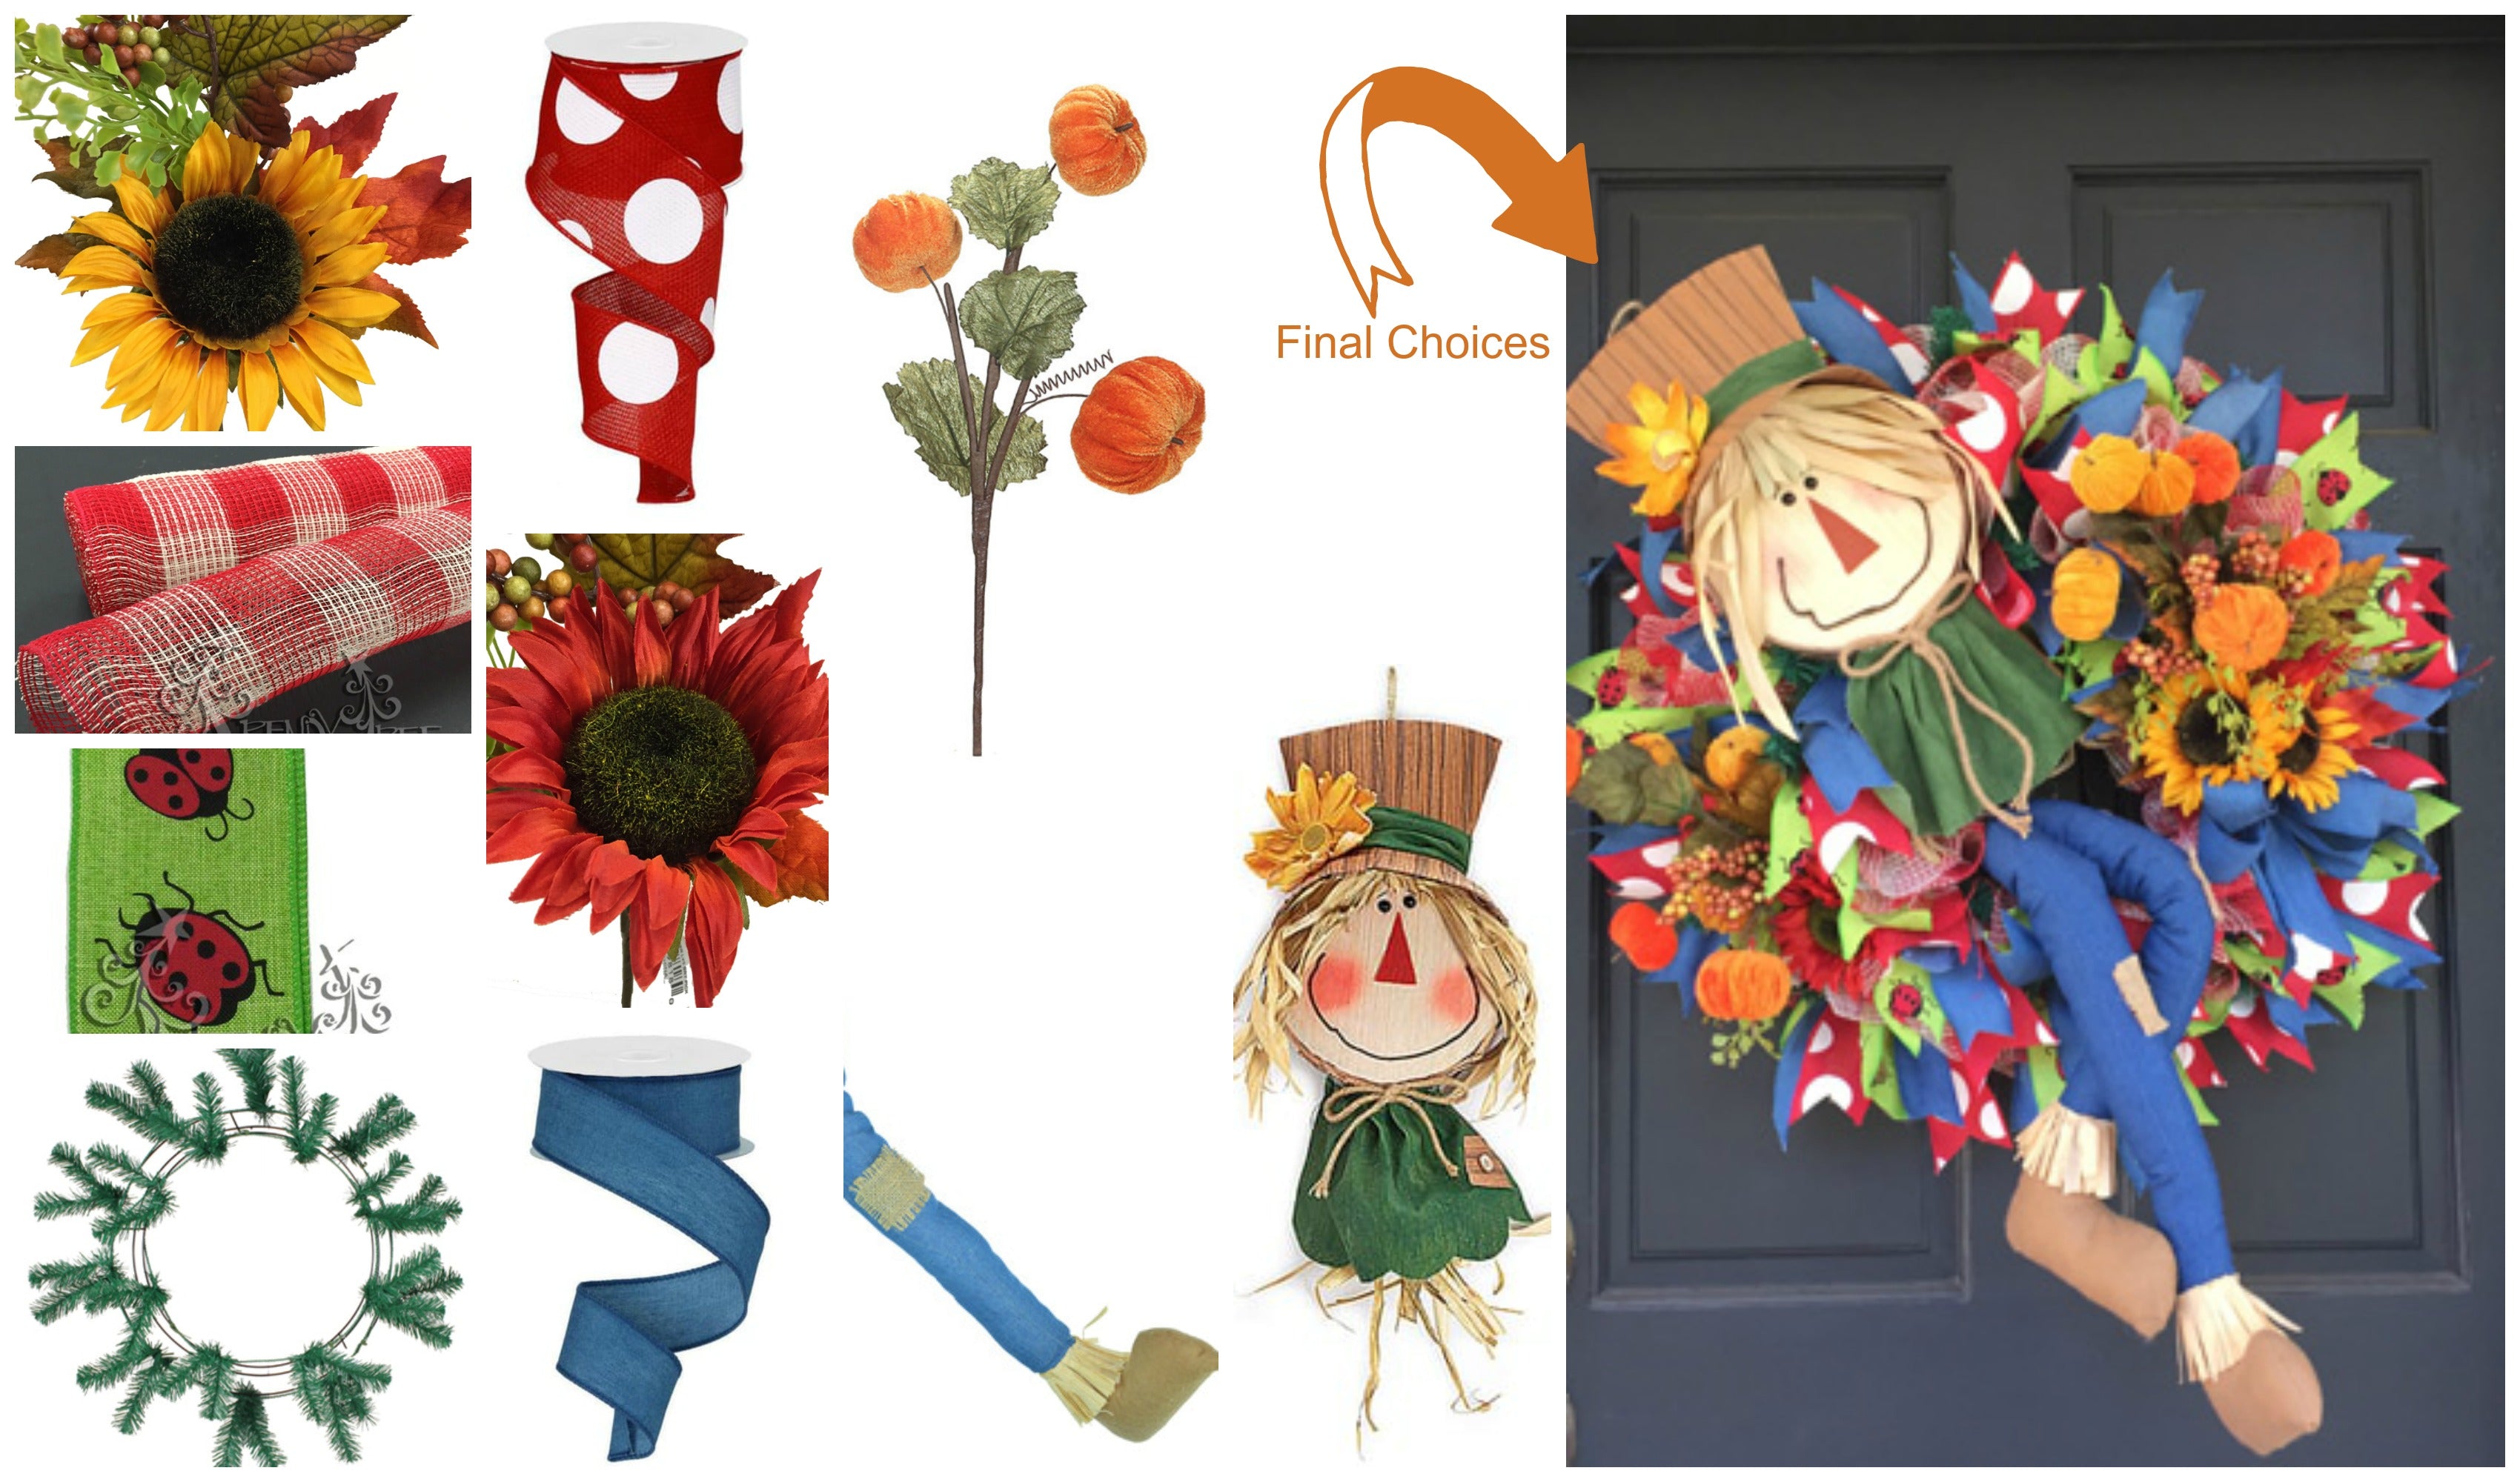
For this project, we chose a Burton & Burton Scarecrow Head and a pair of legs. We always have to use products that we have a large enough quantity in stock, that's the first thing for us.
But let me start at the beginning. Open PicMonkey and choose "Collage"
Resize the collage and make it large as possible so you have plenty of room to start adding products. For the purpose of the tutorial, we had created a folder and copied several images right from the website into the folder. Copying images off the website is easy to do, just right click and copy.
If you have products in your craft area that you plan to use along with some new items, you can take quick images, upload to your computer and pull those images into PicMonkey too.
Our primary pieces were the first products added to the collage.
Next we chose several different styles of mesh that we might want to use. All the mesh was 10" wide rolls.
Next we pulled in some ribbon choices. We really wanted to add in some red to this scarecrow wreath just to give it a little different color than your basic autumn colors.
Next step was to start eliminating some of our choices.
We narrowed down our choices of mesh and chose a red/cream check for a basic ruffle wreath. It gave us some red, and cream for a neutral touch. We really liked the yellow ladybug ribbon because it gave us some red, and more yellow....but we didn't have sufficient quantity to create a wreath kit with, so we had to go with the lime green ladybug ribbon. This ribbon worked great, since it also added in some fresh green color. Denim ribbon was chosen because of the denim legs and we wanted to blend it a little too.
We removed the red/green ribbon, it had emerald green in it which matched the scarecrow fairly well, but looked to much like holiday ribbon. We decided to go with the red/white giant dot ribbon.
The 2.5" denim ribbon was switched for a 1.5" simply because the other two ribbons were 2.5" in width. To pick up more yellow, the yellow sunflower pick was chosen and also the reddish sunflower. More yellow and orange was picked up in the velvet pumpkin sprays. The red wreath was swapped out for an emerald green just to add in a little more of the dark green color.
Here's what our final choices look like. Love the touches of red, most visible in the red/white polka dot ribbon. The red/cream plaid mesh is all but lost when viewing from a photo. It's more visible up close. The denim ribbon strips pop along with the yellow sunflowers too.
There you have it! Put your photo editor to work for you)))
Don't forget to subscribe to our YouTube channel so you won't miss our next video coming out soon!
(This post contains an affiliate link)
SaveSaveSaveSaveSave