Insert video here (please check back later, still editing)
We recently received this new colorfast loose weave burlap to Trendy Tree in several colors and sizes. We have 6" and 12" in assorted colors and more on the way. We thought we would try our hand at creating a flower wreath using burlap, but you can do this tutorial using poly burlap, paper mesh, fabric mesh, Deco poly mesh, etc.
Supplies:
XX750360 24" Evergreen Pencil Wreath
XX167820 10" Orange Pencil Wreath
RK911720 12" Orange Burlap
RK911743 12" Apple Green Burlap
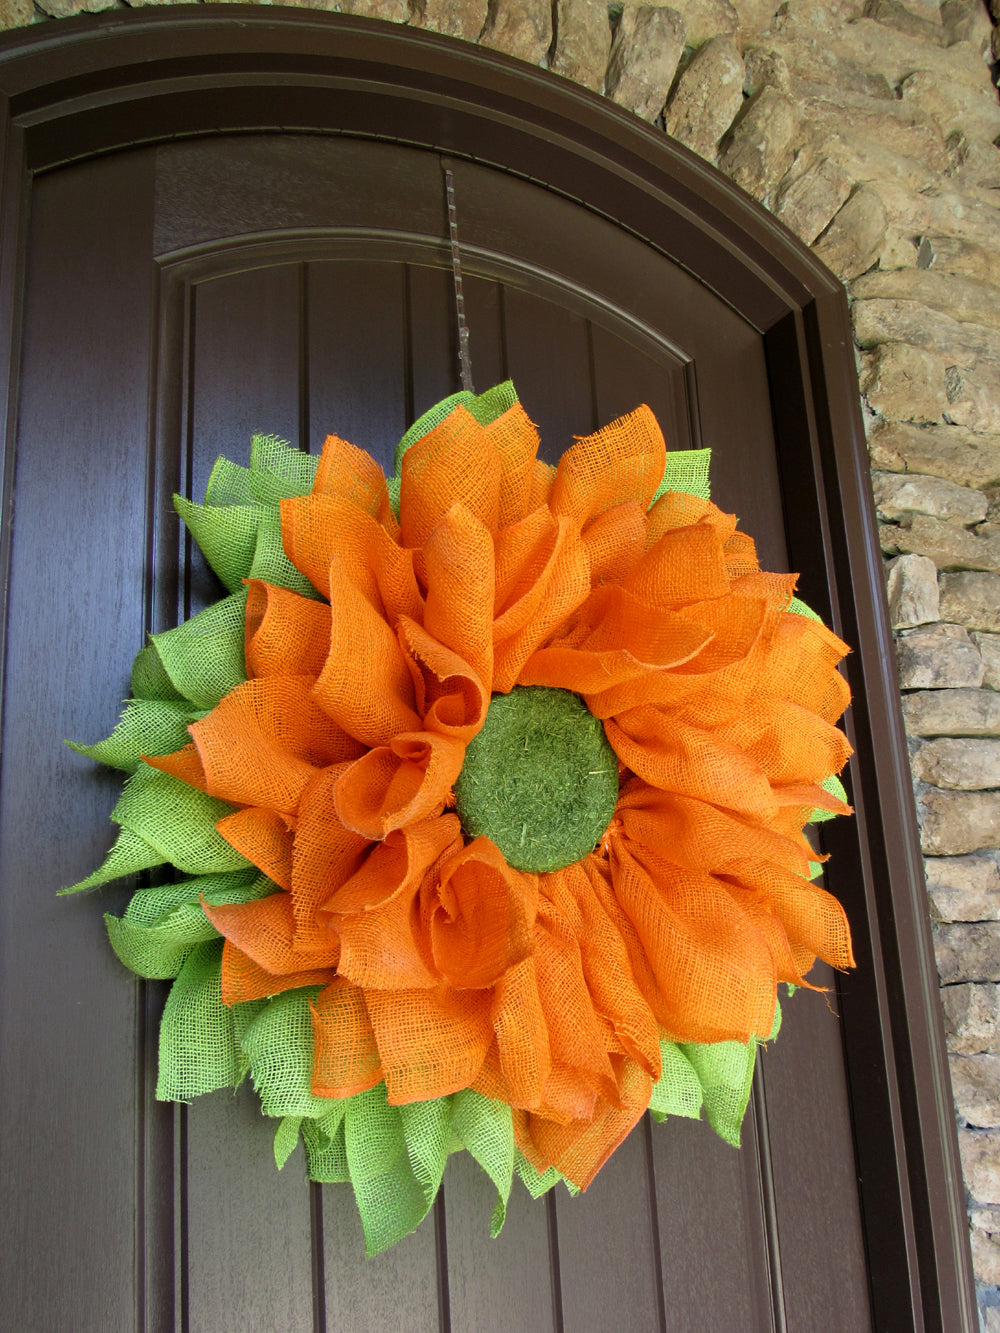
MD037009 7" Green Flower Center
Burlap: This burlap is advertised as "colorfast." I'm sure as with all products that are used outside, it will eventually fade.

Burlap probably should be used only in areas that are fairly well protected from the elements. Burlap will get softer as it hangs outside. I'm using this wreath on my front door which is pretty well protected from wind and rain, but I won't plan on leaving it out there for an extended amount of time.
The 12" green burlap was cut into 12" squares. There is 10 yards on a roll so we were able to cut 30

pieces. The orange burlap was also cut into 12" squares and it also yielding 30 pieces.
Your last piece might be a little short or a little long, it won't be noticeable. Burlap is a softer material and we experimented on the orange by spraying the edges and the whole square lightly with Elmer's Craft Bond Spray Adhesive.

This was done the day before the tutorial, outside, and the burlap still felt a little tacky. You might want to just experiment with this idea before spraying all your pieces. What works in some parts of the country, doesn't work so well in others, so just experiment and back your own judgement.
Wreaths: The 24" evergreen pencil wreath has about 18 twists. The largest of the metal rings measures

15" across and with the addition of the burlap, mesh or other items, you wind up with a wreath that measures 24" or greater.
The 10" orange pencil wreath was secured to the center of the 24" pencil wreath using four zip ties. Put

the zip ties in place, but don't pull them tight until you have all 4 in, and adjust each one a little at a time to keep the wreath centered.
You can stack your wreaths together and attach before you get started or do it when you're ready to add the orange petals.
Summary: To make the petals, take a square of the burlap and lay flat on the table. Bring one corner to the center, and then the opposing corner, overlap some. Scrunch or pinch up in the center, turn the petal over and secure in one of the twist. Starting on the outer ring of the 24" wreath. Place two petals in each twist. As you secure the two petals, pinch them together at the base and shape the petals in a "v" facing to the outside. They won't hold the shape perfectly, but shaping does help.
Continue working around the outer ring until complete and then move to the inner ring. You won't have enough petals to place two in each twist on the inner ring, so start by placing one in each twist. I had about two left over, so I just picked two twists, one on each side, and added the extra petals. No need to have materials left over)))
Once the petals are secured, you can poke the ends of the twist to the inside of the wreath just to get them out of the way.
Secure the 10" and 24" wreaths together in a stacked fashion with zip ties. Make the orange petals the same as the green and start on the outer ring of the 10" wreath. Place two petals in each twist. You will have more than enough to place two petals in each twist.
Once you have finished, you will notice some gaps that could stand to be filled with another petal. You can fashion a petal in the same manner, cut a chenille stem in half (a color that matches your petals works best). Lay the piece of chenille stem over the top of the petal in the center and twist from the back making a sort of "pick." Place the chenille stem over the metal ring where the gap needs to be filled and secure to the metal ring by reaching your hand under the wreath and twisting from the back. I think I put in 4 extra picks which filled the gaps pretty well and still had a couple of pieces left, so I just made more picks and put the extra petals in somewhere around the center.
The green flower center is large enough to fill the hole in the 10" wreath. It's made of Styrofoam and grass. I inserted two

wooden floral picks into each side of the flower center leaving an end of about 1" sticking out. You can hot glue the sticks if you like, just be careful that the glue isn't too hot for Styrofoam or it will melt it. The floral picks I had were too long, so I just cut them off to about 2.5" or so. If you don't have floral picks, you could use very small dowels or toothpicks even. Secure the flower center to the wreath frame by using zip ties around the ends of the picks sticking out.
When you're finished, trim your loose strings because you will have some. It's better to snip them off with scissors instead of pulling since you can get a never ending supply of strings once you start.
Check the back of your wreath for anything sharp that might scratch your door and either bend it into the center or cover with tape. Make a hanger for your wreath using a couple of chenille stems, floral wire or a couple of zip ties.