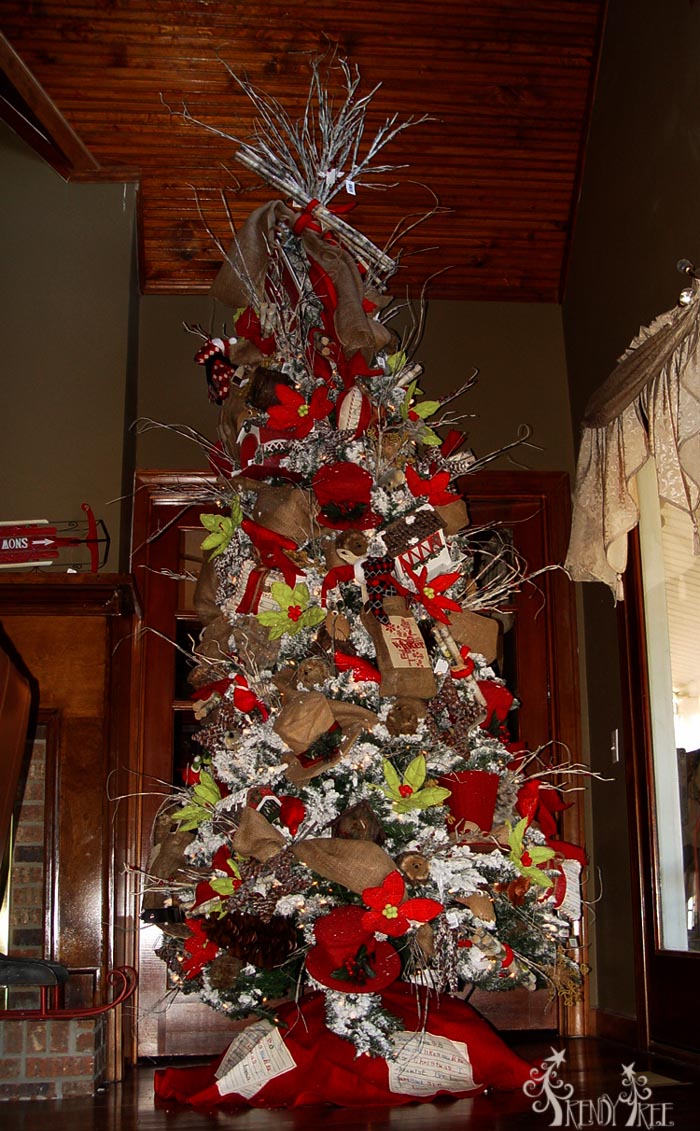
Carrie and I decided to do a Christmas tree tutorial this year while decorating my tree. We don't claim to be professionals by any manner, and are throwing out our ideas and recommendations as just things that we have learned during our own experiences. But we're always happy to share and showcase the products we have on Trendy Tree.
Let me say, it is difficult to photograph a tree to do it justice. But, we did our best and we hope it inspires your decorating and maybe gives you some new tips.
Position the Tree
Most everyone has a special place they put their tree every year, but experiment with different locations. It's a good time to rearrange furniture, take out a couple of pieces if possible to make your area more open for the holidays since you'll have more traffic in your house and need space for gathering. Remember not to put fresh trees over heating/cooling vents and remember when choosing the ht of a tree to allow for extra room above the tree topper. You don't want your tree to look crowded in the room. I love the slimmer versions of trees compared to the old trees of days gone by. You can really put a lot of decorations on a slimmer tree and not take up your entire walking area.
Check the Lights
Before you ever get started doing anything....check the lights. Strange things can happen to pre-lit trees.

If your tree is pre-lit and you need to add new lights, just leave the old ones in place and add more. If you just need more lights on your tree than those that came with it, battery lights are a great option.
If you're choosing new lights, you may have to choose between "cool white" and "warm white." Below is an image to show you the difference between the cool white and warm white. This image is an example of the LED battery lights we have in stock. Of course, there is always the multicolor lights which are perfect for whimsical trees.

Another nice way of doing your lights is to mix of the size of your lights....choose some larger round bulbs to go with your twinkle lights just to add a little contrast.
Our lights were all working....which is great. This tree has been used for several years now and leans just a little at the top....but it still has a few more years in it maybe)))
If you notice the bundle of green around the base it's the storage bag that we keep the tree in. This is the greatest thing! It fits just above the rolling wheels on the tree base, and when you're finished with the tree, two people can pull the bag up to the top of the tree and close the bag off. You have to lay this tree on it's side to be able to do that. But once the top is secure, the bottom is secured too and it has handles along the sides were two people can carry the tree out for storage. Just place your tree skirt over the green thing and it covers up easily. Nice investment. Not something we sell, but we should!
Shape the Branches
If your tree is new or old, the branches will still have to be re-shaped whether you've just gotten it out of the box or pulled out of storage. It helps to have someone on the ladder shaping and someone directing from the floor (that would me be....lol).
Divide Tree into Thirds
It helps to divide your tree into thirds, at least visually, before you get started. We put a piece of red roping around our tree just to use as a guide.
 Burlap Pieces
We took some
18" loose weave burlap and cut it into pieces about 36" in length. We wanted to use the burlap color to tie in with our natural theme. And instead of trying to go round and round the tree with burlap garland, we just cut pieces and gathered about 4-5" from the end, attached it to the tree using the branches, swagged it down a bit and attached to more branches. Just sort of making a pouf or swag of burlap here and there. We used a whole roll of burlap that was 10 yards in length.
 Sort Decorations
We sorted our decorations according to size into groups of large, medium, small. It really helps to have a plan and start with your largest items first.
The first and largest piece we used on the tree was a RAZ Sled that Carrie secured in the very top of the tree. Ironically, after everything was added, it really doesn't show up that much, or not as much as we thought it was going to.

3316459 RAZ Red Sled
This sled is 23" X 11.75" X 3" and made of wood and metal, but not too heavy. Carrie secured it at an angle in the top of the tree using chenille stems secured to the tree pole, not just the branches.
We had picked out a larger sleigh from RAZ to use in the top of the tree, but decided it was too heavy as a topper and we may use that on the hearth or somewhere else.

3428858 RAZ Sleigh 28"
This RAZ Sleigh is also made of wood and metal, but considerably heavier. But it will look great filled with fresh green branches, pinecones and some battery lights....or stuffed teddy bears....or elves. This is a new item from the RAZ Sleigh Bells collection also also comes in a larger size.
Attach Large Decorations
Some of our largest items were the top hats. We chose three or four different styles. We had a natural burlap color, red burlap, faux leather and a red knitted top hat. All these hats were from RAZ and all but the red knitted top hat is shipped flat. We stuffed the hats with crumpled newspaper to fill them out. The hat were just stucked deep into the branches at an angle. They didn't require any additional securing or anything.

3453369 RAZ Red Knit Top Hat

3452386 RAZ Red Burlap Top Hat

3352319 RAZ Faux Leather Top Hat

3352344- RAZ Burlap Top Hat
We counted our large top hats and started with placing three in the top section; four in the mid section; and 5 in the lower section.
Our next largest item was the RAZ Bridge decoration. We only had three, so we placed one in each section. If we placed the first one in the right section of the top of the tree, we placed the next in the left mid section and the third in the right lower section.
We did place a few items on the back of the tree, but the tree is positioned in front of some French doors and the back really wasn't going to be visible so we didn't put too much effort in making it perfectly covered in the back. It has a lot of decoration to the front and sides.

3100514 RAZ Covered Bridge
These RAZ Bridges are made out of paperboard and pinecone. They have little bottle brush trees. The bridges measure about 7.5" in width. They were secured to the tree with chenille stems attached to branches.

3100514 RAZ Covered Bridge
Ou

3100514 RAZ Covered Bridge
The of our large decorations were the Winter Burlap Bags. These are just burlap sacks that we filled with newspaper to fill them out, then we tucked some RAZ Jointed Bears peeking out over the top and in one we placed a RAZ Hedgehog. We only used three of these so we placed them similar as we did the bridges. One bag to a section on the tree.

PN1942 Winter Burlap Bag
The bag looks rather plain in the photo, but when you dress it up a bit.....much better)))

PN1942 Winter Burlap Bag and 3316356 RAZ Knit Bear
The
RAZ Knit Bear has jointed legs and arm, but they are not toys and are for decoration only. The bears are available in two sizes -
14" and a
22" 3316353 Hmmmm...the 22" would look good sitting in that sleigh that we didn't put on the tree....

3453361 RAZ Hedgehog
This burlap bag has a RAZ Hedgehog sitting in it.....they are just the cutest ornaments!
Next we added some large RAZ Pinecone ornaments. Now, when I say large pinecone ornaments.....really, you have to see these ornaments, they are huge!

3211944 RAZ Natural Pinecone
This RAZ Pinecone in a natural color is a spray that measures about 22" in total length. The pinecone is about 12" in length and about 6" side. We had four of these and four more of a RAZ Frosted Pinecone.

3211943 RAZ Frosted Pinecone
Next we moved on to our medium ornaments. Again, we counted to see how many we had and divided them out to go into sections. The smaller the decorations got, the easier it seemed to put them on the tree.....and by the time we got to our smallest ornaments....we were having to look for places to put them!

F3206701 RAZ Poinsettias

F3206701 RAZ Poinsettias
We placed a total of 24 RAZ Poinsettias on the tree. I love the softness of these florals. They are made of a polyester type material and really give a nice pop of color.

3353446 RAZ Birdhouse
We used a total of 6 of the RAZ Birdhouses. They are made of dark colored paper, have little bits of twig and moss on them. They are lightweight and had burlap strings for hanging.

3103424 RAZ Pinecone Star
These RAZ Pinecone Stars measure about 10" in diameter. They are assorted, one is frosted. We used about 16 on the tree.

3103424 RAZ Pinecone Star
Sometimes the Pinecone Stars were wedged into the tree at an angle with the edges sticking out rather than just hanging flat against the tree.

XE8761 Birch Bundle
The Birch Bundle is one of my favorite decorations. It's a bundle of three branches that measure almost 12" in length. Each branch is about 1" in diameter. They come tied with a bit of raffia, but we added just a little bit of Red Fuzzy Wool Roping to add a bit of color. They are light as a feather and we just stuck them in the tree branches without having to secure. We used about 15 bundles.
The last of our medium decoration was the Dear Santa Pillow.

DS10-2348 Dear Santa Pillow
This little pillow is about 9" x 8". To attach it to the tree, we wrapped some burlap ribbon and natural roping around it and slipped a tree branch through the back. You could just tuck them within the branches too I'm sure, but we wanted to add a little extra texture to the pillow.
The lettering on the pillow is a real Dear Santa letter written by a little girl. The red burlap tree skirt that we'll add at the end, matches the pillow along with a table runner and ribbon. Here's a link about the little girl who wrote the letter and her mom who created this collection. A portion of the proceeds from the sale of these items are given to Childhelp Organization. To read more about this story
click here.
Next we filled in with our smaller ornaments. At this point, we pretty much just filled in with an ornament wherever we could find a spot!

3453361 RAZ Hedgehog
RAZ Hedgehog 4" ornament, we used 6 sets or 12 pieces total.

3405160 RAZ Wild Animal Ornament - Fox
We used four sets of the RAZ Wild Animal ornament (a total of 12)

3405160 RAZ Wild Animals

3405160 RAZ Wild Animals - Raccoon

3405160 RAZ Wild Animals - Moose

XY7108 Corrugated Paper Owl
This Corrugated Paper Owl is a different little ornament. It measure about 4" and had a jute string for hanging. We used about six on the tree.

XY663718 Jute and Cardboard Snowflake
This snowflake is made of jute and cardboard and measures about 6.5" We used about 12 on the tree.

MW1122F7 Red Cardinal Pick
This large cardinal is about 8" and we used 12 on the tree.

3253427RAZ Red Feathered Bird with Stocking Cap
More red birds! These are adorable little fuzzy red birds from RAZ wearing stocking caps. We used about six on the tree.

Our tree topper was made with several birch branches in two styles.
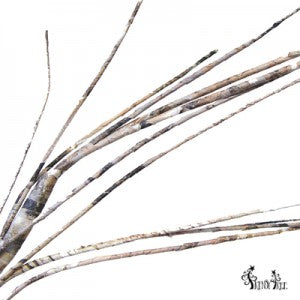
kg2927 Paper Birch Twig Spray

XS9481 Snowed Birch Branch with Red Berry
We used a combination of both these twig branches for the topper and just tied a piece of the 18" natural burlap, 4" red burlap and natural jute roping around the clump. We had first placed about 3 zip ties around the branches to hold them together. They were just pushed down into the top of the tree.
We then took more of the two styles of branches and inserted them throughout the tree. We used about 28 of the Birch Spray and 16 of the Birch Spray with the red berries.
Also we laid in a bundle of longer branches crosswise with our topper. This was
3422458 RAZ 27" Faux Birch Twig Bundle from the 2014 Emerald Cottage Collection.

Here's a better view of the mid section of the tree.

Other items we used were 3 of the Red Fuzzy Wool Roping, Natural Jute Roping and 4" Red Burlap Ribbon that we primarily used to tie around the birch bundles, pillows and topper.

DS10-2321 Dear Santa Tree Skirt
The final touch was the rich red burlap tree skirt from the
Kaylee Dear Santa Collection. This collection has a
square table topper that matches. It measures 54" and is made of a combination burlap/polyester and has covered buttons for closure.

rn457124 Fuzzy Wool Roping Red
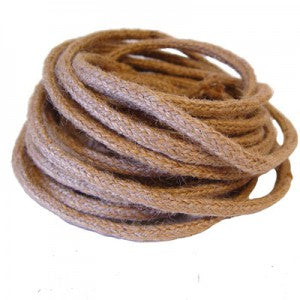
rd105618 Natural Wired Jute Roping
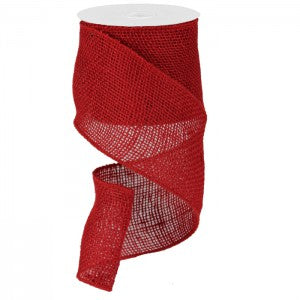
RA132024 Loose Weave Burlap Red 4" Wired Ribbon
Well, that's my tree for this year....it's up early, but that's okay. This is our most busy time of the year in the shop and if I don't get my decorations up early, there will be no time left to do it. Carrie is working on her list now for a whimsical tree....so we may have to do another video soon!