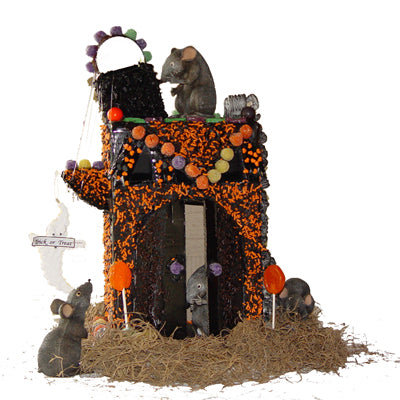
A great rainy day project, like today, is making a Halloween Candy House. This house was made using things we already had around the house, not even the candy had to be purchased, today anyway))
Start with a box. I had photos to post of the box used here, but alas, they are missing. This box was used standing on its end. A door with an arch was cut on the bottom of the box to leave open. It shows better is some other photos. Find other small boxes or objects to add dimensions to your box. Offset shutters, doors, etc. A portion of a canister that hold little tubs of flavored drinks made the "bell tower" on top and packing peanuts were used for the "rock" chimney.

After all the pieces of the house are securely taped, spray a light coat of black (or gray) paint. AJ used a hair drying to speed things along while Maggie sorted out candies. The spraying was done outside of course. We placed the house on an old Christmas platter turned upside down for a base.

The reason we didn't have to buy candy today specifically for the Halloween House is because I save any hard candy that has gone stale or out of date. I keep a special bag in the cabinet and the kids know this is off limits and for decoration only. Keep an eye out in discount stores that sell salvage food products. While these foods are sold as fine for human consumption, I pick them up with decorating in mind. Sometimes they're still in date, but they go in my candy decorating bag. The candy is still tempting to eat, so be sure to have something fresh on hand that can be snacked on during the process.

Packing peanuts broken into pieces were glued on for the chimney. Only spray lightly with paint.
Once your candies are sorted out, try to somewhat make a plan before you start sticking them on. Gumdrops, suckers, jawbreakers and any type of flat candy work great. Sprinkles in several colors fill in large spaces and cover up gaps. AJ and Maggie are making trees by inserting orange suckers into large gumdrops which will be "glued" down on the flat side with icing.

Even little guys can help out with some of the task. Matt is putting candy sprinkles on the roof.
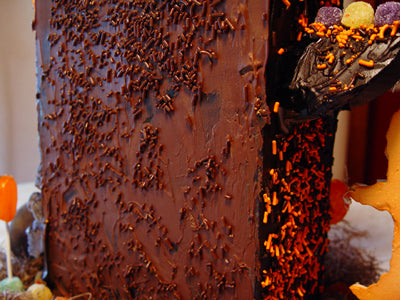
The back of the house was covered with melted chocolate (chocolate almond bark) and chocolate sprinkles applies. Almost has a stucco look.

The light coat of spray paint was all that was needed on the chimney. We did have some green gel icing in a tube that they promptly names "monster snot" that was drizzled around the "rocks" but it doesn't show up well in the photo.
Most of the candies were glued on with black icing from a can. This one can just about did the whole house except for about one square of almond bark that was used once the black icing ran out. Sometimes I mix up a batch of Royal Frosting and tint. This is easier to work with than melted almond bark. The icing in the can worked fine, but wasn't stiff enough to hold gumdrops on the sides or front and almond bark was used there.

Gaps between the house and your base are easily covered up with gumdrops placed around the foundation. Spanish moss completed the base.

Since this Halloween Candy House had doors on the front that would actually open and close, we had to find something to fit inside the house. This set of RAZ Halloween Mice fit the bill perfectly.They were positioned around, inside and on top of the house.


The Halloween Ghost is also from RAZ. It is a cookie ornament and was perfect for hanging down from a side roof. A toothpick was inserted into the cardboard and the ornament is hanging from that.

Spanish Moss was placed around the edge to cover up the base. The base also makes it easy to move around. The house was secured to the base with wide tape prior to decorating. Once all the little fingers were out of the way, a glue gun was used to secure clumps of Spanish Moss and any loose gumdrops.
Building a candy house can be a huge undertaking, especially if you have to gather up all your items at one time. Save yourself some time and purchase cardboard house frames at Hobby Lobby in different sizes. Pick these up on the half price days and just set back in your closet for those rainy days)) Add to your bag of candies all year long and turn the kids loose! Be prepared for a mess before you start. Take photos of their handiwork - you're making memories for the years to come))


