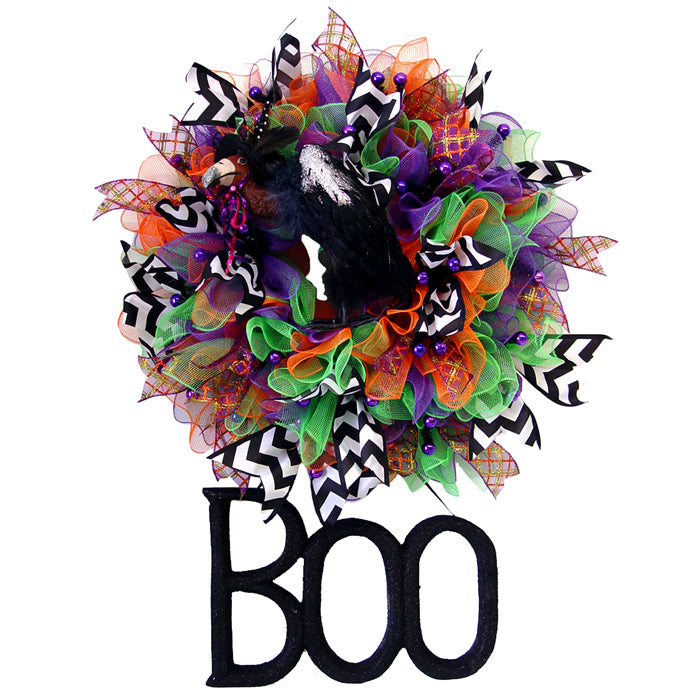
We just LOVE Halloween and just couldn't wait any longer to go ahead and do a Halloween Wreath Tutorial with items that are already in stock. We have tons of new Halloween decorations coming in for this season with all sorts of Witch legs and signs. We chose to hang this sign off the bottom of the wreath which really makes it a fairly large display. I'll give the dimensions of the BOO later down in the blog)))
We started with a
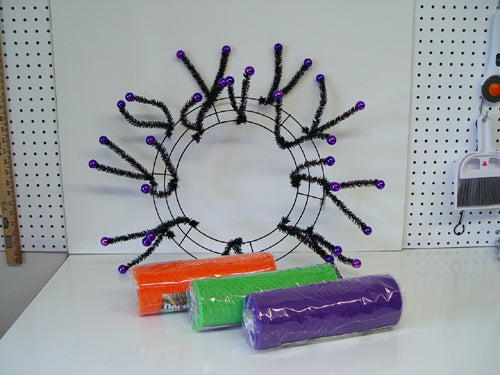
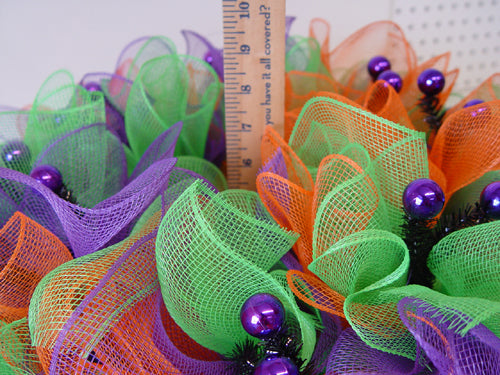
Black Pencil Wreath with Purple Balls and three rolls of 10" x 10 yards
Deco Poly Mesh in
Orange,
Lime Green and
Purple. We wanted to try the plain mesh with no foil to see what kind of coverage it would give using the ruffle technique. This is also the most inexpensive mesh we have in stock with a price of $3.99 per roll. Each roll of 10" x 10 yard mesh will yield 18 ruffles so we used all three rolls with just a tiny bit left over, not really enough to do anything else with. The
Pencil Wreath with Balls Work Wreath is a little more expensive than the regular Pencil or Work Wreaths but give a little extra bling without adding more product and less work. The
Pencil Wreath with Balls are $10.99. So your expense for the basic wreath is $22.96.

When working with the Pencil Ball Wreaths, it's important to remember not to secure the twists by pulling on the balls. They are glued on and if one should come off you can easily glue it back on. They're pretty tough, but occasionally you might have one to come loose.
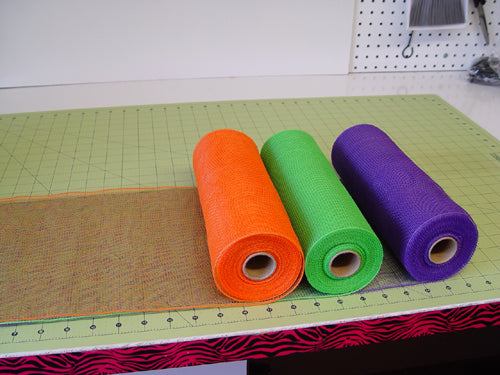
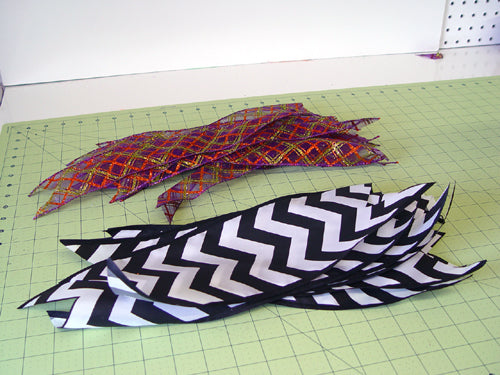
First we placed all three rolls on the cutting mat and lined them up to cut all three layers at one time.
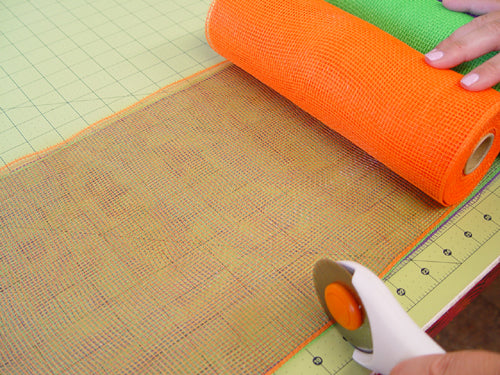
Cut strips of mesh 20" in length. We used a rotary cutter which is really a time saver if you make a lot of wreaths. There is a Blog post with more information on the cutting mat and rotary cutter
here.
We use a 24" x 36" self healing
Omnigrid Cutting Mat and a
45mm Fiskars Rotary Cutter (these are available at Amazon and we have included our affiliate links.)
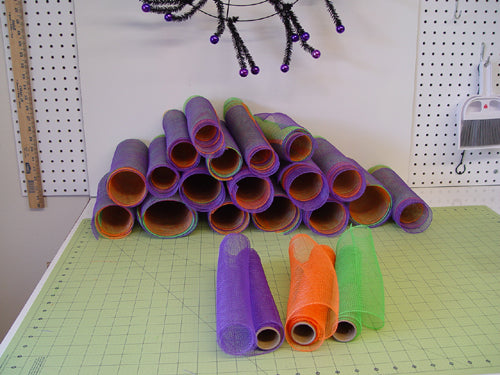
We cut 18 rolls from each color and you can see we had just a little left on each roll.

To make the ruffle, just lay the mesh out flat and start pinching up right down the middle of the mesh, sort of a pleating or gathering motion.

Hold it pinched in your hand until ready to place in the twist. Since both of us were working on the wreath we decided to do all three layers of ruffles at one time on this wreath, instead of working all around in single layers. You need someone to hold your ruffles until you get all three ready to secure.
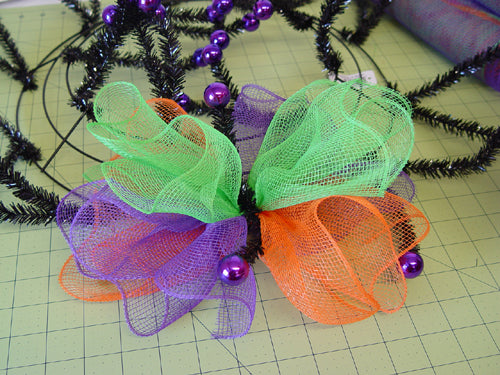
We secure three ruffles into a twist and gave it a couple of turns....not by the ball remember)))
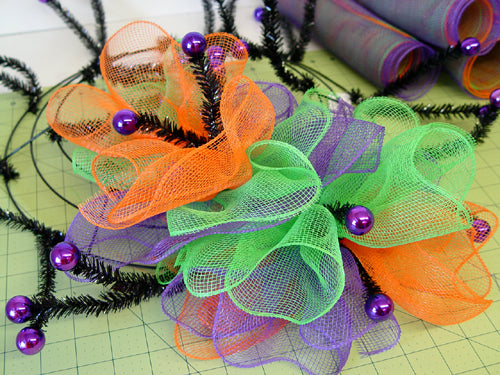
For this wreath we worked around the wreath form going outside to inside.....it really doesn't make any difference.
This image shows the completed mesh....three ruffles in each twist. See how the Pencil Ball wreath just adds a little bit of extra bling here.
You can measure the depth of the wreath to determine the length needed for ribbon strips. We cut these at 15"
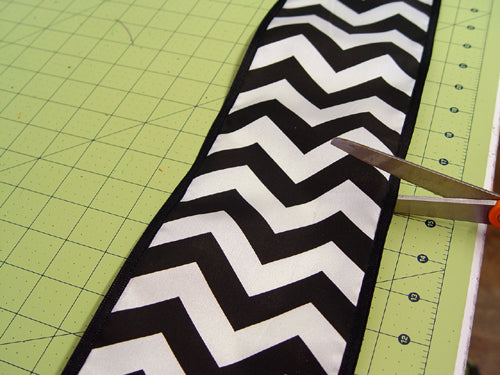
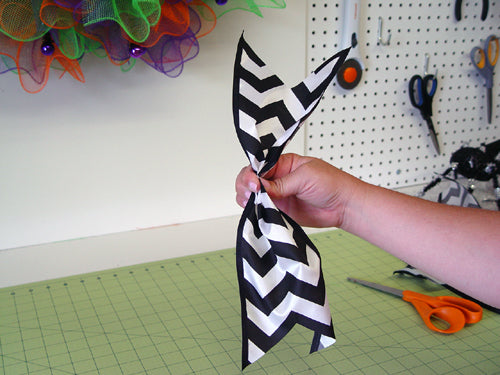
The ribbon we chose is a new
Chevron Stripe in Black and White. It's 5" in width and 10 yards in length and wire edged. Black and white is a nice bold contrast especially for Halloween projects.
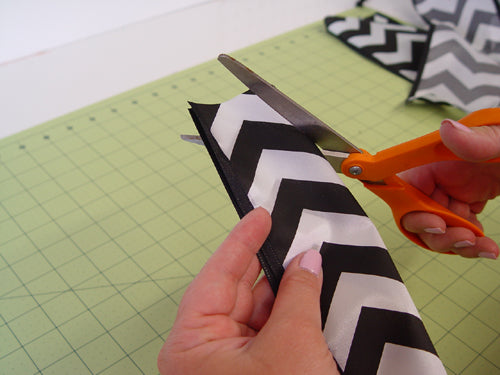
The ribbon was folded and ends trimmed at an angle from the folded side to create a chevron or fishtail finish.
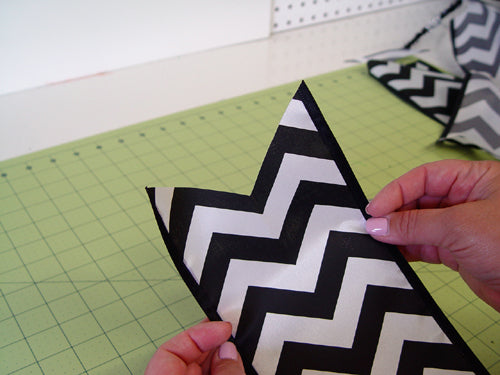
You can just cut at an angle too.....just depends on how you want the end of your ribbon finished. If you're not using a lot of ribbon, or have just a couple of tails in a bow, you can just fold the ends of the ribbon to finish it off.
Pinch the ribbon strip in the center and secure it between one of the twist.
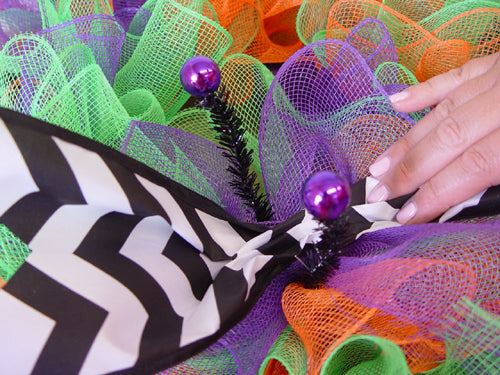
Just open one of the twist making sure the ruffles stay in place and lay the pinched ribbon strip right on top of the ruffle. When using a ribbon that has a front and back side, be sure to place it in the twist with the right side up. Secure the twist now with 3-4 turns since this will be the last layer for the wreath.
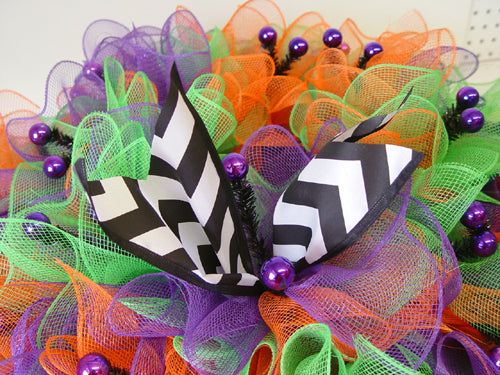
It's always a good idea to hang your wreath up and step back and take a look. You want to make sure that your ribbon strip looks the way you want and isn't too short or too long before you cut the rest of your strips.
For this wreath we chose two ribbons. The other one is a Glittered Diamonds ribbon 2.5" in width and 10 yards in length and is a sheer wire edge ribbon. Sometimes you can layer your ribbons together, but we decided to place one ribbon strip in each twist. We alternated between the ribbons in every other twists. So, we cut 9 strips of each style of ribbon and had about 6 yards left on each roll....enough to do another project for sure.
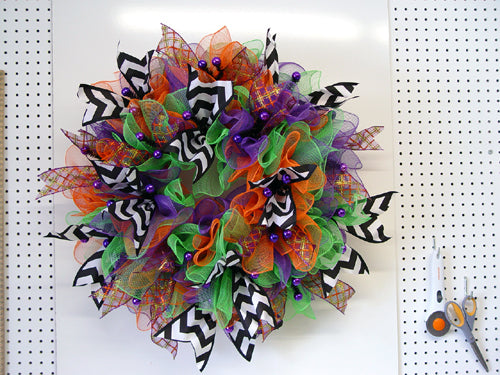
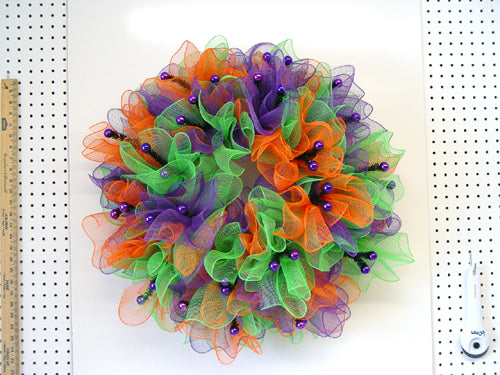
This is our wreath once the ribbon strips were all attached and now it's ready for further embellishment. You can see the center is almost completely full and you can push back the mesh in the center to make the opening more visible to place any sort of final touches.

We chose this
RAZ Black Glittered BOO Sign which is made of Styrofoam and very lightweight. It has a ribbon hanger and we just secured it to the wreath frame with a chenille stem. The BOO sign measured about 17" and is also available in orange.
We also added a
RAZ Black and Silver Spider (upper left corner) but with the assorted ribbons, it really just didn't do the Spider justice so we removed it and tried something else. We'll save the Spider for another project because it's really a great product to work with. It measures about 7", the legs are wired so you can bend them and it has LED lighted eye that flash.....kids love this)))
We settled on a
RAZ Vulture for the center of the wreath......buzzard if you're from the South))))
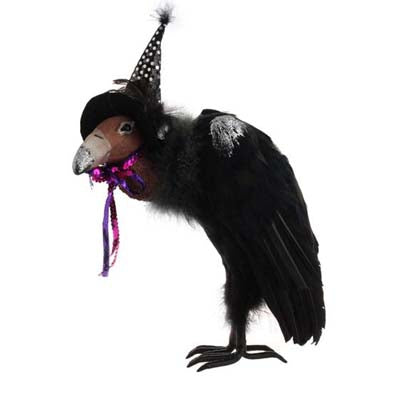
The
Vulture is very lightweight and made of feather and Styrofoam. It's weight makes it perfect for your decorating projects. It measure about 13" and is wearing a witch hat. You could also place him perched on top of the wreath, but since we had the BOO sign coming off the bottom, we placed him in the center.
We have many options that you could do with this wreath with all kinds of signs....too many to list here.....just browse through the
Halloween Sign Collection and don't forget to browse through
Halloween, Autumn and Fall Decorations which includes tabletop decorations like the Vulture.
Save