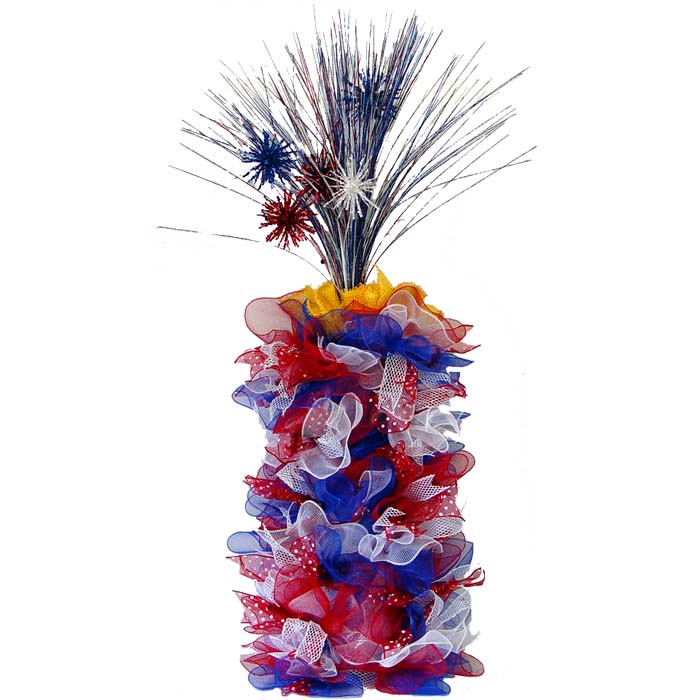
Large Deco Poly Mesh Firecracker tutorial using the new Work Creations Ribbon piece. This is a new product in stock at Trendy Tree and we're exploring uses for it! Hope you will share with us how you've used the product in some of your creations))) Just send us a pic to
info@trendytree.com

The
Work Ribbon is a rectangular piece of metal that measures 22" in length and 4" in width (just the metal frame) The metallic pencil sized twists are the same as on other Work Creations Products and extend another 5" The twists are staggered around the metal frame. The frame is bendable. Products such as mesh, ribbon etc are connected to the
Work Ribbon just the same as wreaths, garlands, candy canes and other forms. The Work Ribbon is now in stock at Trendy Tree in a non metallic white and metallic colors of: black, purple, lime green, red, silver, gold, royal blue and fuchsia. We still have metallic turquoise, emerald green, chocolate and copper to come in. The Work Creations Ribbons are $4.99 each.
Notice how the twists are staggered around the metal frame. For this particular project we added two additional twists at the top and bottom of the frame to even it out. This will be demonstrated later in the tutorial.

For this Firecracker Tutorial we chose a Red Pencil Work Ribbon and 10" Deco Poly Mesh® in plain red, white and blue. These rolls of mesh are 10" in width and 10 yards in length, they have no foil and are the least expensive of the mesh rolls. We used the ruffle technique for the Firecracker. The plain Deco Poly Mesh ® can be found in the "
Solid Mesh" category. It is available in 10" and 21" width. The 10" plain mesh that we used for this project is only $3.99 per roll.

The first thing we did is layer all three rolls of mesh on our cutting mat so three pieces could be cut at one time. The strips were cut 20" in length. My grandson helped me do the cutting on this project)) The cutting mat and rotary cutter is great for doing ruffle wreath projects.
We use a 24" x 36" self healing
Omnigrid Cutting Mat and a
45mm Fiskars Rotary Cutter (these are available at Amazon and we have included our affiliate links.)
There is more information about the
cutting tools on another post if you would like more information. There are 11 twists on the Ribbon so we cut those 11 and added 2 more for the places we wanted to even out with extra ruffles. You can cut 18 20" ruffles from a 10 yard roll of mesh. We layered the ruffles on this project three deep....but you could probably alter that a bit and just add 2-3 here and there and actually get two Firecrackers out of three rolls or mesh, or just have some left over for another project or bows.

These are our 20" rolls cut and the remainder of the mesh left over. We did cut two extra rolls to make 13.

To make the ruffle, scrunch up the mesh or gather it right down the middle lengthwise.

Hold it pinched in the center until you are ready to place it between the twists on the Ribbon form.
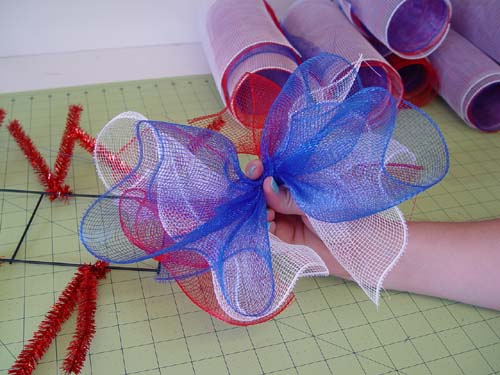
Since we had "helper" hands.....we did three ruffles at a time and held all three, securing them all at one time. If you're working alone, you can go all around the frame three times or just keeping adding ruffles as you get three done to one twist at a time. We altered the color combinations randomly.

Secure the three ruffles in one of the twists giving it a couple of turns. It doesn't have to be secured really tightly at this point since we're going to be adding some ribbon strips later. It doesn't matter which twist you start on, just pick one and work around the frame.

This photo shows where we added in a twist to even out the ruffles. We added one to the top and bottom of the frame using a metallic chenille stem. We only had one left in blue so we cut it in half to make two twists......in hindsight....don't cut the length. The short pieces will work, but using the entire length would have been easier to handle.

You will have some stray strings here and there you will have to clip after handling the mesh. You can also look at it at this point and do any reshaping if needed.

We added a couple of ruffles at the top made of 10" paper mesh. It was just some that we had left from another project but we thought it made the top of the firecracker a little more defined. You wouldn't necessarily have to do use, or you could use just some solid color ruffles if you wanted. They were just secured right on top of the ruffles already in place, just undo the twists and re-secure having all the ruffles secured in the same twist.

Next we chose some ribbons to add to the Firecracker,
Sheer Red with White Polka Dots and a
Glittered White Honeycomb ribbon. Both these ribbons are wire edged.

Measure the depth of your project to determine what length to cut the ribbons. We cut these pieces at 12"

To make a nice finish to the end of the ribbon, just fold it together and cut at an angle from the folded side.

This cut gives the ribbon a nice chevron cut or fishtail finish. It's not absolutely necessary, but we like the look. You can also just cut across at an angle.

To secure the ribbon you want to un-do the twist, making sure your ruffles stay in place. Then pinch the ribbons in the center and lay them down right on top of the ruffles. For this project, we laid the ribbon down crosswise in an "X" fashion, then re-secured the twists giving them 3-4 turns this time, since this was the last layer and you want it secured well.

Be sure to place your ribbon face side up if it has a back that is plain. Take the time to smooth out the tips. This is easy especially with the wire edge ribbons. A cluster of both styles of ribbon was placed in each twist. There was excess left of the both ribbons we used.
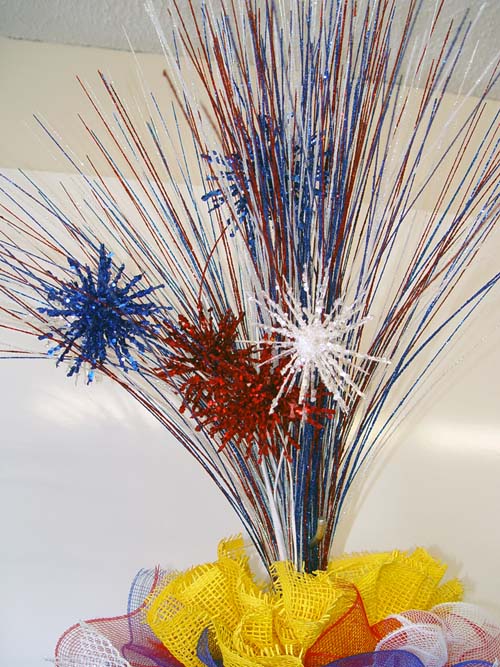
Next we chose some Patriotic Sprays to use on top of the Firecracker. We chose some
RAZ Red White Blue Glittered Pom Pom Sprays and also some
Patriotic Glitter Grass.
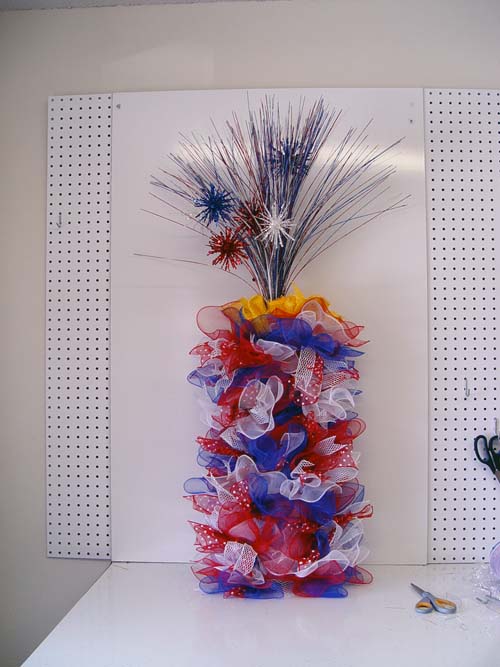
The sprays were just threaded down through the top of the frame and weaved in and out of the metal frame. They can be secure tightly with zip ties. Zip ties hold sprays better than chenille stems I think, especially when they are top heavy, you may have to secure in a couple of areas. We used two of the
RAZ Glittered Pom Pom Sprays and three of the
Glitter Grass Sprays.
You could use one or both styles either way. We also have another
Patriotic Twig Spray that would work in this project. The overall size of the length of the project is about 48". Just the Firecracker itself is about 30" in ht and 16" in width.

This image just shows the
Patriotic Glitter Grass Sprays as a topper.

This is a cluster of three
Glitter Grass Sprays used.
You could also use
RAZ Red White Blue Lighted Branches as a topper.
 Save
Save