
This is a Easter Basket (wall hanging) project that we put together today showing you how to make a basket of Deco Poly Mesh®. This basket is made of Poly Burlap which is a new product that just came out late last year. It looks like burlap, but is made of poly which has the water resistant qualities of regular Deco Poly Mesh®

First thing we did was take a 16" Box Wire Wreath form and cut it in half with some wire cutters. It's fairly heavy wire, so you may need so strength to do this or some really heavy wire cutters. Be careful of the cut edges of course.

The primary other material was a roll of chicken wire. If you've been following our Blog, you know I occasionally like to use chicken wire to form shapes. One roll of chicken wire will last a LONG time, and it's inexpensive. You can find it at Lowe's, Home Depot. etc.

The chicken wire was cut just a little more than the width of the half of the Box Wire Wreath. You need enough excess to fold over the edges to secure.
Just a hint. If you have some old leather gloves they are perfect when working with chicken wire. The dress kind of gloves that are thin leather and fit snug. Perfect for protecting the fingers.
Once the chicken wire was cut, the bottom edge was folded up to the top. This allowed the top edge of the chicken wire to be smooth. The sides were secured and the bottom just by folding the wire around the wreath form. Then the center was poufed out to get the shape of the basket. Actually you could fashion the basket out of just the chicken wire, but the half of the wreath form really added some stability.


Next we took some brown chenille stems and cut them in half to use as the "twists" to secure the mesh.

We started at one edge and placed them about 2" apart, securing the twist in the wire. Any time there was an opportunity to secure the two pieces of chicken wire together during this part, we did that also.

The twists were applied by staggering the placement so they didn't all line up right under each other. Plus, when you start adding mesh, you'll find gaps and places that you need to add another twist and it's very easy to do at that time.

The Deco Poly Mesh® that we chose for this project was a 4" Poly Burlap in Brown.

The mesh was started just the same as using any style of the Work Wreath products. Just pinch the mesh together, leaving a tail of 3" or so and secure the mesh with a couple of twists of the chenille stem. It doesn't really matter which twist you start with, just start at an edge somewhere. I started at the upper left edge.

Just tuck the raw edge of the mesh to the inside of the form.

Grasp the mesh about 3-4 inches and pinch together for your next "pouf" and secure in the next twist.

Continue working around the form. Don't worry about the ends of the chenille stems sticking out right now, we'll tuck them in later.

Just keep working around the form, filling in here and there when you have your pouf measure, but have a gap in your twist, just add one. The wire is very flexible, don't worry about trying to keep it too symmetrical. Always at the end, when you're finished with your poufs....you can always tuck in a loop to cover up a hole if you have one.

Once you've gone all the way around it, step back and look at it.....it needs a little shaping doesn't it....

This photo doesn't look a lot different, but we scrunched it down in the center a little and turned it over and poufed out the center so it would have it's rounded shape (more visible from the side).

We used a piece of a2" Angel Vine Garland to fashion the basket handle. The Angel Vine Garland is made of twig and a bit messy, but it's wrapped in a thin rusty brown wire that helps it to keep it shape. We took a piece, sorry but I didn't measure it. The piece of garland was doubled to give it more substance and strength.

The garland was secured to the wreath form using a zip tie and pulled tightly. I tried just using some floral wire, but it didn't hold snug enough to suit me. You can never go wrong with zip ties))) And please note that the lighting in my craft corner is just the pits! Depending on the camera angle and such....sometimes the colors just look differently.
Both sides were secured the same and remember I had doubled the garland. I didn't do anything to secure these two pieces together because I had already planned to wrap something around the handle that would decorate and secure it at the same time. If I had not been adding that decoration, some thin floral wire wrapped around the handle would hold the two layers together easily.

The finished basket, unadorned. You can see that we tucked those ends of the chenille stems to the inside of the basket.

You can see I ran out of brown chenille stems of course and had to finish with some off white....but they don't show. You could also use floral wire to secure your mesh to the frame and it REALLY won't show, but would be harder on your fingers.
We took a piece of cardboard the width of the inner circle of the wreath frame to make a little bit of a backing for the basket. This basket was made just for a tutorial and for our own use in the shop or at home, but if it was one to be sold or anything, the back would be cleaned up more and probably covered with some burlap fabric or mesh, hot glued to the edges to cover up the chicken wire. Even though it wouldn't be viewed from the back, you wouldn't want the chicken wire scratching a door or wall. Before we finished, we actually took two pieces of the cardboard and made sort of a pocket....like a pita pocket....to hold the items we were using for decoration.

We took some yellow flowered vine (not a product we sell) and wrapped around the basket handle. This was secure with fine floral wire. This secured the two layers of the basket handle too. 
Filled the bottom of that cardboard pocket that we had added, with tissue paper and added the Glittered Styrofoam Eggs and Glitter Tube  Striped Eggs.
The Glitter Tube Eggs are available in several colors and two sizes. The ones used in this basket are about 4". The larger size is 8" and also available in several colors.
If this project was going to be a permanent decoration, the eggs would have been secured either with floral picks, or hot glued into the basket. Our project are usually dismantled as soon as we are finished photographing and items used over again for something else.

The Yellow with Turquoise Edge wired ribbon is 2.5" in width and 10 yards in length. It's a new spring item that just arrived and has a nice color and easy to work with. 
You could add just about any color to this basket, fill it with Easter items, or just flowers, fruits or vegetables. The basic basket would work all spring, summer or even fall filled with gourds, little pumpkins, sunflowers. When I said we would dismantle this project.....I didn't mean we would dismantle the basket....think we'll keep it around....I can see it might find a place on my kitchen wall.....or back porch....
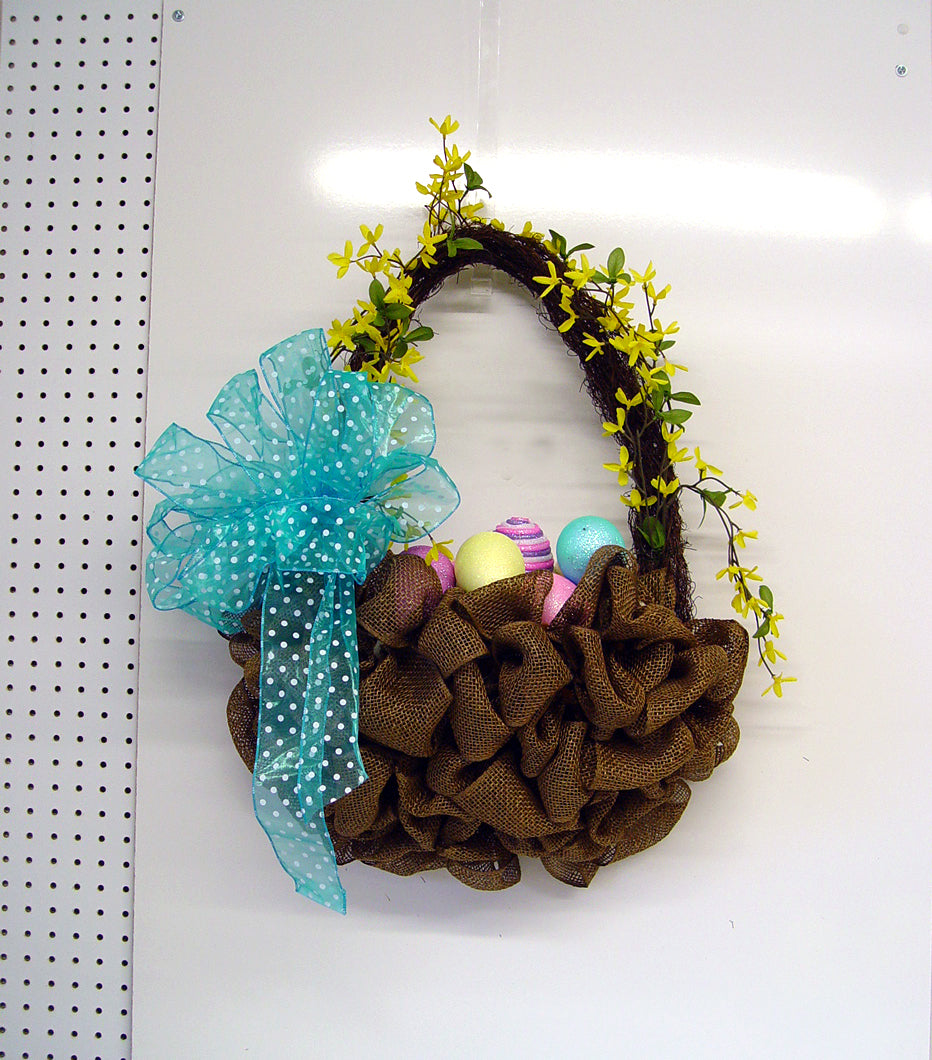
This blue bow was made with another one of our new spring ribbons, a Turquoise with White Polka Dots.
It's a 2.5" sheer wire edge ribbon, but this roll as 25 yards. 
This fun ribbon is available in purple, hot pink and red. We're really enlarging our ribbon inventory this year. We have new styles from Berwick Offray, DStevens, Sullivans and Lion. Plus we have many new styles coming from Craig Bachman to boot.
We've been working on our Ribbon Category....moving some items around....making new sub-categories so if you can't find something that you know you've seen before, just let us know and we'll find it for you.
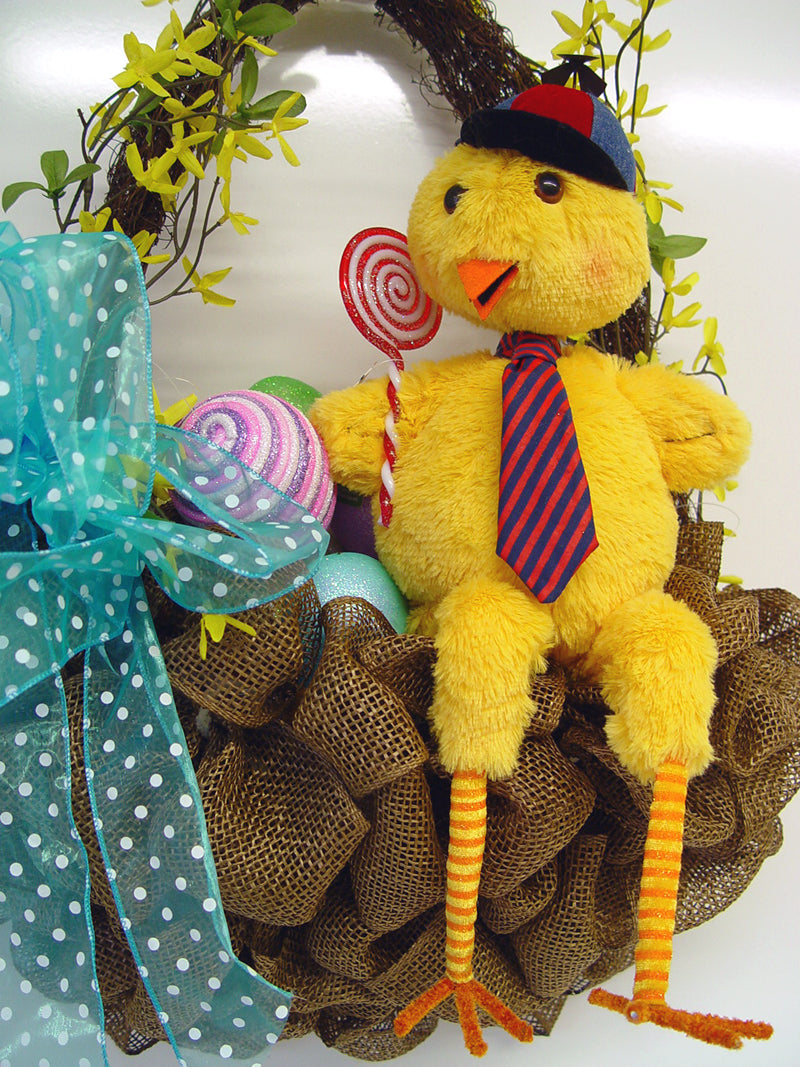
The next addition was this little guy! The Boy Chick from RAZ. The adorable little man,  chick....well....anyway....comes in three different styles.
He's wearing a beanie cap with a propeller no less, a necktie and one has a lollipop, a shoulder bag and one has a sling shot. He measures approximately 21" in height and is posable.
The Boy Chick is a RAZ Exclusive design and he's new for this spring. The Boy Chicks are priced individually....or you can take a whole set!

I like the cross-legged look)))
Hope you enjoyed this tutorial.....we enjoyed making this project and it really didn't take but about an hour from start to finish.


