1/17/16 Here's a easy tutorial for a basic Valentine wreath. It's very bright and colorful and easy to make! It does take a little more time than a ruffle or pouf wreath, but you can grab your supplies and sit down in the living room and work while watching TV with the family))
Supplies - Limited Number of Wreath Kits available (Sorry, kits are sold out)
XX764924 Heart Pencil Wreath Metallic Red
RC126602 Black Tulle 6" x 25 yd
RC126611 Shocking Pink Tulle 6" x 25 yd
RC126622 Pink Tulle 6" x 25 yd
RS402724 Red Jute Flex Ribbon 1.5" x 20 yd (sold out)RS4003E1 Black/Silver Deco Flex Ribbon 1.5" x 30 yd
RS4027T2 Dark Pink Flex Jute Ribbon 1.5" x 20 yd
RG178110 Gray/White Stripe 2.5" x 10 yd
RG1033WT Pink Satin Hearts 1.5" x 10 yd
Please note that some supplies may be sold out, but the tutorial is left up because you can usually substitute products and achieve a similar look.
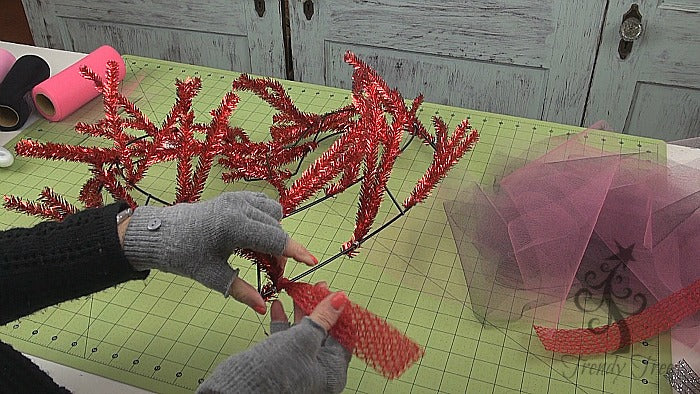
We started with an 18" Red Metallic Pencil Heart Wreath. This wreath has about 26 twist ties around the form. We didn't use the ties for our tulle and flex ribbon, just push them out of the way for now.
The first step was to cut the 6" tulle into 12" lengths. We cut all three colors at one time using a rotary cutter, but you can cut with scissors. By the time we finished, we did not use all the black tulle, but we did use all the pinks. You may want to just cut several strips, and then when you tie them on, go back and cut more.
The three colors of flex ribbon were also cut into 12" lengths. It will not take all the flex ribbon so just cut several strips and re-cut when you need to. The flex ribbon is very stretchy so be sure to just let it lay flat when cutting.
To attach the flex ribbon the wreath form, fold the ribbon in half. Take the folded end and slip under the metal ring on the form. We started with the outer ring.
Slip your fingers through the folded loop and grasp the cut ends of the ribbon and pull through making a slip knot, securing the flex ribbon to the wreath form.
Pull the knot snug, but pull close to the knot and not at the end of your flex ribbon - it will stretch out of shape. Sometimes you have to pull gently on one piece of the ribbon to make it snug. Try to keep your ends even. But it's very important to pull close to the knot and not at the end of your ribbon.
The strips of tulle are tied on the same way. Fold the tulle in half, keeping the ends straight.
Slip the folded end of the tulle under the wreath form. Put your fingers through the folded tulle and pull the cut ends of the tulle through. Make the knot snug.
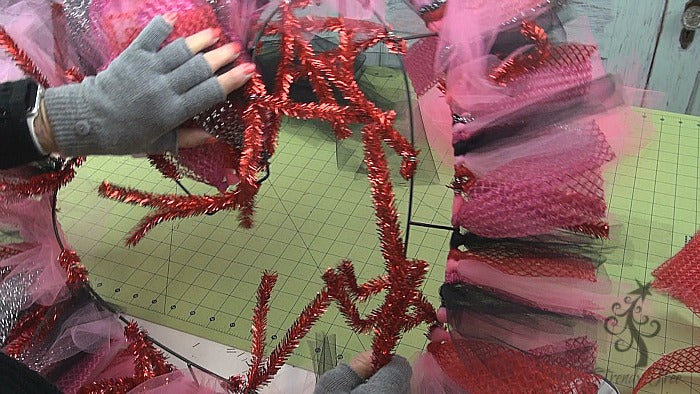
I suggested in the video to use about 20-22 pieces of product in each section. A section being the space between two vertical post on the wreath. But the sections aren't all the same size. So just fill in strips of products until the wire is covered well. When you think you have covered it well, push the material over and fill in a little more to make it nice and full. Just continue around the inner ring, once the outer ring is complete.
Next we cut the gray/white 2.5" ribbon into 12" strips. We did cut up the whole 10 yards, but you might only want to cut 26 strips since there are 26 ties on the wreath. It would have only left a couple of feet on the roll, which really isn't enough to do much with, so we cut up the entire roll.
The ends were finished off with a chevron cut.
The 1.5" heart ribbon was also cut 12" in length, and we cut up the entire roll. The heart ribbon was layered on top of the striped ribbon and pinched in the center. A ribbon cluster was secured in each twist around the wreath. There were still ribbon strips left over, so we randomly applied an extra ribbon strip into a twist here and there just to use up all the ribbon.
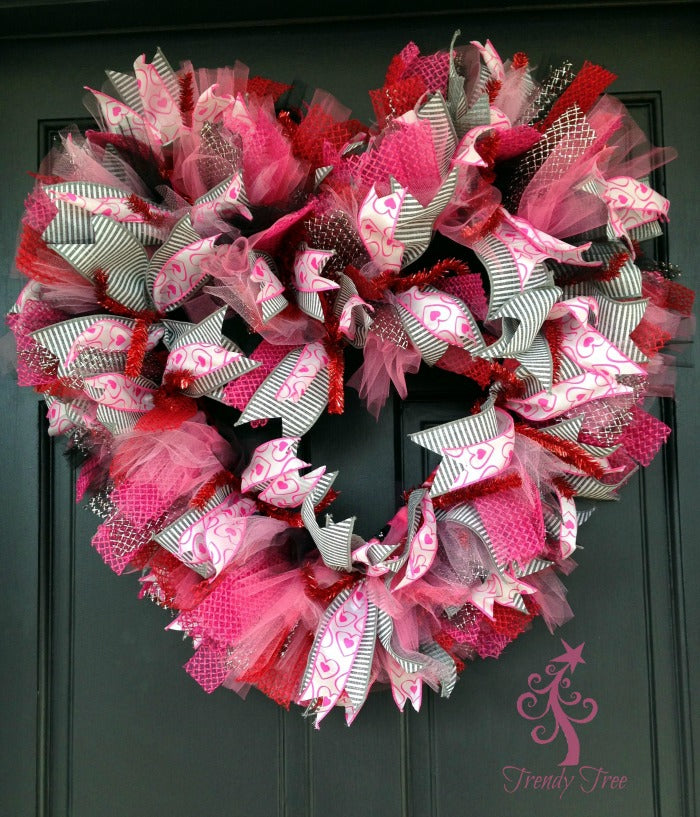
The finished wreath measured approximately 28-29" in width. You can hang the wreath as is, or you could always add a Valentine sign, sprays, etc.
Again, this is a easy project, that just takes some time doing all the cutting and tying on. As you can see in the images, it was cold in the shop and I had to wear gloves! Next time I may just move the video equipment to the house and film as I sit in front of the fire making my wreath))))