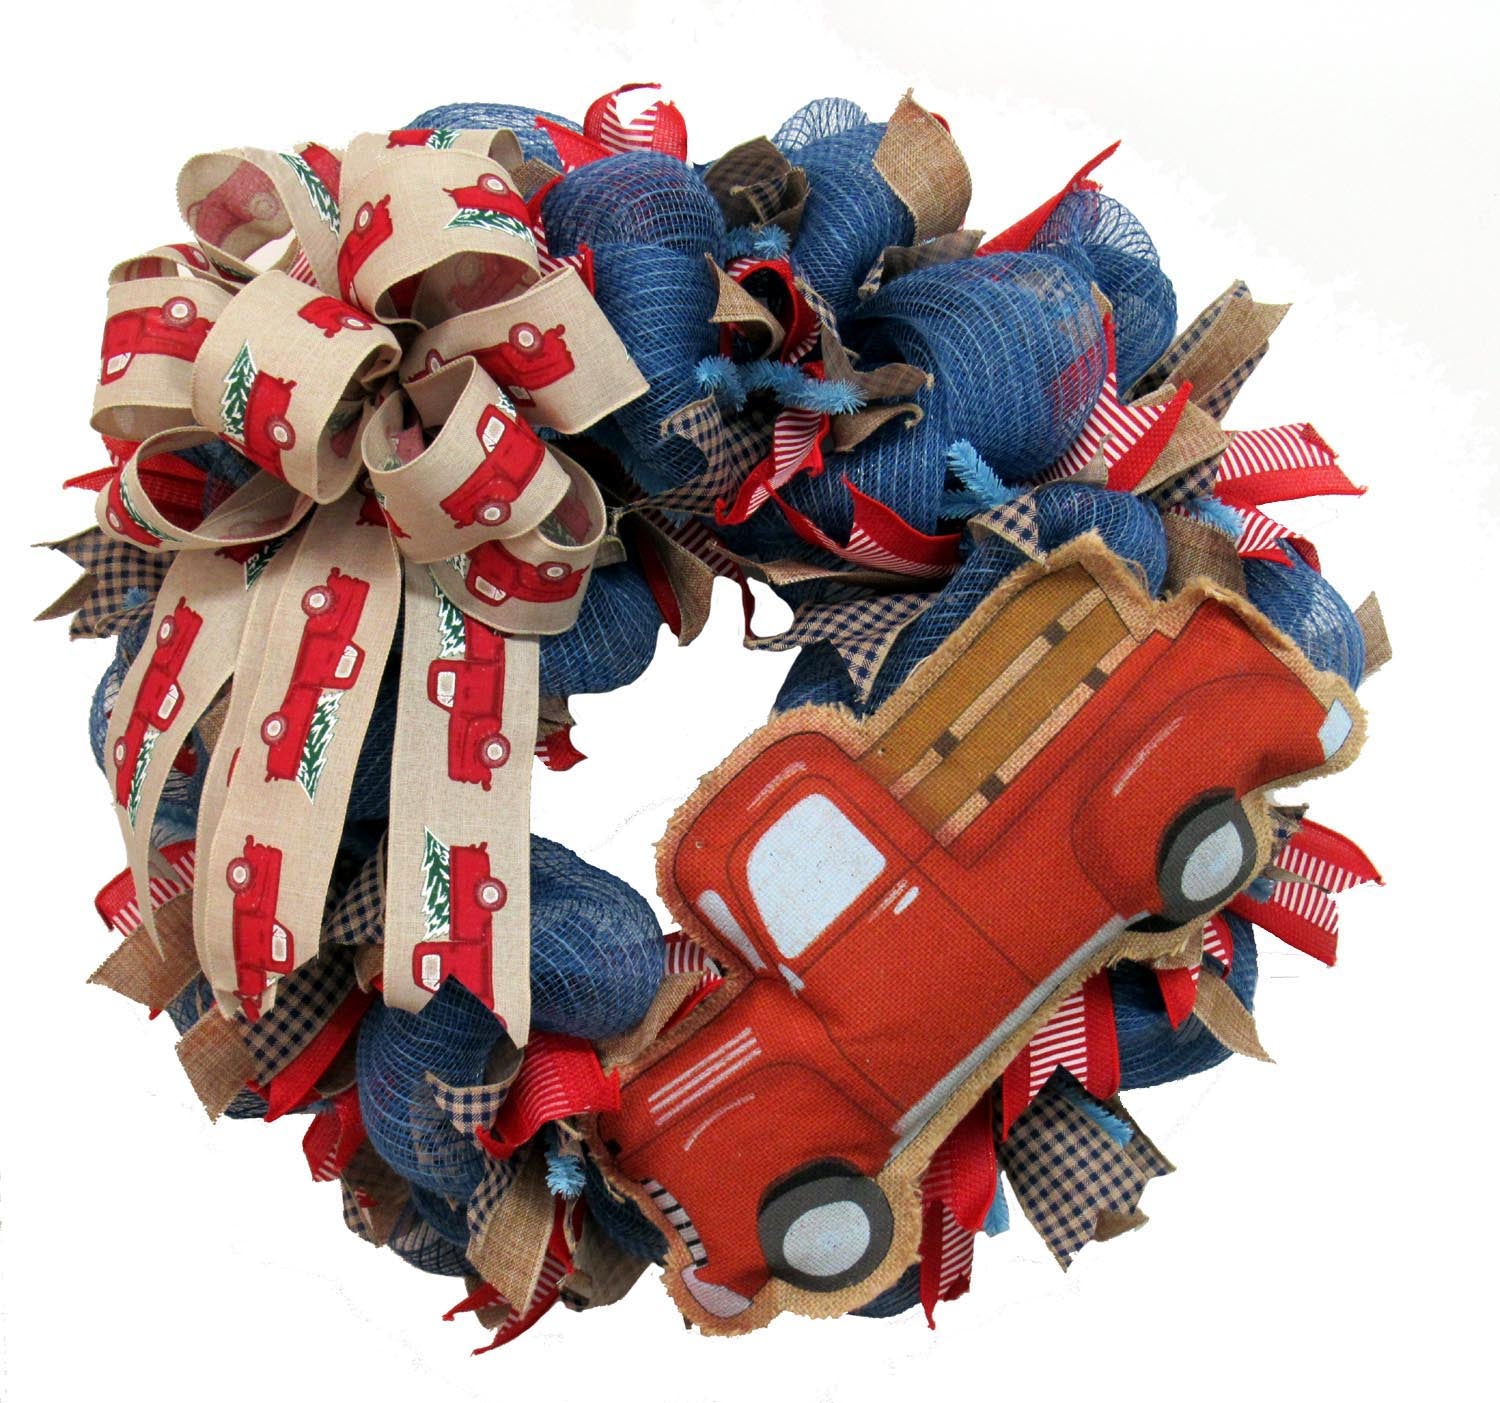
Here's a wreath that Carrie and I did for a Facebook Live on 9/28/17. It's a red truck wreath. We'll show you the list of the products used. All the products of course came from Trendy Tree. We'll have the products in a kit for sale - as long as the supplies last.
DISCLAIMER: We know the quality of this video is not good. We had camera and connection issues and rather than just throw in the towel for the day, we choose to go ahead and video with a phone with no tripod. So, it's shaky and we apologize for that, but hopefully you can get the gist of the instructions))
Supplies:XX750469 24" Sky Blue Pencil Wreath
AA0368 Red Pickup Truck Burlap Hanger
XB945-27 21" Denim Poly Jute Mesh
RG01564NF 2.5" Red Truck Ribbon
RG848024 2.5" Red Stripe Ribbon (available in kit only)
ZXP-TT01 1.5" Light Brown Ribbon
ZXP-TT04 2.5" Navy Tan Gingham Check
Update: Kit with supplies has sold out, but some of the individual products may still be available.
Once this kit with supplies is sold out, we will continue to leave the tutorial since the basic instructions can be followed and other choices in products made to create something similar.
Summary:Pouf Technique:
We chose a 24" pencil wreath for this project. Our 24" pencil wreaths measure 15" across the largest ring, but with the addition of mesh, ribbons etc - you finish up with a wreath that measures 24" or greater.
We have pencil wreaths in all colors and also work wreath in many colors.
The pouf technique was used for this mesh. Poufs were about 10" in length and we started on the inner ring. Just attach the mesh to a twist on the inner ring. You can secure that raw edge with a zip tie or chenille stem to keep it from popping out somewhere.
Our mesh for this project is a great combination mesh made of 46% Polyester; 12% Polypropylene; 22% cotton. The addition of the different fibers gives the mesh a nice feel and texture. There is no foil so it's a great "anytime" type of mesh. It is available at Trendy Tree in a 21" width and a 10" and is called Denim Blue. Again, this project could be made with many different colors of mesh.
Measure 10" and gather the mesh, secure in the next twist. Just continue measuring, gathering and securing as you work around the inner ring.
You can make your poufs anywhere from 10-14" depending on how full and fluffy you want your wreath, just be consistent with the size of the poufs.
When you have worked around the inner ring and get back to your starting twist, open the first twist where you started and lay the last pouf in, re-secure the twist.
Pull the mesh snuggly down to the outer ring and secure in the closest twist. Continue making your 10" poufs around the other ring. Once you get back to your first pouf again, open that twist, make sure the pouf doesn't come out, and secure the last pouf with a couple of turns of the twist. Cut off your mesh at this point leaving a tail of 3-4" Secure that tail to the wreath form from the back of the wreath with a zip tie or chenille stem. Use wire cutters to snip off the end of your zip tie.
You will have a couple of yards left over of mesh. We did the math once to make our poufs a size that would use up all the mesh and it didn't turn out well. We didn't have any leftover mesh, but the poufs were too big and floppy. Just save the leftover mesh for another small project.
Ribbon: We chose four different styles of ribbon for this wreath and made 12" ribbon strips with three of them. We reserved the ribbon with the red truck print to make a bow for the final touch. We thought that cutting the red truck ribbon up into strips might lose the effect that the truck was printed on the bow. But, you can try different ways to add your ribbon. You might want to leave off the ribbon strips and just make two bows. They can be one large, one small; or 4-5 bows to position around the wreath. Just experiment and see what you like best.
We do advise doing a test strip with your ribbon before you start cutting up your ribbon. If your ribbon is too short, it will be stuck down in the mesh and not show up well. Don't be afraid to mix patterns and prints together. We do usually try to mix up sizes and use some 2.5" and some 1.5"
We cut 18" pieces from each of the three ribbons - the gingham check, the stripe and the solid. There are 18 twists, typically, around this 24" pencil wreath and our plan was to put a cluster of three ribbon strips in each twist.
To make the ribbon cluster, we started with one 2.5" ribbon, pinched it in the center and then picked up a 1.5" ribbon, pinch and hold, then add the other 2.5" ribbon. Holding all three pinched in your hand, sort of spread them out so they are not stacked right on top of each other - so the ribbons will show up well. Make sure they are all face up.
Open up a twist, it doesn't matter where you start, and make sure your pouf stays in place, lay the ribbon cluster down and re-secure the twist. This time you can re-secure with 3-4 turns. If you don't ant the tips of the twist to show, just bend them to the inside. I would not trim them off because you might want to take your wreath apart later and make something else with it.
Work around the wreath adding a ribbon cluster to each twist. All this ribbon is wired and it's much easier to work with. We finished off the ends of the ribbon (before we attached) with a chevron or dove-tail cut, or angled cut. Just choose whichever you prefer. There was ribbon left over after clusters were placed in each twist.
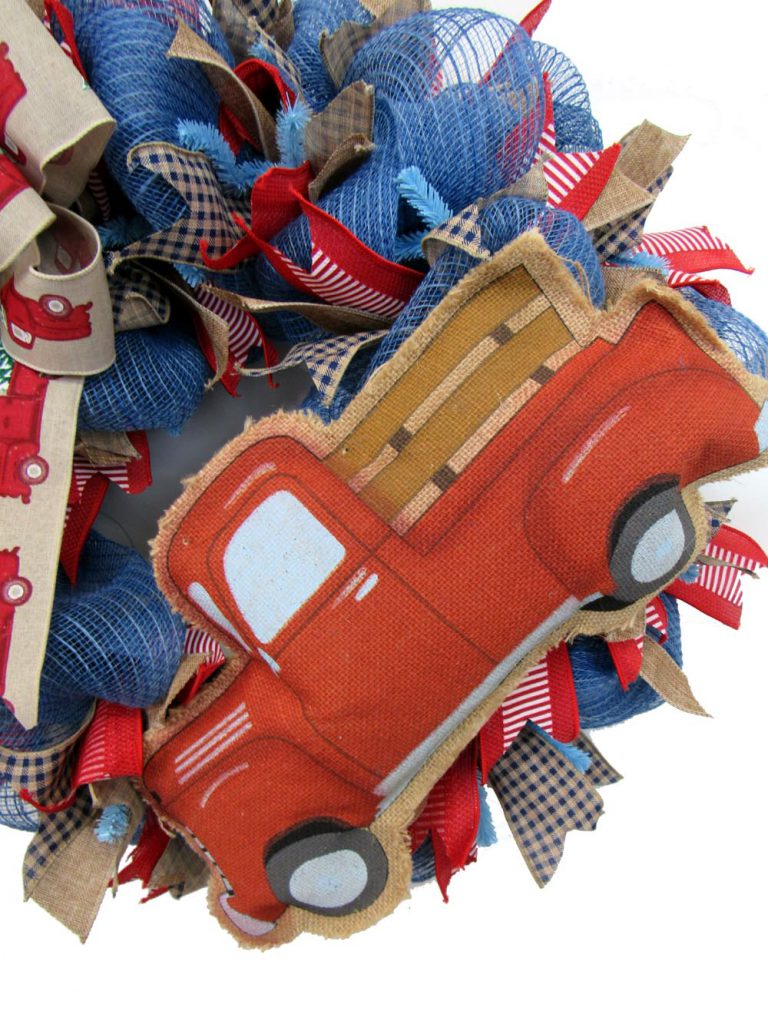
Red Truck Sign: The red truck sign is made of burlap and lightly stuffed. It's very lightweight which makes it perfect to place on a wreath. It has a metal hanger, but we used wire cutters and removed this. You can position the sign in the center, bottom or off to the side. It helps to hang the wreath on the wall to figure out your placement and don't be surprised if you don't have to move it a couple of times.
We ran a piece of floral wire through the back of the burlap sign in two places and secured the sign to the wreath form with the wire.
The sign is not quite as right red as it looks in the image, it's a bit darker. It measures about 17" When we were at market in January, we saw so many things using old red pickup trucks. I don't know if it's the farmhouse craze right now or not, but pickups were everywhere!
Bow: The last thing we did to our wreath was to take the 2.5" red truck ribbon and make a bow. Bows can be made many different ways of course. We did a simple loop bow. If you're new to bow making, I would suggest taking some scrap ribbon or some very inexpensive wired ribbon to practice with before working with your good ribbon.
We started by measuring 12" for a tail. The end of cut with a chevron or dovetail cut, or you can just make an angled cut across the end. Pinch the ribbon at 12" and make a 6" loop. Twist the ribbon to bring the right side back up and make another 6" loop. Measure to make sure you keep all your loops the same size. Keep twisting each time before you make the next loop to keep the ribbon face side up.
We made 10 loops and then secured the bow with a piece of floral wire. The ribbon was cut off leaving another 12" tail and that end finished off. We then cut another 24" piece to use as additional tails. This was gathered in the center and secured to the back of the bow with the bow wire. Now we had 10 loops total and 4 tails.
The bow was secured to the wreath in the left upper corner, opposite to the truck size. Just secure the bow to the wreath frame, being care not to pull your bow down into the mesh. You want it sort of laying on top of the wreath. If there is a twist tie in the area that you can secure it to, you can do that and not go all the way down to the frame.
Once your wreath is finished, clip all your strings. It's better to clip than to pull. Check the back for anything sharp that might scratch or your wall or door. You will have some raveling. You do have less raveling with mesh that you don't cut into lengths, but you'll still have some. All mesh products ravel.
The finished wreath measured about 24-25" in diameter.
Again, we apologize for the quality of this video! We had so much difficulty getting started, but just wanted to go ahead and share since it is a fairly simple wreath to make, so we hope this won't discourage you from following us on Facebook and YouTube. Drop in to our Facebook page and give us a like and put a check mark on receive notifications so you'll get a notice when we go live!
SaveSaveSaveSaveSaveSave