2017 Halloween Wreath with Orange Pumpkin Kids Tutorial
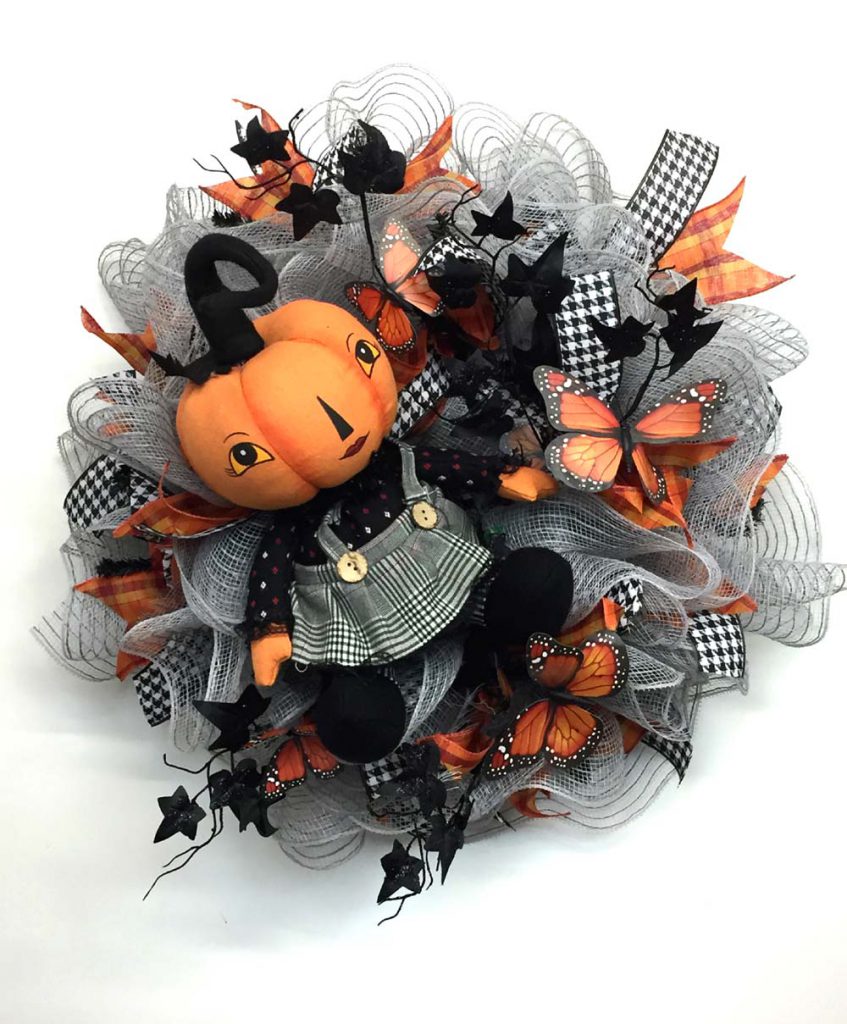
Halloween Wreath with Orange Pumpkin Kids Tutorial. This was a very quick and easy wreath to make. The supplies (while they last) will be available in a kit and the kit will contain either the boy or the girl and enough supplies to make one wreath. Please note that is is a smaller wreath that measures about 20″ once completed as it’s made on a 10″ wreath form.
Wreath with Boy
Wreath with Girl
Supplies
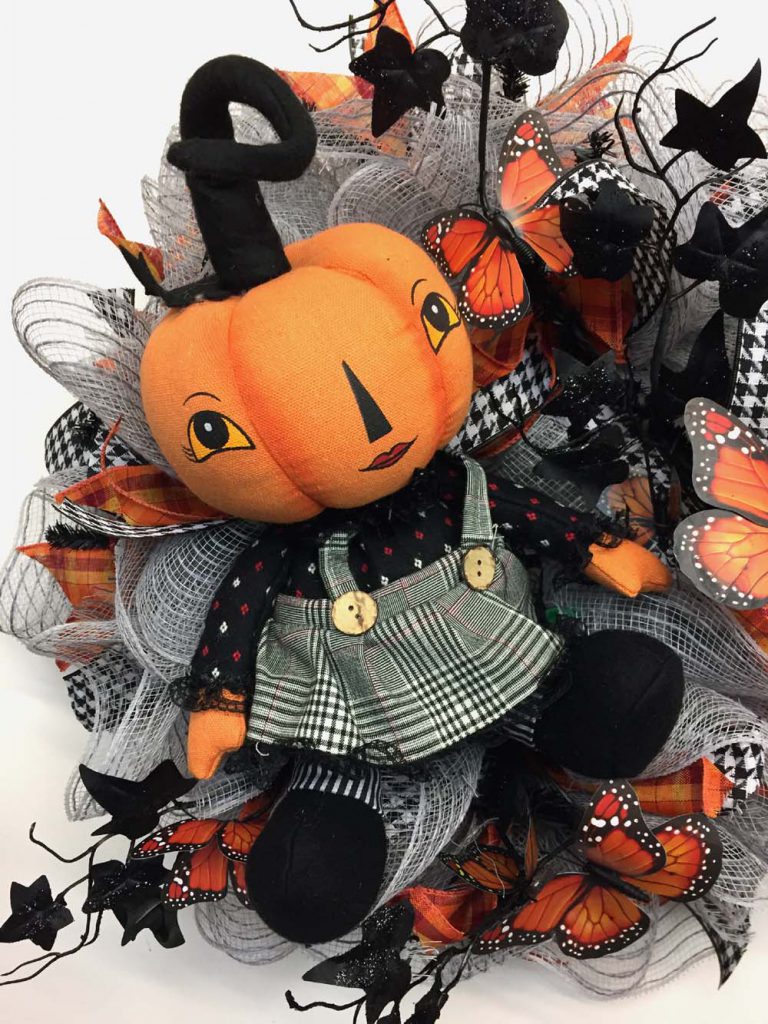
30027642 Orange Pumpkin Kid – Girl or Boy (the pumpkin kids be available in the kits only, not available on the website – one kid per kit)
XX167702 10″ Black Pencil Wreath
XB96910-16 10″ Grey Burlap Mesh
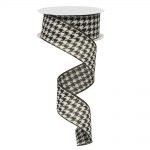
RG01523 1.5″ Houndstooth Ribbon
RX0F6210A-25 2.5″ Fall Plaid Ribbon
F3706729 RAZ Butterfly Spray – 2
Note: A limited number of kits will be available and others of the individual supplies will be available as long as they last. One kit will be enough to make one wreath. The tutorial will be left up even after some or all the supplies have sold out, since the basic instructions can be followed and other choices made in similar products.
Update: Sorry, kits have sold out and no more will be available. Summary:
10″ Pencil Wreath: A 10″ wreath was chosen for this tutorial since it seemed to be a good fit for the pumpkin kid. A plain black wreath was chosen, but you could use a metallic black or another color.
The 10″ Pencil Wreaths have 12 twists on the two rings. There are about 5 twist on the inner ring and 7 on the outer ring.
Mesh: Carrie and Rachel chose a 10″ Grey Burlap Mesh for this project. The mesh is 10″ in width, 10 yards in length which is a perfect size to use for the 10″ Pencil Wreaths.
The mesh is a combination product that contains Polypropylene, cotton and Polyester. It is called “burlap mesh” because of it’s texture. The extra components of cotton and Polyester to the Polypropylene really give it a nice feel and it’s not as shiny as just plain Polypropylene.
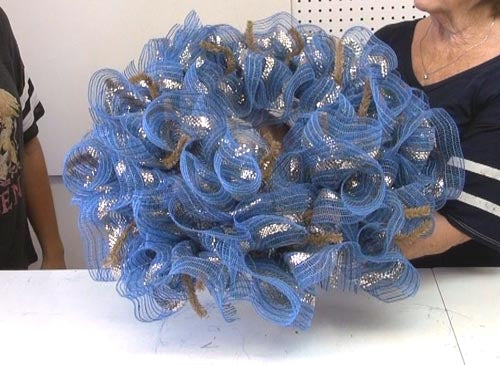
The first step was to cut the mesh for the ruffle technique. We watched a tutorial by Lori “Hard Working Mom” recently and she cut her mesh in 30″ lengths for a ruffle technique. Since that time, we have used the 30″ length to make one ruffle instead of three 10″ pieces.
This does cut down on raveling since you have fewer cut edges. All mesh ravels, and you still will have some and you’ll just have to clip strings at the end. It’s best to clip strings rather than to pull.
The mesh was cut using a Omingrid Self-Healing Cutting Mat and a Fiskars 60mm Stick Cutter. These are items that we used to sell on Trendy Tree, but now we just off you our Amazon affiliate link.
These two tool are very helping if you do much cutting with mesh. You can cut multiple rolls of mesh at one time, and you can replacement blades for the cutter.
To make a ruffle, just let the mesh piece fall naturally on the table, smooth it out and scrunch up through the middle gathering it along the way (selvage or uncut edges to outside).
Attach the ruffle to one of the twist on the pencil wreath.
We started on the outside and worked all the way around securing one 30″ ruffle in each twist. Initially, they had planned on not adding any ribbon strips so in the video they said, secure the twist with 3-4 turns. But later, decided to go ahead and add ribbon strips, so at the point, you can secure with just a couple of turns since you’ll need to open the twist back up later to add ribbon strips.
Once the outer ring is finished, just move on to the inner ring and continue adding one ruffle to each twist.
The ruffle portion is now completed with one 30″ ruffle in each twist on the inner and outer ring. It’s very full! To open up the center a bit, just push the ruffles toward the front (pushing from the back side).
Ribbon: Two choices of ribbon were used for this project. One was a 2.5″ Fall Plaid ribbon and the other a 1.5″ Black White Houndstooth. You can add ribbon in several different ways, but one of the simplest is to cut ribbon strips.
It’s always a good idea to do a test strip before you cut up your ribbon. We decided that a 10″ length worked fine for this wreath, but you can experiment with the ribbon. You might rather add simple loop bows, or use the ribbon to make one or two large bows. There are lots of options with ribbon.
Both these ribbons are wired which works best for most any project because you can shape your ribbon and it will hold its shape. You will find that most all, if not all of the ribbon we sell on Trendy Tree, is wired.
The ends of the ribbon strips were finished off differently. The Houndstooth ribbon was just cut at an angle on each end, and the plaid ribbon was finished off with a dovetail or chevron style cut. You can finish your ribbon strips off in any way that you prefer.
There will be ribbon left over from this project too, especially since we were working with a 10″ wreath. Both styles of ribbon work well for fall or Halloween decorating.
The ribbon strips were pinched in the center of the 10″ strip, and both styles of ribbon secured in a twist at the same time. To secure the ribbon strips, it’s important to open up the twist, make sure the ruffle stays in place, lay the ribbon cluster down and re-secure the twist. This time you can close with 3-4 turns.
Butterfly Sprays: The RAZ Butterfly Sprays have been very popular this year. When we first saw them at market, they were in theHalloween section, which seemed a little strange ….butterflies for Halloween. But the colors are just stunning. The orange butterflies really pop and the black leaves really provide a nice contrast.
We initially thought that we would use three sprays, but actually just used two. The ends were shortened by a few inches and they were just bent a little and secured sort of laying of top of the wreath, using the tips of the twist ties to hold them. Just be sure that you just twist the remaining ends of the twist ties around the spray and that you don’t “un twist” the part that is holding your ruffle and ribbon strips. Each of the two sprays were attached to the wreath in about three places.
You can also attach the sprays using chenille stems or zip ties and secure to the work wreath frame, but be careful that you don’t pull them down into the wreath so far that they don’t show up well. The sprays are so pretty, you don’t want to lose the full effect of them.
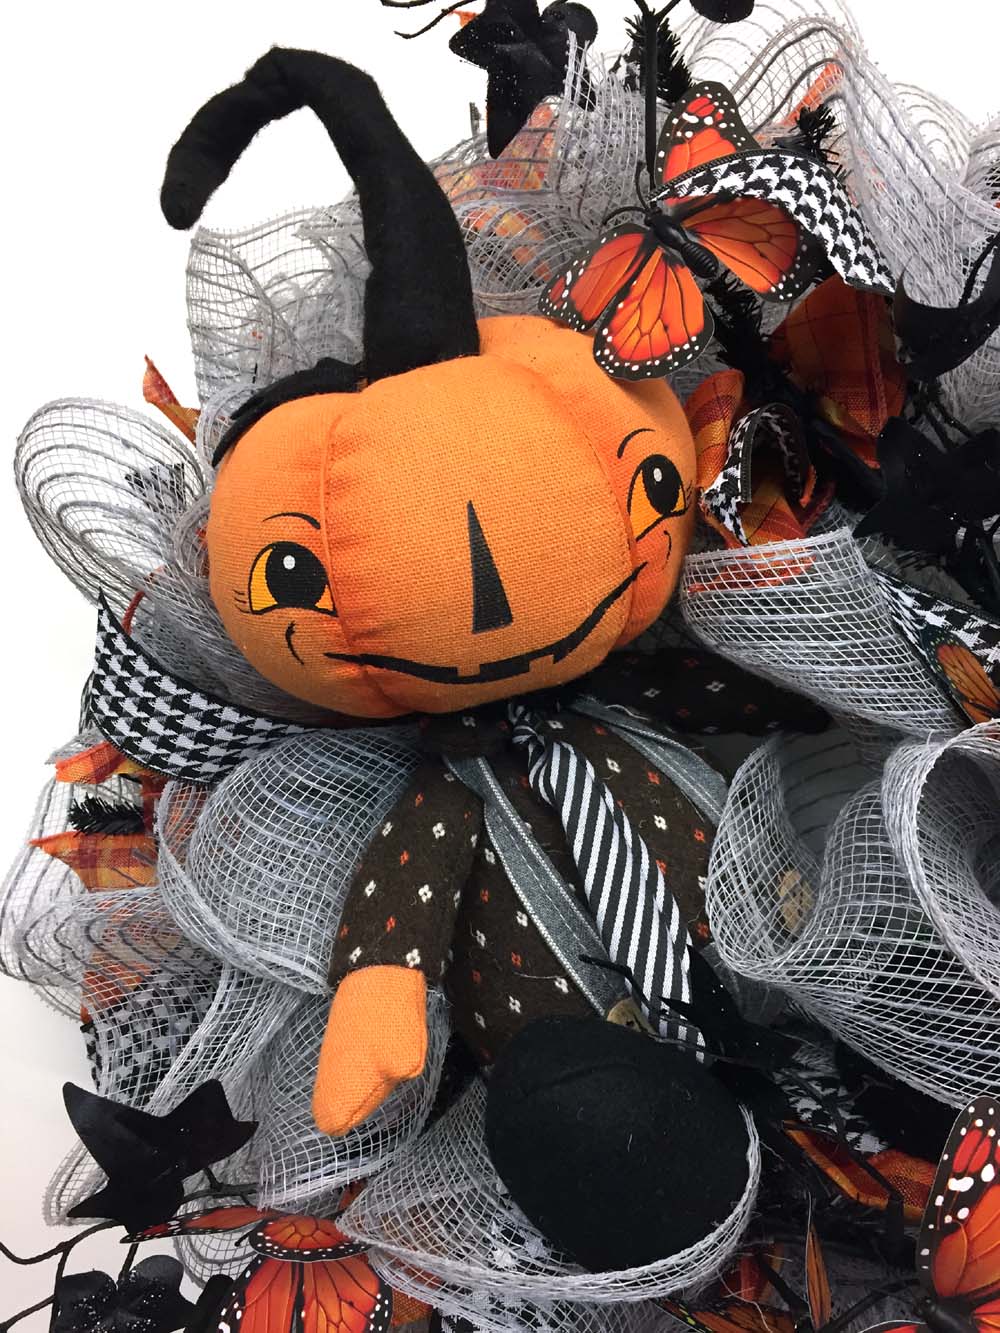
Pumpkin Kids: The pumpkin kids are actually self-sitters. Be careful when you say that))) One is a boy and one is a girl. If you order the supply kit, you will receive one or the other, just which ever is available. The only ones we have available will be in the kits, they are not available as individual purchase on the website. The pumpkin top are wired for shaping.
You can position the pumpkin kid in the center, or off to one side. We sort of placed one in the center and more over to the left side. You can secure it by using the existing twist on the wreath, just make sure that you don’t loosen your ruffle and ribbon strips. Twist were secured around the neck of the pumpkin kid and for extra security, chenille twist was inserted from the back of the wreath and twisted around one of the legs.
You can also use a piece of floral wire and go around the neck and secure to the work wreath frame and put a piece around one or both of the legs to.
You may want to position the wreath on the wall to see where you best placement would be. These closeups show you the detail on the faces of the kids. The arms are wired, but the legs dangle freely.
Remember, this is a smaller wreath since it was made on the 10″ Pencil Wreath and the overall measurement after finished is around 20″ in width.
Happy Halloween!