Burlap Snowman Wreath. This was an easy wreath to make using the pouf technique. We'll show you the supplies, and we'll have these products also in a wreath kit to purchase. Please note that once the kits well out, we will continue to leave the tutorial up, since you can apply the basic instructions to other products and create a similar style wreath.
Supplies:XX7488W4 24" Burlap Work Wreath
82882A Burlap Snowman -sold out, no more available
RY910718 21" Snowdrift Jute Check Mesh
RN5531T1 2.5" Red Cream Check Ribbon (sold out on website - available in kit only)
RG867924 2.5" Baby It's Cold Outside Ribbon
RG1584KF 1.5" Chalkboard & Natural Ribbon
11/8/17 Update - Kit with supplies has sold out and no more will be available. We will leave the tutorial up though since the basic instructions can be followed and other products chosen.Summary:Wreath: A 24" Burlap Work Wreath was used for this project. Our 24" wreaths measure 15" across the widest wire ring, but with the addition of mesh, ribbons and other products, the finished wreath is 24" or greater. You could also use a Burlap Pencil wreath or a white wreath for this project.
A typical work wreath has 18 twists positioned around the wreath.
Mesh: We chose a combination mesh for this project. This product is a 21" Snowdrift Jute Check Mesh. There are 10 yards on the roll, and you will have a little left over. The mesh has a great texture with the addition of cotton to the Polypropylene which gives it a jute feel and the cottony tufts that make the squares.
To start the mesh, we grasped it about 3-4" from the end and turned that raw edge under. This is a technique that we saw Damon Oates of Deco Exchange do in one of his videos. He has great tutorials and you'll want to check out his pages. He also has a subscription type program where he teaches crafters how to make wreaths and develop their businesses.
Take the tucked under end of the mesh and attach it to one of the twists on the outer ring, this is your starting point.
Measure 10", pinch and attach in the next twist. Continue working around the outer ring adding a pouf to each twist. You may need to put your hands under the pouf to fluff it out a bit.
When you get back to your starting point, attach your last pouf by opening the starting twist, making sure the starting mesh stays in place, and secure the last pouf to the outer ring right on top of that. Re-secure the twist with a couple of turns.
You're now ready to move up to the inner right. Pull the mesh up snug, no need to cut or anything, and attach in the closest twist. This is your starting point for the inner ring. Continue to measure 10", pinch and secure in each twist around the inner ring. When you work around to your beginning point, do the same as the last time. Get your 10" measurement and allow 3-4 more inches. Cut the mesh free and turn the raw edge under to where you pouf will be 10" Open up the beginning twist, and lay your last pouf down. You may have to reach under the pouf to secure the twist. Now your raw edges should be hidden.
Hang your wreath and check the poufs, you can make adjustments if needed if some have gotten off sized.
Poufs can be made 10" - 14" just depending on your preference. I wouldn't advise larger than 14" because the poufs can become large and floppy. You will have a little bit of mesh left over.
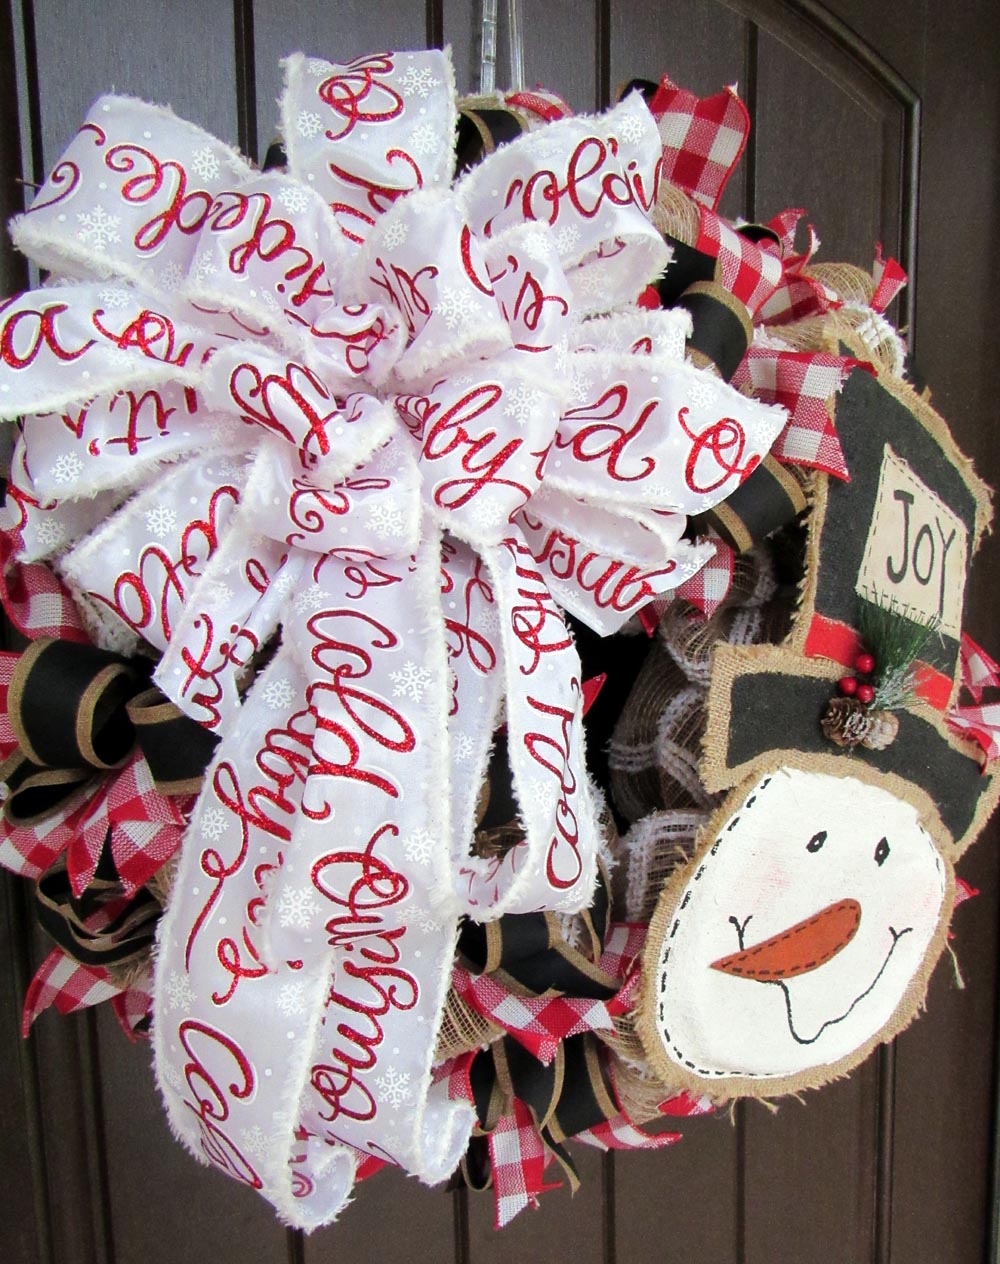
Ribbon: We chose three different ribbons for this project. One was a brushed flannel 2.5" red and white check, 1.5" chalkboard with natural edge and a white ribbon with red glitter Baby's It's Cold Outside with snowdrift edging. We opted to use the check and the chalkboard for ribbon strips and thought we would make a big bow out of the white ribbon.
It's always a good idea to use a scrap piece of ribbon for a test strip. We started with a 12" strip and this seemed about right. We cut the tails of the ribbon in a fish-mouth or dove-tail cut by folding the ribbon in half, then lengthwise, then cut across the folded side away from you. You can finish off your ribbon tails in this manner or just an angled cut, which ever you prefer. We cut the 1.5" chalkboard ribbon with just angled cuts on the end.
Since we were only using two of the ribbons styles for the ribbon strips, we decided to use two of the red check strips and one of the chalkboard strips. We chose to cut the chalkboard in 26-27" pieces and made a "shoestring" type bow. We took two of the red check strips and secured in a twist, and then reopened the twist and added the shoestring bow out of the chalkboard ribbon. If you can hold all three ribbons in your hand at one time, go girl! Or guy!
There are 18 twists on a wreath, so our plan was to put a cluster of two red check and one chalkboard bow in each twist. Well, of course the math didn't work out! You should be able to cut about 30 pieces of 12" strips off a 10 yard roll. Cutting the chalkboard ribbon into 27" only yielded about 13 pieces. And rather that cut into another roll of ribbon, we decided to just go with what we had.
We adjusted the ribbons as needed to achieve a full look. In areas where the burlap snowman was going to be placed, we omitted a cluster there and in the area where the bow was going to be placed. Some of this adjustment was done after the snowman sign and bow were placed. So lets talk about adding the snowman.
Burlap Snowman: The burlap snowman is about 15.5" in ht and 11" in width. It's very lightweight and just a painted burlap sign with jute string hanger. We inserted a bit of floral wire through the back of the sign at the top and the bottom to use to secure to the work wreath frame.
We started out intending to place the sign in the center of the wreath, then opted to put it to the side. That's the way wreath making goes....you start out with a plan, then change it along the way)) Place the sign where you want it and work your fingers through the mesh reaching the back of the work wreath. Secure the sign to the metal rings using the wires. We secured the sign in two places.
Bow: Mil and Dil DesignsWe used the Baby It's Cold Outside to make one big bow. We didn't use all the ribbon, there was a little left. The bow was loosely based on the Terri Bow developed by Terri Marhsall of . She has a great video on YouTube where you can see the original bow demonstration. She also has several video tutorials if you're interested in learning more wreath making techniques. The Terri Bow is a great way to use up scrap ribbon, but we wanted to make our bow out of just one ribbon.
We did a separate video on making the bow so the first video wouldn't be quite so long and you can watch that demonstration below. We did use a Bowdabra for this bow and we no longer sell the Bowdabra on Trendy Tree, but here's our affiliate link we can share with you. It's a handy device!
Final Touches: Clips your strings, all mesh ravels. Clip strings rather than pull, check the back of your wreath for any sharp objects and fluff your ribbons. You're all set!
The wreath measured about 27" in width when finished. And again, we'll leave the tutorial up even after some or all the supplies have sold out since the basic instructions can be followed for another project using different materials.