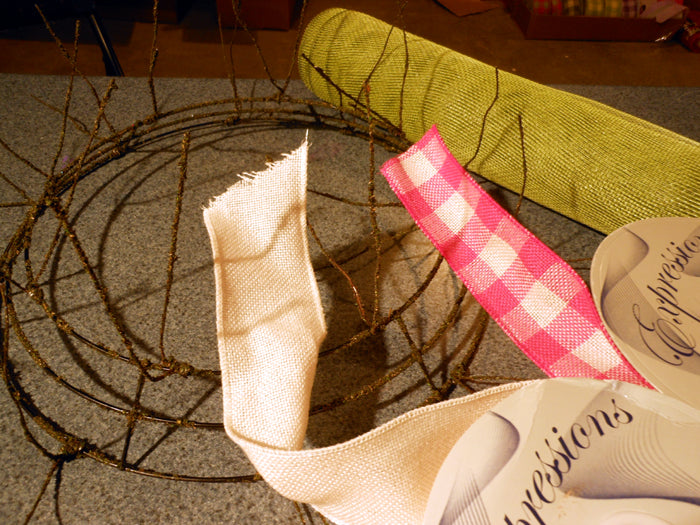
This post will help to show you how to create a beautiful spring Deco Poly Mesh using a round Twig Work Wreath, one roll of Deco Poly Mesh, assorted burlap ribbons and other embellishments.
(please disregard the differences in the color of the mesh due to lighting)
The Twig Work Wreath is a product that most everyone has a love/hate relationship with. You hate working with it, but love the results.

This is a closeup photo of the Twig Work Wreath. You can see it's very rough, crusty and wiry. The coating will flake off and you'll have a mess while you're creating your wrath, but the twists hold wonderfully well and are practically invisible. The Twig Work Wreath works great when you don't want the twists to show. You can even use this for practically any color of mesh. I made a wreath this week using white Vertical Line Mesh and the wreath form is just not visible.
The regular Work Wreaths are a nice choice when you do what to add a bit of color to your project and also the fuller twists make a nice bed for your ornaments or embellishments when you're using hot glue to secure lightweight items. So, there is a place for all sorts of wreaths during the creating))
The Twig Work Products are hard on your fingers, if you have some really thin gloves that fit snug, you might try them and see if that helps.
We get asked on occasion why the wreaths are listed as 24" wreaths when they really aren't that wide. They actually measure about 15" across, but are listed as 24" because your finished product will always be (usually) 24" in width or even wider. Most wreaths I've completed measure 27" or more...and that's only measuring the width of the mesh on the wreath, not the extra embellishments.

The first step is to unroll the mesh a few feet and gather or pinch the width of the mesh, grasping 3-4" from the end. Choose a "twist" somewhere on the wreath to start. It doesn't matter where....doesn't matter if you start on the upper ring or lower right. I generally start on the upper and go completely around the upper ring, then drop down and go around the outer ring. Some folks go up, then down, back up and so forth. For me, it works better going around the top ring, then the lower.
Place that first gathered mesh between the twists and secure it tightly with about two twists, then move on to your next pouf.
Try to keep your poufs all about the same size. For this style of Deco Poly Mesh® you probably should grasp the mesh at about 12" to make the next pouf. You don't have to measure, but just notice as you're going around the wreath form, if you have a pouf that is definitely much smaller or larger than the last one, just undo the twists and adjust your size of the pouf. If helps if you place one hand under the pouf to fluff it up a bit before you secure it.
Poufs that are too tight will show too much of Work Wreath. Generally, it takes just about the whole roll of a 21" x 10 yard roll of Deco Poly Mesh® to go around a 24" wreath. You might have a couple of feet left....sometimes I have that much and sometimes less. It's good to pay attention as you're getting close to being finished to make sure that you don't run out. If it looks like it's getting close you can always re-adjust. Course, you can add on another roll, but you really shouldn't have to for the "average" wreath.

Once you've gone around both rings of the Wreath, depending on the length of mesh that you have left over, cut it to about 4-5" and tuck toward the inside back of the Work Wreath. You want to cut you tail off long enough that you have enough length to tuck it out of sight without it popping out and showing.
Stand back and take a look at the wreath, check for an even fullness. Don't worry about a gap here or there, because you're going to add some pretty things to it))) If you want it more open in the center, gently push the poufs out to the sides a bit and you might want to add something to the center too.
Notice you can still see the skinny little twists sticking up in the wreath......but we're not done yet.....we'll hide those later. Right now you want to be able to see them because you're going to add your embellishments right into those twists. Some things you might add directly to the Work Wreath securing with pipe cleaners, floral wire or even fishing line, but for pops of color you can add your ribbon pieces right back into those same twists.
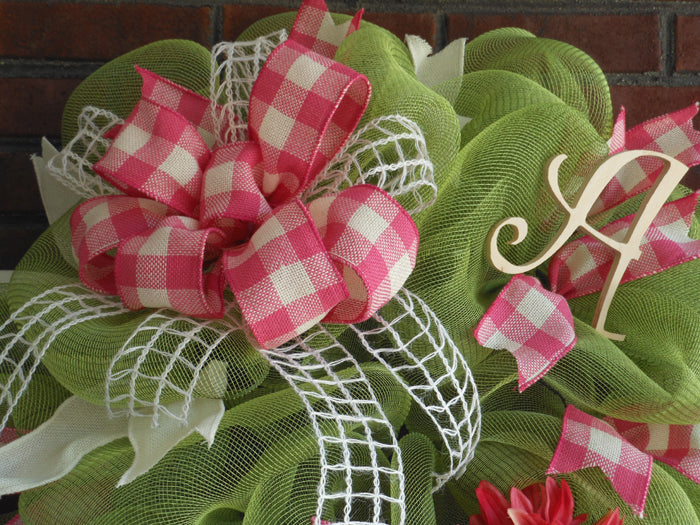
 The colors in this wreath are really nice spring colors.....the mesh is a Two Tone Moss/Apple Green and just perfect for spring and summer. It is complimented by the gorgeous Pink and Cream Faux Burlap Check ribbon and Cream Burlap.
Using plain mesh (no foil) is really nice for spring and summer creations when you don't necessarily want a lot of shine from the foil styles. It's one of the least expensive styles of mesh also and great for starting out wreath making.
You could add your choice of ribbons and change up the look on this wreath completely. The Moss/Apple mesh would look great with some summertime watermelon colors, bright butterflies....bugs or bees....the possibilities are just about endless. Plus, if you're making the wreath just for yourself and not for re-sale, you can pull those ribbons and embellishments right off after a few weeks and put on something different and have a completely new look. 
This base of Moss/Apple Green Mesh could carry your wreath decorating right on to fall. Some orange, copper, or even chocolate brown ribbons and embellishments would look nice.
I love pink.....love check....so this Dark Pink and Cream Faux Burlap is one of my favorite ribbons. Love the way it looks with the green, and for me, that's a color combination that you can use all year long.....except maybe the fall....
The Dark Pink and Cream Faux Burlapis just that....faux burlap. Real burlap is nice, but when we were making the choice on this ribbon whether to go with real burlap or faux....the faux was smoother, neater and doesn't smell))
The Dark Pink and Cream Faux Burlap will be available in more sizes this summer too along with many new colors. We'll have a 9.5" and 19" widths.
It's a wire edged ribbon too of course, I think all the ribbons we have in stock are all wire edge which making working with them a breeze. You can make your bow...and if you don't like it, undo and start over. This wreath has a simple 6-7 loop bow and then extra lengths of ribbon were cut, edges trimmed chevron style and just pinched in the center and secured into one of the twists here and there.
The Cream Faux Burlap adds some additional contrast for the pink, and the wide open weave burlap in ivory add just a nice texture. Just gives it a little more interest. The nice thing about using ribbon in this manner....is that you can make your ribbon last longer! Premium ribbon will generally be more costly than the mesh. Some wire edge ribbon comes on 10' rolls and some 25' You need a nice mesh to make your base, but your premium ribbons will be one of the primary things that makes your wreath unique.

If making bows just isn't your bag.....we do have an item that will make your day))) The ProBow.....bowmaker. Just click on the link if you want to learn more.....it's been a lifesaver for me.
On attaching the extra pieces of ribbon....just locate the twist and gently untwist it, making sure that the pouf of mesh stays put, it will if you don't move it around or pull at it. Lay the pinched ribbon right on top of the pouf and re-secure the twist with a couple of turns. This way your ribbon fits snugly down into the mesh and doesn't look like it just hanging on the outer edge. Once you have everything secured, tuck the ends of the twists to the toward the inside of the Work Wreath out of sight.
You can secure your bow the same way, or if you made it with longer floral wire or pipe cleaners, you can secure it to the Work Wreath frame.
Positioning the bow is strictly a preference. Try it out in different places and choose where it seems to look the best. It helps to get an idea of where you plan to place the embellishments before you start securing them. This wreath has three primary embellishments....the bow....the flower...and the initial. Seems like odd numbers work out better most of the time.....just depends on what you're making and the look you wish to achieve.
Flowers on stems can be wired directly into the Work Wreath frame. Lightweight items like the initial can be hot glued or secure with fishing line. It just depends on how permanent you want to make your wreath and if it's going to be on your front door with exposure to the elements, or hanging on an interior wall.
Some suggestions for embellishments are listed below:

Metal Flip Flop with Hook
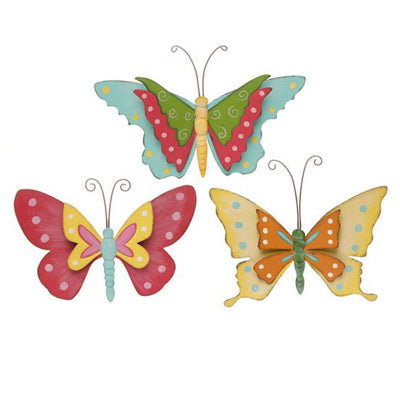
RAZ Multicolored Butterflies
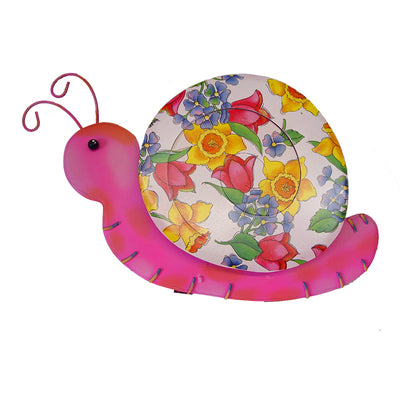
Everybody needs a big pink snail)))
So, if you've been thinking about "making one of those wreaths" you've been seeing all over Facebook or in your neighborhood....take the plunge and get started. It's easy and fun! But I warn you.....it's addictive)))
*Wreath and images by Gina Small of All About You Designs