Repost of a favorite project from a few years ago))) The ornament products will no longer be available, but you can improvise with new things that are in stock.
Halloween is a great time to do activities with children. This Halloween Tree is inexpensive and very easy to make. Lets get started!

Halloween Tree Made of Branches
Items Needed:
- Branches
- Floral tape (or duct tape, or something similar)
- Spray Paint
- Cutters
- Plaster of Paris
- Water
- Pot
- Decorations

Items Needed
The first thing we had to do was find the branches. The absolute best branches would come from an upturned tree stump. The roots of a tree are gnarled and twisted. It's not always easy to find however......so look for branches that resemble a tree form. You may have to take 2-3 branches and put them together to form your "tree." Choose branches no more than 1" at the widest part and around 36" tall.
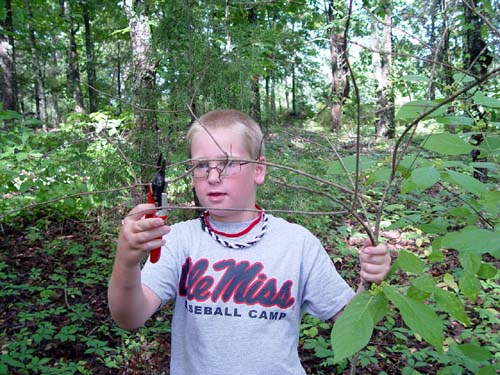
Branches
We used a backyard picnic table as a work area. Take the branches and arrange them to resemble a tree. If using green branches, remove all the leaves and tiny little twigs. Final shaping can be done later. Once you have them together in the shape you want, take green floral tape and start wrapping around the branches to hold them together. Narrow duct tape, or freezer tape will work. Floral tape stretches a little and makes a good snug fit. Once you have the branches taped together, do a final measure with your pot. Our tree had to have another 6" cut off from the bottom. It just depends on what size tree you need, but you don't want something so tall that it tips the pot over.

Floral Tape
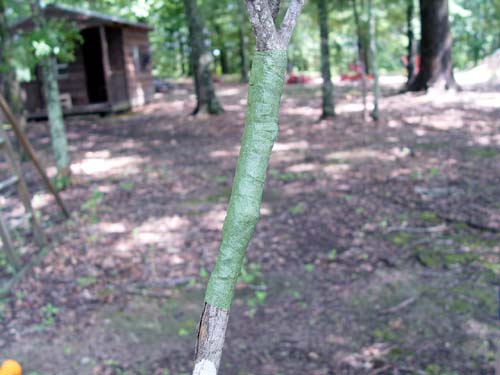
Floral Tape
Next, spray paint the tree with black paint. If you find a great single branch, you wouldn't have to paint, but black paint covers up the taping well. Dark brown, gray or any color could be used. Kids love to paint! This is a great opportunity to turn them loose. Our only problem was that once they painted the tree, they wanted to paint the sand box toys, the table and anything else that wasn't moving! But we stayed focused and only painted the tree for today. Have some paint thinner handy for cleanup.

Painting Branches

Painting Branches
Set the tree aside for drying and proceed to mix up the Plaster of Paris. The directions are on the box. We just started mixing by trial and error until we had a thick cake batter consistency. Use something disposable for stirring. Be careful not to put too much water. Better to be too thick than too thin. You need a pot or container without a hole in the bottom. The container you choose doesn't have to be one for show, it can be anything - a tin can even. Once you have your tree seated in the container, you could put the container and all down into your good pot, cauldron or even a hollowed out pumpkin!
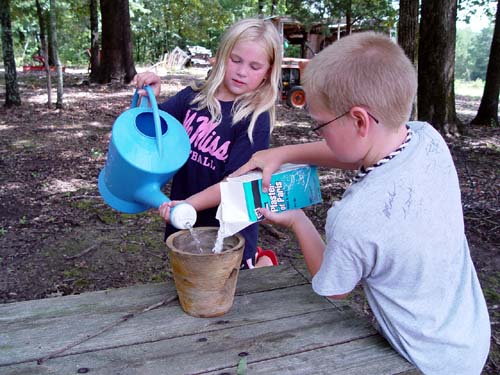
Plaster of Paris
Once you have your container about 1-2 to 3/4 full, position the tree trunk in the center of the pot. Wait until your tree has fully dried. I think you can see by the expression of the faces, that ours was still a little sticky. Mississippi humidity!

Seating Branch
Leave the tree for the Plaster of Paris to dry. It will take at least 30 minutes. We placed some loppers around the tree to hold it in place while it dried.

Plaster of Paris Drying
This was a perfect time to cool off and take a break! During this time, we decided on what we were going to decorate the tree with. Naturally, since we sell RAZ Halloween decorations this is where we started!
Once the tree was dry, we filled the top of the pot with spanish moss and hung a little off some of the limbs. We didn't fully decorate the tree, just added a few things to give you the idea of how it would look. Will take more photos at the Halloween party when its complete. We also plan to use purple mini lights with black wire on the tree.

Halloween Tree
The large
ball ornaments are from RAZ. They come in orange, black, green and purple and have Boo or Spooky written on them. They large, but lightweight. The
Black Feathered Owl in the top of the tree made of feather and paper and very lightweight. Three whimsical
mice made of resin are perfect positioned around the pot.

RAZ Black Feathered Owl

RAZ Mice

RAZ Halloween Buzzard
The large Feathered Buzzard from RAZ is perfect for Halloween decorating, though I think we've actually sold more at other times than Halloween! Purchased for gag gifts I suppose. Though one customer said she had hers positioned on the cabinet over her stove........Road Kill Cafe I guess))) (If you're not from the South, you may have trouble figuring that one out.....e-mail me)

RAZ Feathered Vulture
The Buzzard is 18 1/2" and made of feather and paper. It's very realistic looking.....kinda of makes you nervous just being around it!

RAZ Vulture Back

RAZ Jack O'Lantern People
The RAZ
Jack O'Lantern People are a perfect side companion for the tree. They are whimsical and have these silly grins on their faces. It is 17 1/2" tall and from the Pumpkin Patch collection of RAZ Imports.

RAZ Jack O'Lantern People
Making the Halloween Tree is easy and inexpensive. The Plaster of Paris step could be omitted and just fill you container with sand, dirt, or rocks. Using the Plaster of Paris though will make the tree more secure and you can actually re-use it for a few years. We'll post more photos later and show you what it looks like fully decorated and lit up.
If you have any questions or comments - please leave them and we will followup.
Happy Halloween!


