New Horse Head Work Wreath frame recently came in and we finally got a chance to do a tutorial))) We created a Horse Head Wreath Kit for this tutorial and once the kits have sold out, we will leave the tutorial up since you can create it using different products.
Horse Head Wreath Kit - Sorry this kit is sold out and no more will be available.
Evergreen Horse Head Work Wreath - 1 (Burlap Horse Head Wreath is available)
Redwood Pine Branch - 12 (not on website)
Long Needle Pine Branch - 3 (not on website)
1.5" Burlap Ribbon - 1 (RA1367)
Other items you will need: small black zip ties, scissors, wire cutters, needle nose pliers. One or two large zip ties to make a hanger for the back.
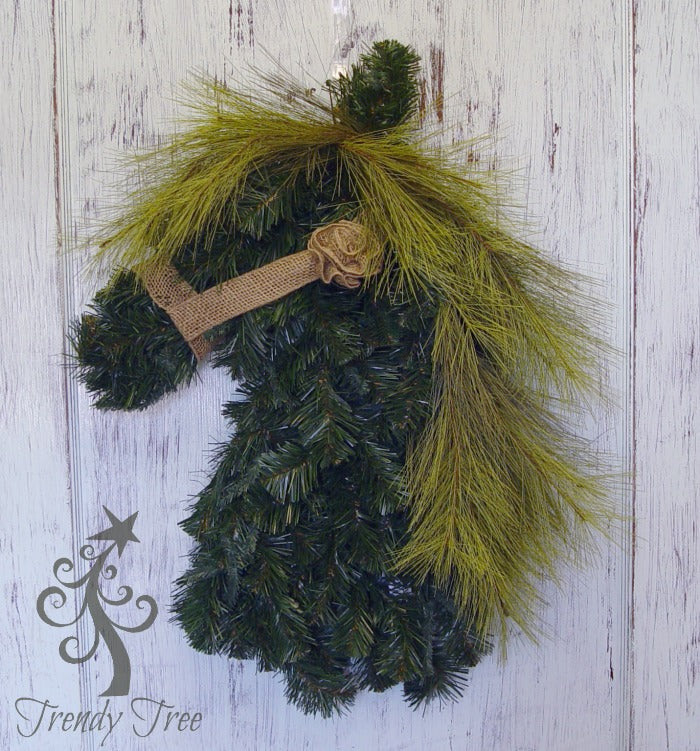
The Horse Head wreath is made on the Pencil style and evergreen in color. There is also a Burlap Horse Head wreath for sale on the website. We will do another tutorial at some point using the Burlap Horse Head and a different style of mane for it.
The kit includes 12 Redwood Pine Branches that are much like the limbs on a Christmas tree. Eleven of these branches were used to cover the wreath form. We started by attaching the branches at the bottom and working upward. We used three branches across the bottom and attached them to the form using the twist ties that were on the form, or using small zip ties in areas where there was no twist tie. You may have places where you don't use the twist ties and they can just be tucked to the back out of the way.
We did three branches across the bottom, three more branches for the next layer positioning the tips of the second three branches over the ends of the first three branches. Then narrowed down toward the next with just two branches.
We used one branch for the nose and shaped it into sort of a square before attaching. The tip of the branch was pointed to the outside with the stem of the branch toward the middle. Two more branches were used to fill in around the top. This left one branch that was used to make the ear. The limbs of the last branch were snipped off as singles and two pieces twisted together, shaped into a triangle and secured at the ear. One more single stem was used to fill in the center. The remaining single pieces can be used to fill in any gaps when you're done.
Flip the wreath over and work from the back securing all the branches well using tiny black zip ties in areas where there isn't a twist to use. Most of the branches will need to be secured in two places to hold well. The stems of the branches are pretty long and sharp and need to either be shortened, or turned to the inside of the wreath with the needle nose pliers so they won't scratch your door or wall.
Next take a piece of the 1.5" burlap ribbon and tie a piece around the nose. You could hot glue this if you wish, but we just tied it in a knot on the back and later you can secure the raw edges of the ribbon with a zip to so they won't slip out and show.
(Sorry some of these images are not very clear, they were taken from the video.)
Next cut a piece of the burlap ribbon about 1.5 yards and slip one end under the nose piece and pull the ends to back behind the ear. Find a place on the back side of the wreath to tie the burlap ribbon so it is snug, but not so tight that it pulls on the nose ribbon. Again, ends can be secured with zip ties when you're done.
Shape your wreath by smoothing down edges, spreading branches out where you need to to fill in gaps.
Next we added the long needle pine branches by snipping each pine needle branch off the main limb. There will be three pine sprays in your kit. Some of the pine needle branches will be longer than others so use the shorter ones in the front for bangs and the longer ones down the neck.
We just slide the long pine needles branches in place to figure out how they needed to be positioned first. You also can make a hanger for the wreath by using a large zip tie and placing it right in front of the ear for the wreath to hang straight.
Once the pine needles were positioned, we turned the wreath to the back and secured them with tiny black zip ties or twists where appropriate. It was easier to place the needles with the wreath in the hanging position.
You probably could speed this process up by using hot glue for attachment, but we felt securing everything with additional zip ties would make it more secure and allow more freedom to adjust things afterwards.
Next we added a little concho to the halter by making a small rosette out of the burlap ribbon. Here's a link to a post we did a while back showing details on making these little flowers. Just click on the image for the blog post.
When you're finished, check the back again for sharp edges turn them to the inside or cover them with foam tape to protect your walls or door. Fill in any gaps with your extra evergreen pieces if needed. The horse could be decorated easily for the holidays by using colorful ribbon for the halter, or jingle bells....a pretty summer flower for the concho...lots of ways to change him up. The overall measurement was about 27" ht and 20" width.
Hope you enjoyed the tutorial.....ride em' cowboy!