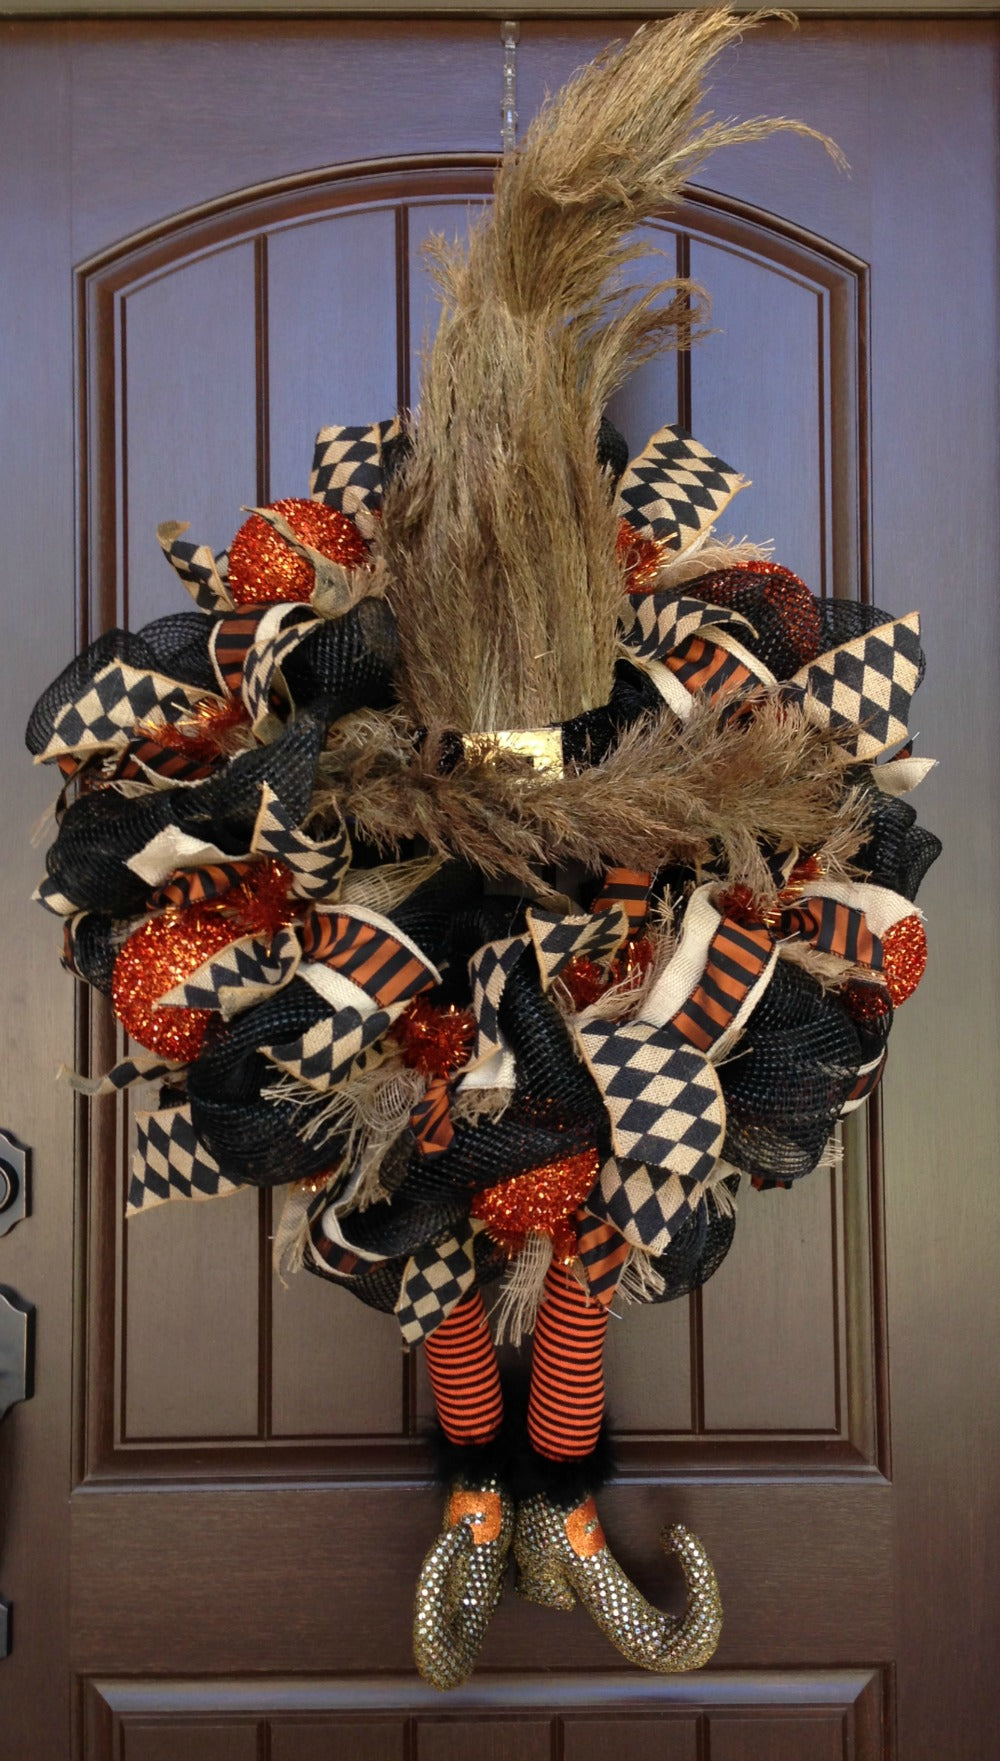
Grassy Witch Hat with Legs Halloween Wreath Tutorial
Grassy Witch Hat with Legs Tutorial 2016
New tutorial we did using this unique grassy witch hat. We added the with legs with their burnished gold color shoes to give this wreath a bit of a primitive look along with the primitive style ribbons.
Please note that this tutorial will be left up even out some or all the supplies are sold out since you can apply the basic directions to other projects and just choose similar size materials.
SuppliesXX749538 24" Copper Metallic Work Wreath
RE104302 21" Black Vertical Line Deco Poly Mesh SOLD OUT NO MORE WILL BE AVAILABLEXB97010-15 10" Dark Natural Frayed Edge Burlap Mesh TEMPORARILY SOLD OUTRA1265 2.5" Textured Sackcloth Beige Ribbon
RA21295T 1.5" Black/Orange Stripe Faux Dupioni SOLD OUT - NO MORE WILL BE AVAILABLE
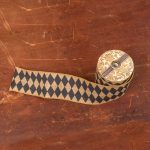
SS13916 3" Natural/Black Harlequin Burlap SOLD OUT - NO MORE WILL BE AVAILABLE
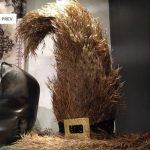
AAF749 Grassy Witch Hat SOLD OUT - NO MORE WILL BE AVAILABLE
239903 26" Orange/Black Witch Legs with Burnished Gold Sequin Shoes SOLD OUT NO MORE WILL BE AVAILABLE
XY625234 4" Cut Foil Copper Ball Ornaments (5) SOLD OUT NO MORE WILL BE AVAILABLE
Many of the items used on this wreath are now sold out and some we are unable to re-stock. You can select other styles of black mesh and other Halloween ribbons. Others styles of witch legs/hats may also be available. The tutorial will be left up since basic instructions can be followed using other styles of mesh and embellishments.
Summary
The 21" Vertical Line Black mesh was attached to the 24" Copper Work Wreath using the pouf technique. Poufs measures 14"
15" Lengths were cut from the 10" Dark Frayed Natural Burlap and gathered into ruffles. A ruffle was attached into each twist by opening the twist and placing on top of the pouf. You could add more of the burlap if desired.
We use a 24" x 36" self healing Omnigrid Cutting Mat and a 45mm Omnigrid Rotary Cutter (these are available at Amazon and we have included our affiliate links.)
24" Lengths were cut of the 2.5" Textured Sackcloth ribbon along with 24" pieces of the Orange/Black Faux 1.5" Dupioni. The striped ribbon was layered on top of the sackcloth. The ribbons were pinched about 5-6" from the ends and a twist opened and secured right on top of the pouf and the frayed edge burlap. The opposite end of the 24" pieces were pinched and secured in the next twist. The ribbon should lay loosely over the pouf, if it is too tight, pinch a shorter amount. These strips were secure all around the outer and inner ring.
The 3" Natural/Black Harlequin ribbon was cut in 13" strips. All the ends of the ribbons were just cut at an angle. The 13" pieces were pinched in the center and secured into each twist by opening the twist again, laying the ribbon piece down and this time securing the twist with 3-4 turns since this was our last layer.
The Grassy Witch Hat was secured directly to the work wreath frame by making a small hole in the cardboard brim, close to the body of the hat and securing (loosely) with a chenille stem. The cardboard isn't very thick and securing too tightly would probably tear a hole in it fairly easily. Then clear fishing line was used around the top of the hat and secured to the work wreath frame to keep it from tipping forward. The hat is a little messy to work with and do some shedding (natural dried grass).
This wreath would work best for an inside product. Don't think the hat should be exposed to the weather. But it just all depends on your location. I could use it on my back porch since it has a wide overhang roof.
The 4" Copper balls were secured with chenille stems. You could hot glue also. We just ran a chenille stem through the hanging string and wound the balls around the chenille stem until it was snug, then secured the chenille stem to the work wreath frame.
The wreath measured about 29-29" before the addition of the hat or legs. The depth was 9-10"
Be sure to subscribe to our YouTube Channel so you won't miss our next tutorial coming out!
SaveSaveSaveSaveSaveSaveSaveSaveSaveSaveSaveSave