Reposted 2/23/13:
The grandchildren decided today that we needed a pinata for Memorial Day. Memorial Day which is 3 days away.......you know how the requests from grand-kids are)))
Well, typically to make a pinata I start with paper mache mixture to build the form and this usually takes 2-3 days to dry completely. Since we didn't have that kind of time, we tried to come up with something we could create from cardboard.
We came up with a Firecracker shape by cutting a piece of cardboard about 24" in width. Rolled it up into a cylinder shape and taped it together.
So, now we have a Firecracker 24" in ht and about 12" in width. 
One good thing about the Trendy Tree shop, we have plenty of cardboard, tape, boxes etc. So after we rolled up the cardboard, we cut circles to fit in the top and bottom from old boxes. Our cuts were not perfect....but they worked.

A false bottom was created since it was such a tall pinata I didn't want the weight of the candy to make the form sag.
The candy will be placed closer to the top.....noticed AJ making a mental note of this so he'd know where to hit it.
Next step was to decide how to decorate. We opted for basic red, white, blue and marked off two different designs on the cardboard. One side with horizontal stripes, the other with vertical. Simple enough.

Next we were ready for the tissue paper fringe. These are easy to do but you may have to experiment a little to get your cuts just right.
Basically just remove the folded tissue paper out of the bag and cut across the top about 2" down from the top without ever unfolding it. Then make lengthwise cuts through the folded tissue paper about 1/8" to 1/4" in width. Only make your cut to within about 1/2" of the top so that when you unfold it, you will have a strip
of fringe. 
Start at the bottom of your project and use glue stick on the cardboard. Gently unfold the paper fringe and stick down. Always work by adding the next layer of fringe overlapping the last.
You want to make sure the strips are close enough that your cardboard isn't showing through. It doesn't have to be perfect and bare spots can always be covered up. Save yourself some time and frustration.
Buy Elmer's Glue Stick......it lasts longer. It does dry quick so work by pasting a few inches at a time....paste, apply fringe. I like to work left to right to left, but there is no right or wrong way. You essentially just want to cover the cardboard.


At this point, we were ready to add the candy.
Choose small individually wrapped candies. This pinata was just going to be for the three grandchildren so I only used about 3 varieties.....bubble gum (sour ball kind), Laffy Taffy and Jolly Ranchers.
Pinatas I've made for birthday parties with larger groups of children can hold 2-3 pounds of candy and have been made for that weight. This one is large, but not designed for heavy candy.

Usually I like to use Tootsie Roll Pops because once they fall out, the kids can find them quick to pick up.
Ready for closing!
Usually I add the twine to hang the pinata from at this point. The string has to be strong enough to withstand the beating and still not pull out of the pinata. This Firecracker Pinata was quickly put together and there is no way that the circle lid would hold the string for hanging.
So this one will be hung horizontally by tying some twine around both ends.....picture frame style, and suspending from that. It is not shown in the photos.
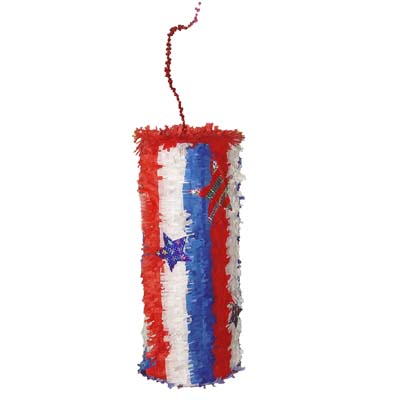
Before the lid was secured, we took a RAZ sparkle berry spray and cut a couple of branches from it. Twisted the branches together and pushed through the circle lid. The spray was taped underneath the lid. The lid was secured with tape and covered with fringe.

All done! To add just a bit more sparkle, we cut out some star shapes from a patriotic banner (left over from another project). Before the stars were cut, I added some adhesive paper to the banner, then cut the shapes. This gave a little more body to the stars. They were glued in place with glue stick.


Now......where is that plastic bat??