This weekend we worked on another Easter wreath using a 24" Light Brown wreath frame, poly/jute mesh, cotton windowpane mesh, paper ribbon and some jute open net ribbon. We put together this wreath, but have several different options that you can use to create this look. Lets start with our supplies first.
Supply List YW2024 Light Brown Wreath Form 24"
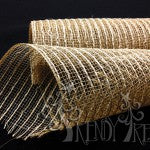
XB93210-15 Natural Poly/Jute Combination Mesh 10" - 2 rolls
RE500029 Yellow Cotton Windowpane Mesh 21"
RR700767 Multi Blue 4" Paper Mesh
QXB330110 Fuchsia Burlap Net Ribbon 10"
MT18217 Burlap Easter Egg Wall Hanging
We started with the Light Brown Wreath Frame. This wreath frame is very similar to the Craig Bachman Work Wreaths, and made on the same style and sizing. The largest of the metal ring measures 15" in diameter and with the addition of product and style of your wreath, your finished project will be 24" or larger.
This wreath turned out to be about 30" The wreath has about 18 twists, with 8 on the inner ring and 10 on the outer ring. Yours could vary a little bit and the twists may be a tiny bit shorter than the twist on the Work Wreaths, but worked fine.
The mesh we chose, you've seen us use many times before, but it's just a great natural background that blends well with so many otherproducts. It's a 10" natural color poly with jute thread. This mesh is 10" in width and 10 yards in length.
We cut out strips 10" in length. It did not take two complete rolls to finish this product, we probably had half of the second roll left over.
We use a 24" x 36" self healing Omnigrid Cutting Mat and a 45mm Omnigrid Rotary Cutter (these are available at Amazon and we have included our affiliate links.)
Take the 10" strip of natural poly/jute mesh and pull slightly on the diagonal.
Then grasp the mesh in the center and pinch it making sort of a bow look.
This is very similar to the "flower petal" style or spiral curls. Create clumps of three curls or spirals to attach into one twist on the wreath frame. You can use a clothespin or clip to hold your curls until you get three made.
Secure the clump of three into a twist, closing it with only a couple of turns. Continue adding clumps of three until you have worked all the way around the inner ring and the outer ring on the wreath frame.
It doesn't matter if you start on the inner ring or outer ring, just start on whichever works best for you.
When you have secure the mesh clumps, push them toward the outside of the wreath frame.
Next we added in some curls using the same technique with the Yellow Cotton Windowpane.
Normally we never say split 21" mesh or other product to use in a 10" fashion. But the cotton windowpane mesh is a very open weave and we chose to split it right down the middle lengthwise, and then cut 10" strips same as the Poly/Jute.
We added one of the Yellow Cotton Windowpane curls to each twist on the inner and outer rings. To do this, it's important to open the twist, may sure your previous mesh curls don't pop out, and lay the yellow windowpane curl on top of the natural mesh, re-secure the twist with a couple of turns. Still no need to close with 3-4 turns until you get to your last layer.
Next we cut strips of the Multi Blue 4" Paper Mesh Ribbon into 24" pieces. Cut the ends of your strips at an angle. All mesh ravels and paper mesh is no different, but I think there is less raveling with cutting the ends of your ribbon at angles versus a chevron cut.
Pinch the ribbon about 3-4" from the end and open up one of the twist, making sure the natural poly/jute curls and the yellow windowpane mesh curls stay in place, lay the blue paper mesh ribbon strip in the twist and close this time with 3-4 turns since this is the last layer of product we will be using.
Let the ribbon lay over the curls and attach the other end of the ribbon the same way, pinching 3-4" from the end, open up a twist and re-secure.
In hindsight, it might have been easier to attach the egg shaped Easter Wall Hanging to the center of the wreath before doing the mesh ribbon.
We worked around the inner ring and outer ring with the blue paper mesh ribbon. Had plenty of this ribbon left over to do another project or two.
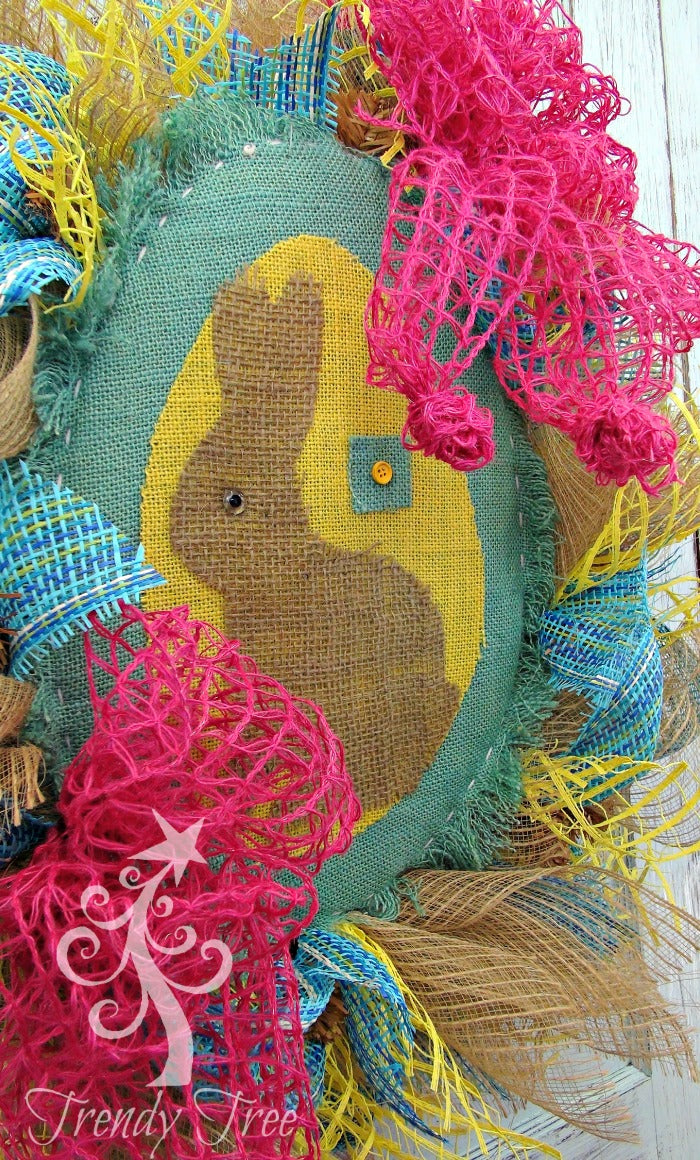
Next we attached the burlap Easter Wall Hanging. This wall hanging has a cardboard inner filling, so it would be best to use this product on an interior wall or in a very well protected area. The wall hanging is covered in burlap and has the shape of a bunny on the front and some buttons on the back.
To attach it to our wreath frame, we slipped a small zip tie through the burlap at the top and bottom of the wall hanging. Then we used another zip tie to attach the wall hanging to the wreath fame in two places.
Next we decided to add in some fuchsia by using the Fuchsia Burlap Net Ribbon.
This jute ribbon is 10" in width and 5 yards in length. It contains wire and is very easy to shape.
We used the whole roll to make two loop bows, one larger than the other and just secured them to the top and lower edges of the wreath using chenille stems.
This tutorial was easy to do and you have enough product left over in the Yellow Cotton Windowpane and Multi Blue Paper Ribbon to do more projects.
We're also going to list some other suggestions that you could use to make this same wreath and just change up your contrasting items. Just click on the links to see all the colors available in the product.
Cotton Windowpane MeshPaper RibbonYellow Burlap Net RibbonOrange Burlap Net Ribbon