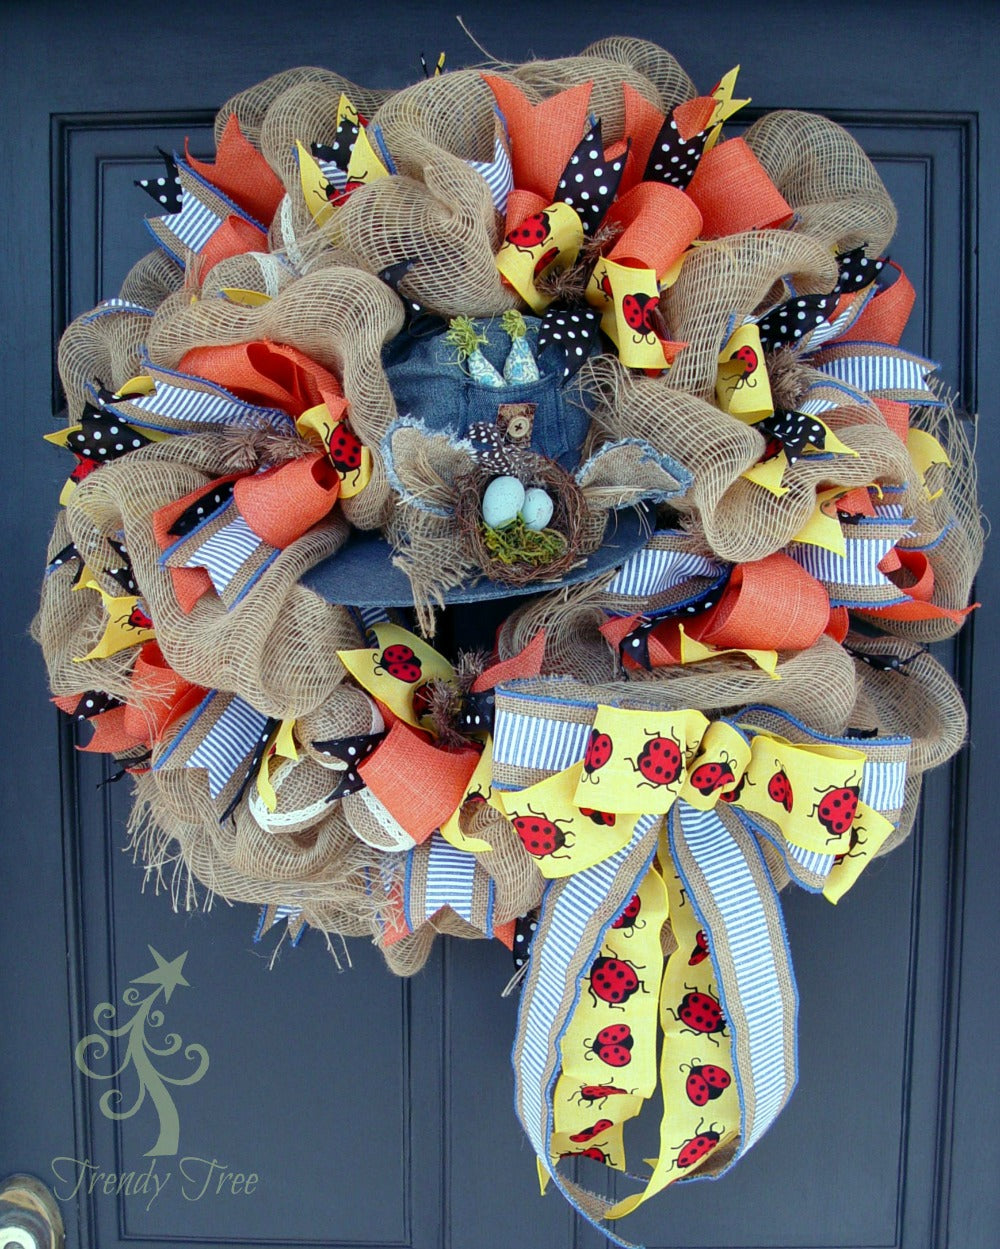
Here's a new tutorial using a Denim Bunny Hat that we just made. It's made with the pouf technique.
Supplies
A limited number of wreath kits that contain the supplies needed will be available while supplies last. The tutorial will be left up even if items are sold out, since you can apply this technique and use other materials. (Kits are sold out)XX7488W4 24" Burlap Work Wreath
XB970-15 21" Dark Natural Frayed Edge Burlap Mesh
M37 Denim Bunny Hat
E3506620 RAZ Rustic Burlap & Lace Easter Eggs (Sold out but other eggs available)
RG121294 Salmon 2.5" x 10 yd (not available on website)
RG100002 1.5" Black/White Polka Dot (not available on website)
RG848603 Natural Denim/White Burlap Ribbon 2.5" x 10 yd (not available on website)
Q617140-22 Daffodil Ladybug 2.5" x 10 yd
The mesh we chose for this project is a combination of poly and jute. It has a poly base (plastic) with jute threads and is frayed on each outer edge. The frayed portion is about 2" in length.
The 24" Burlap Work Wreath actually measures 15" across the largest metal ring. With the addition of mesh and other products, the finished wreath can measure anywhere from 24" to 30" in width.
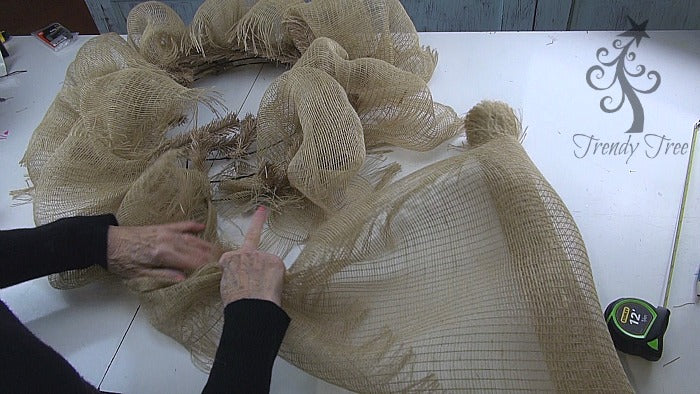
First step was to gather the mesh about 3-4" from the end and secure in one of the twist on the outer ring of the Work Wreath. The raw end of the mesh should be tucked to the inside of the wreath.
Next we measured 14" of the mesh and gathered this material up and secure in the next twist on the outer ring.
Continue measuring 14" and making poufs all around the outer ring of the Work Wreath.
When you work all the way around the Work Wreath with the poufs and reach your starting twist, open up that twist carefully making sure your first pouf stays in place, and secure your last pouf right on top of that first one.
Do not cut the mesh, just pull it up snug and attach to the closest twist on the inner ring.
Once you have secured your mesh in that closest twist, continue to measure 14" and make poufs around the inner ring. When you have worked all the way around and are back to the beginning twist, open that twist and secure the last pouf in the same manner as on the outer ring.
At this point you are ready to cut your mesh from the roll. Cut it off leaving a tail of 4-5" You will have a couple of yards left over from the mesh roll.
Tuck your raw ends to the inside of the wreath.
Flip the wreath over and find your beginning and ending raw ends, twist them together and secure them to the Work Wreath frame using a zip tie or a chenille stem.
Snip off the zip tie end with some wire cutters and push the cut edge toward the inside.
Some wreath makers may use up all the mesh in a roll and you can try this. We did the math once to use up every inch of mesh instead of having a couple of yards left over. But to us, the poufs were a bit big and floppy so we have elected to make our poufs 14". It just all depends on what look you are going for. Sometimes you might want to make them smaller than 14"
Once you have your poufs done, you can make any adjustments necessary if the poufs aren't about the same size.
Next, it's a good idea to decide of placement of your embellishments, just to get an idea of how you want to decorate your wreath.
We planned to use the hat in the center of the wreath and maybe cluster the RAZ Rustic Burlap & Lace eggs in two clusters of three eggs.
Next we decided on how to use our ribbons. It's always a good idea to take some scrap ribbon and test your lengths before you start cutting your good ribbon. Ribbons can be applied in several different ways and you can use as little or as much ribbon as you like. We like to always use wired ribbon because you can fluff it easier and it will hold it's shape better. Also we try to use ribbons of different sizes and contrasting colors.
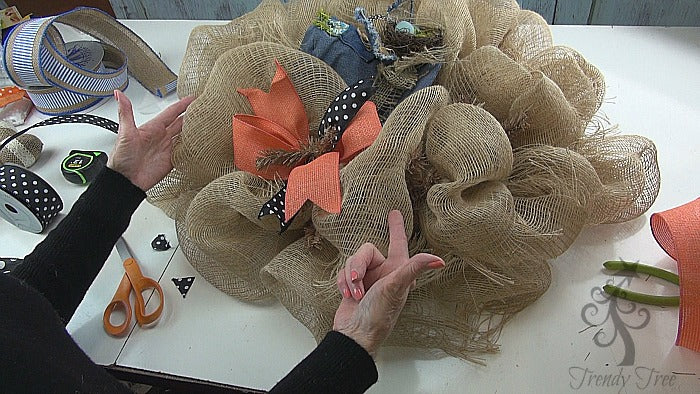
We decided to make a simple bow with about 34" of ribbon int he salmon color. The roll yielded about 10 bows which was enough to place a bow in every other twist. This left one bow left over. So we just tucked it in somewhere so as not to waste the ribbon.
The 1.5" black/white polka dot was used as a contrast on top of the salmon bow. The polka dot ribbon strips were cut 12" in length and ends finished off with a chevron cut as were the ends of all the ribbons we used.
The natural and denim stripe ribbon was cut into 12" strips, pinched in the center and placed in every other twist opposite from the salmon bow.
We always start with a bow plan, and then seem to change things! We felt like it needed more ribbon, so we went back and added more denim strips and also added the daffodil ladybug ribbon for more bright color. We just kept adding ribbon strips until we were satisfied with the look. When ribbon strips were added to the salmon bow clusters, we opened those twists, removed the bows and placed the ribbon strips on the bottom, then re-secured the twists with 3-4 turns. It's always important when adding things to your twists, that you open the twist completely, place the ribbons and then re-secure. If you add your ribbon to a twist without opening it, your ribbon will be two far out on the edge of your wreath and will be come loose and floppy.
We placed some scrap mesh inside the denim hat to shape it. It's made out of fabric with a cardboard brim. We ran a thin floral wire through the fabric portion of the hat in the back, and then secured the wire to the Work Wreath frame. You may need to hang your wreath on a door to adjust the placement of your hat. You also may need to secure in more than one place. You could also punch a small hole in the brim of the hat to help secure, but we try not to damage items permanently when we do our tutorials because many times we take the items apart and re-use on another occasion. The mat in the image is a 24" x 36" self-healing Omnigrid Cutting Mat.
To attach the RAZ Rustic Burlap & Lace Eggs, we just twisted the burlap hangers together and secure with a small floral wire. The secure the cluster of eggs to the Work Wreath frame with the wire.
We used all the salmon color ribbon for our bows, but had other ribbons left over. We made a two loop bow with the natural and denim burlap stripe and the ladybug ribbon and attached it to the wreath with floral wire.
The overall measurement of this wreath once completed was approximately 30" Once you've finished your wreath, always check the back to make sure no sharp edges from the twists. zip ties, etc are where they might scratch your wall or door. Clip strings and fluff your ribbons. You don't have as many strings to clip when you use the pouf technique as compared to the ruffle technique.
Be sure and subscribe to our YouTube channel so you won't miss our next tutorial coming out soon!
(post contains affiliate link)
Save