This is a quick tutorial to show you how to make these huge, billowy Deco Poly Mesh Flowers. It measures about 32-35" in width and took one roll of 21" x 10 yards Deco Poly Mesh. I'm always hesitant to do a tutorial with the first attempt at anything because you KNOW you're going to get better at it with more practice)))) But, here it anyway.....not bad for a first attempt I think. And it was sort of a fly by the seat of your pants experiment. When we were at the Craig Bachman Imports Showroom a couple of months ago, they did a quick demo on making the flowers, but didn't complete it all the way, just showed us how to make the petals so we had to figure out how to do the rest......and you may have a better way and if so, we would love to hear from you)))

We used one roll of Deco Poly Mesh that just happened to be on the craft table. It's the least expensive type of Deco Poly Mesh in the 21" width. We could have chosen something with a heavy foil or even a textured mesh like Vertical Line or Basket Weave. But since this was a practice run, we wanted to use the least expensive))) The
Pencil Tie with Ball is a new product that we've added recently. We have the ties with green ball, red ball and a snowed pinecone.
Pencil Ties comes in all sorts of lengths and ball size. These are 6" length with a ball that is about 2.75" in width.

The first thing we did was measure out squares of mesh. Really couldn't remember what size the designers at CBI had suggested, but figured a square was the most appropriate. Since the mesh is 21" in width, we cut squares 21" in length. We cut up about 3/4 of the roll and just laid the rolls to the side for now.
To make measuring ad cutting easier: Use a 24" x 36" self healing
Omnigrid Cutting Mat and a
45mm Fiskars Rotary Cutter (these are available at Amazon and we have included our affiliate links.)

Deco Poly Mesh has a natural tendency to roll up when its cut. For this project instead of rolling up the pieces like you do for a curly wreath, you grasp the mesh at the corners, opposite the selvage side and give it a little pull on the diagonal.

The pull will make the mesh start to roll up, you may have to help it a little bit. And it really helps to have an extra pair of hands when doing this project because you need someone to hold the "petals" after you get the pulled.

Pinch the mesh in the middle and .....hand it to someone to hold))))

If you're working alone, you can use a chenille stem to hold it temporarily. You can just add the next petal to this same chenille stem, but the clumps add up pretty quick.


After about 12-13 "petals" are ready, hold them in your hand all pinched together in the center. Take one of the Pencil Ties with Balls and wrap around the center where you had the petals grasps a couple of times.
Then take another Pencil Tie with Balls and go around it again. The Flower looked okay at this point, but did seem to have a "halfway" separation. So, we cut the remaining mesh on the roll which yielded about 5 more squares and prepared them.

This image shows the flower from the back and you can see the slight separation after the Pencil Ties were first attached. The last batch of "petals" about five I believe, we placed in the opposite direction from the others and secured with the third Pencil Tie with Balls. Applying the third tie was pretty tight. A little longer tie might have worked easier.
And, you wouldn't even have to use a Pencil Tie with Balls......you could secure with heavy gauge floral wire and choose something else for the center of flower. The Pencil Ties with Balls worked great, and made a nice center too. Gold Pencil ties on red mesh makes a beautiful poinsettia blossom.

This is the back of the flower after we finished.

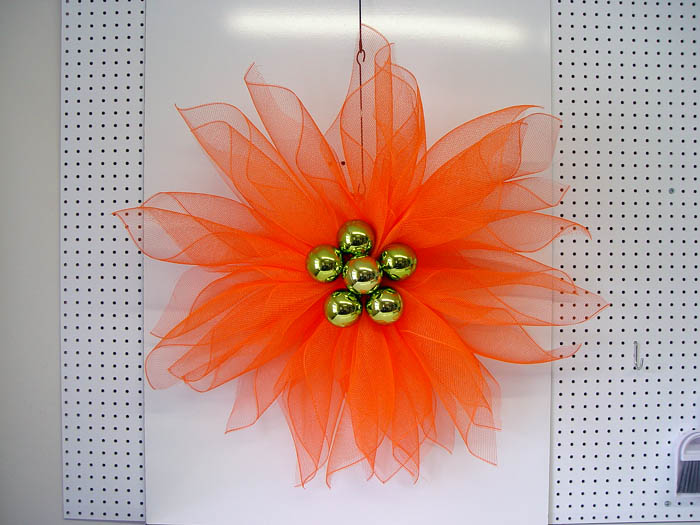
And here is our finished Flower. This technique could be applied with lots of options. You could make a stem and leaves. You could hang from ceilings with clear fishing line. Yellow/Orange would make a great sunflower and you could use a big ornament, grapevine or moss ball for the center. You could use your cardboard roll from the mesh and cover with ribbon for a firm stem.
Well, this was our first attempt at a flower....and if ours turned out this well on a first attempt.....you can make one too)))) We'll experiment with some different textured products and see what happens.....have fun!
This project took less than 15 min total time.
Save