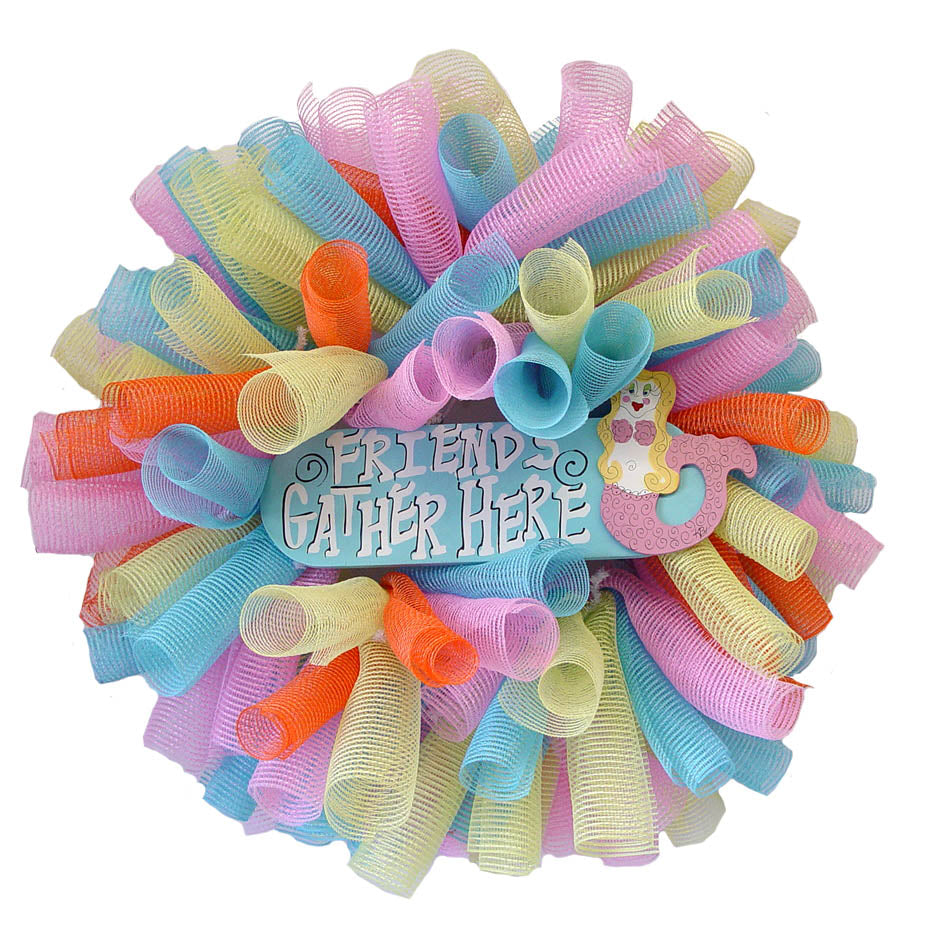
This is a Curly Wreath Tutorial to show you one way to make a curly wreath, there are other ways, but this was the first way we learned so we'll start there. This Curly Wreath results in a really large wreath that measures 32" or so across.
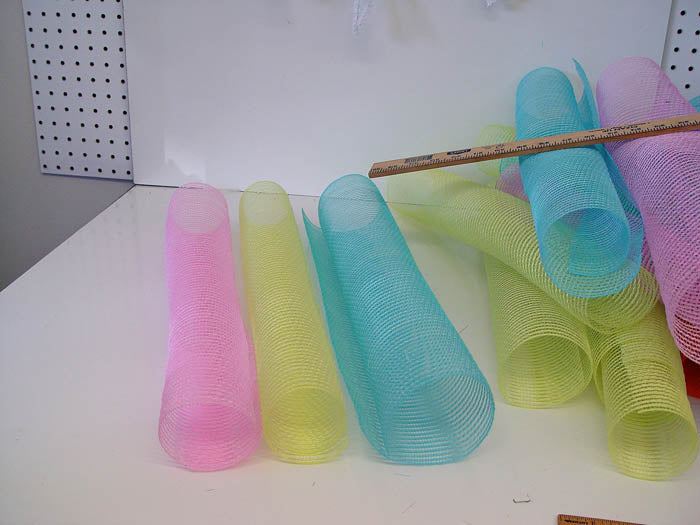
You can make a curly wreath out of most any type of Deco Poly Mesh. The Deco Poly Mesh has a natural "memory" to it and it sort of automatically rolls up once you cut it. We chose the Vertical Line Deco Poly Mesh because of it's nice texture and it isn't quite as see through as plain Deco Poly Mesh. The Vertical Line mesh is 21" in width and 10 yards in length. We chose three colors for this wreath and had a piece of a roll of orange on the craft table that we also used.
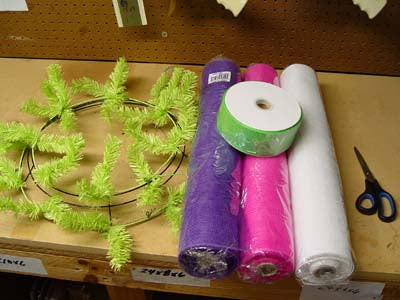
We used a White Iridescent Pencil Wreath, Turquoise, Apple and Pink. The Apple turns out looking almost a yellow in the photographs when used with the pink and turquoise. In hindsight, Lime might have been a better choice.
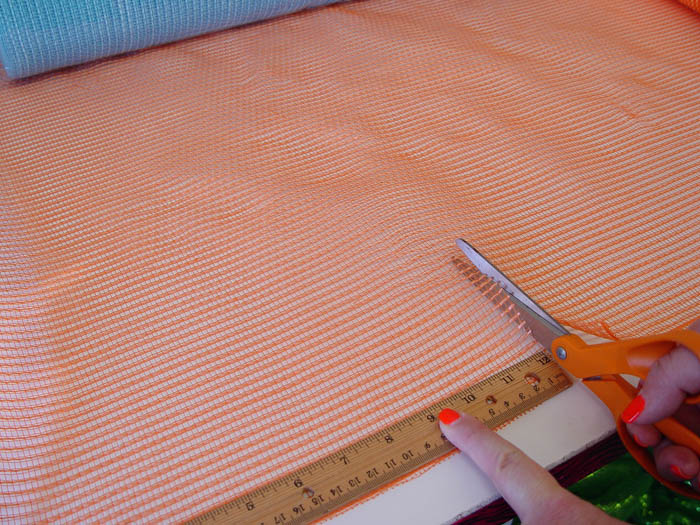
The most time consuming part of this project is cutting the strips. We measured at about 12" for the strips and cut about 17-19 of each color. You can count the number of twists on your Work Wreath and cut that many strips of each color. It won't take the whole roll of the mesh so you'll have some left for another project.
To make cutting and measuring easier:
Use a 24" x 36" self healing
Omnigrid Cutting Mat and a
45mm Fiskars Rotary Cutter (these are available at Amazon and we have included our affiliate links.)
It takes lots of rolls)))
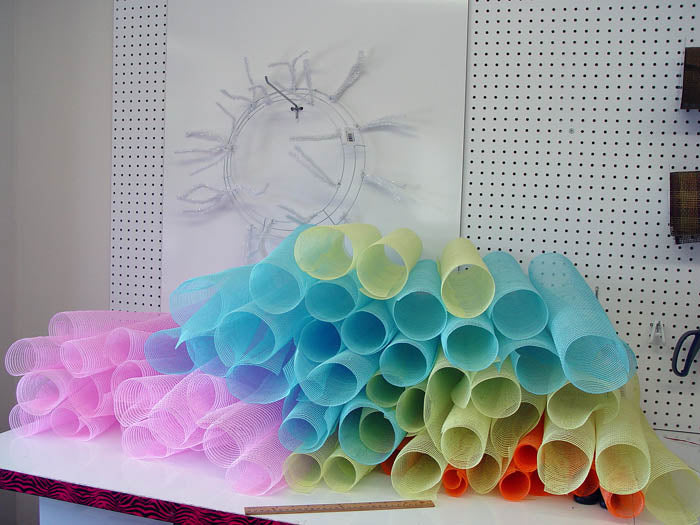
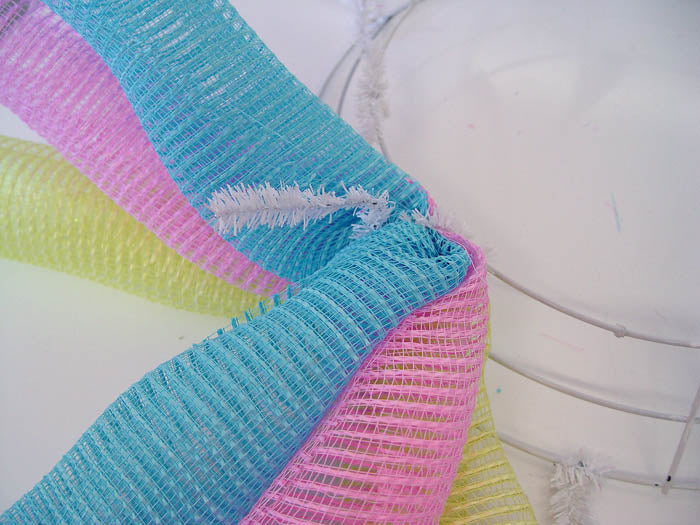
For this wreath, we put three colors mesh together and since we had less number of orange, we occasionally used an orange and spaced them evenly around the wreath.

The rolls will naturally roll up, but you need to roll them a little tighter to get the ready to place in the twist.
Take your three rolls and pinch in the center, lay all three in the twist and secure it with a couple of turns. In some twists you'll have 4 rolls with the orange.
It actually is easier if you start on the outside ring first and then move to the center ring last. Secure your rolls then gently push the ends toward the outside of the wreath. Occasionally a curl will unroll a bit and you have to roll it up again. There will be some raveling too and you'll have to clip a wayward string every now and then. The more you handle mesh, the more it ravels.
If you've completed all the twists and have a gap anywhere that you can see the Work Wreath frame, you can also make another roll and secure it right to the frame.
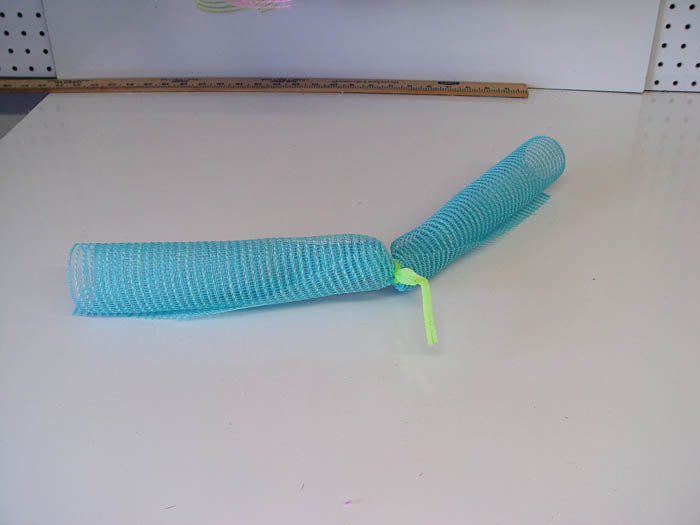
Just choose a color and pinch it in the center, add a chenille stem or floral wire and secure it to the Wreath frame in the bare spot.
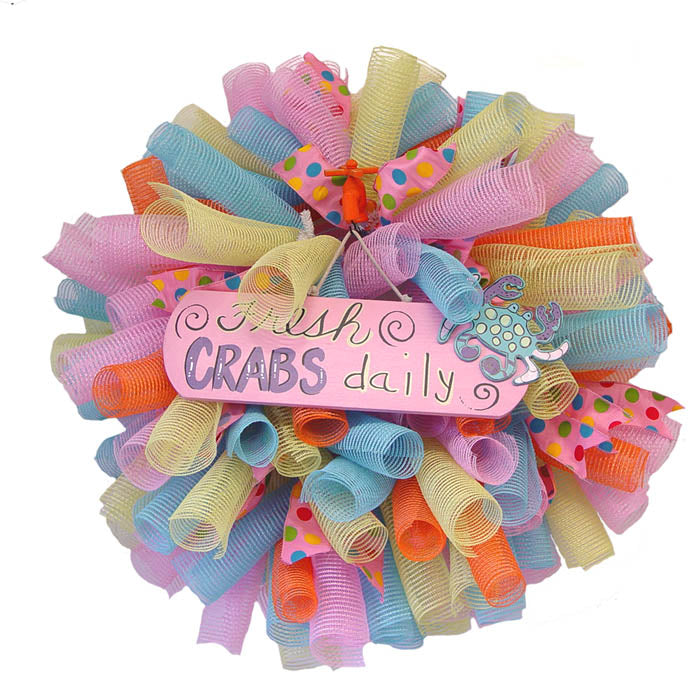 Here's another sign that we have in stock "Fresh Crabs Daily." We also added a few ribbons to the wreath. It really needs more ribbon, but we just wanted to show you the look.
The orange wooden Faucet is a new product which was a good way to hang the sign. It comes in three colors and is actually a yard stake. The stakes are in two pieces so just the straight piece was used here and it was secured to the Work Wreath Frame with a zip tie to hold it in place.

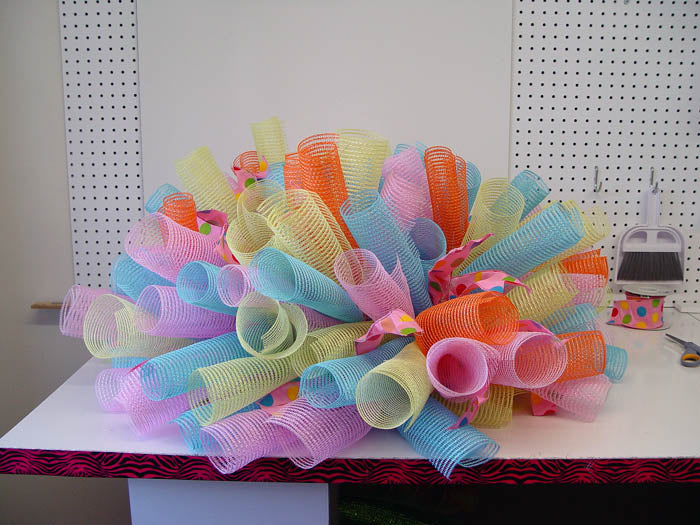
Here's a side view of the wreath to give you an idea of the size of it.
 Palm Tree Sign hanging from the attached Faucets.
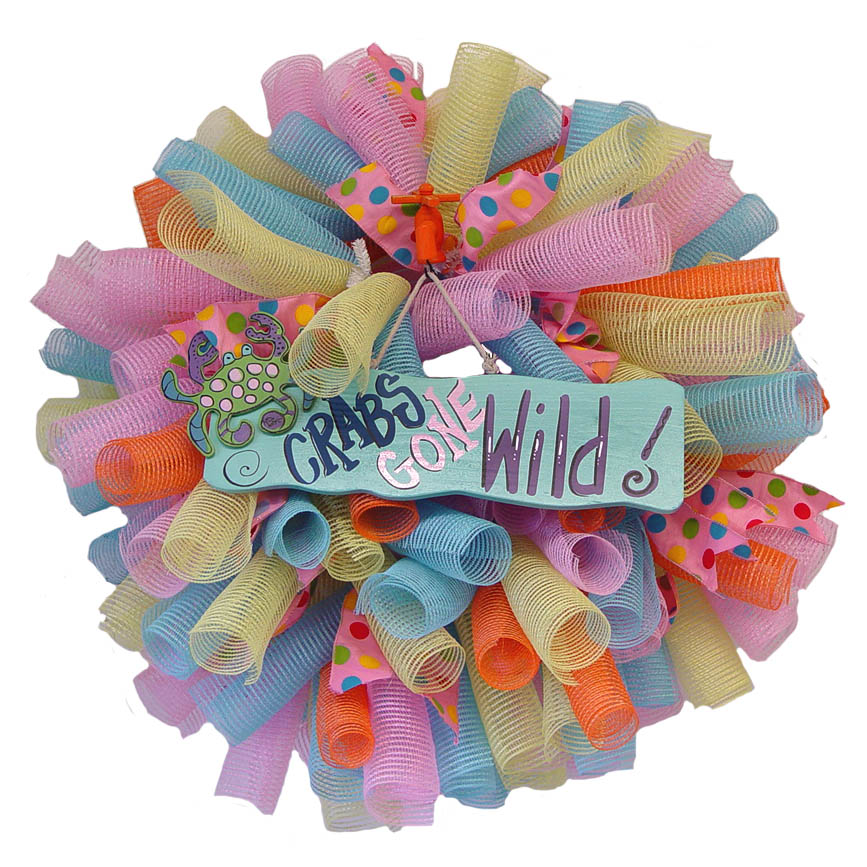 Crab's Gone Wild Sign
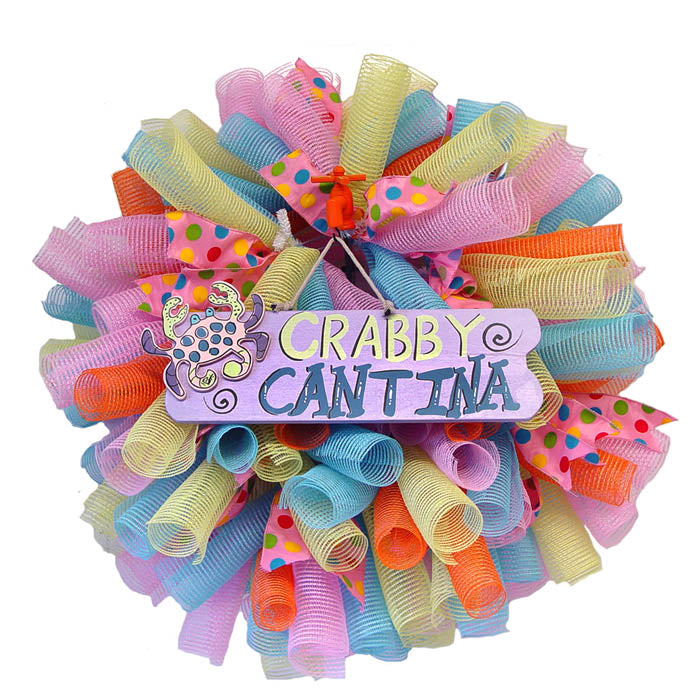
Crabby Cantina Sign
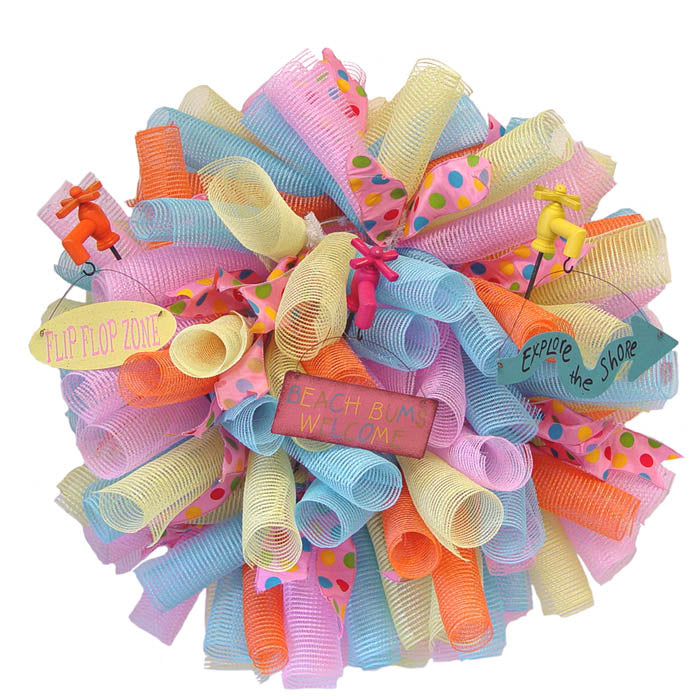
Collection of 3 Shore Word Signs
Save


