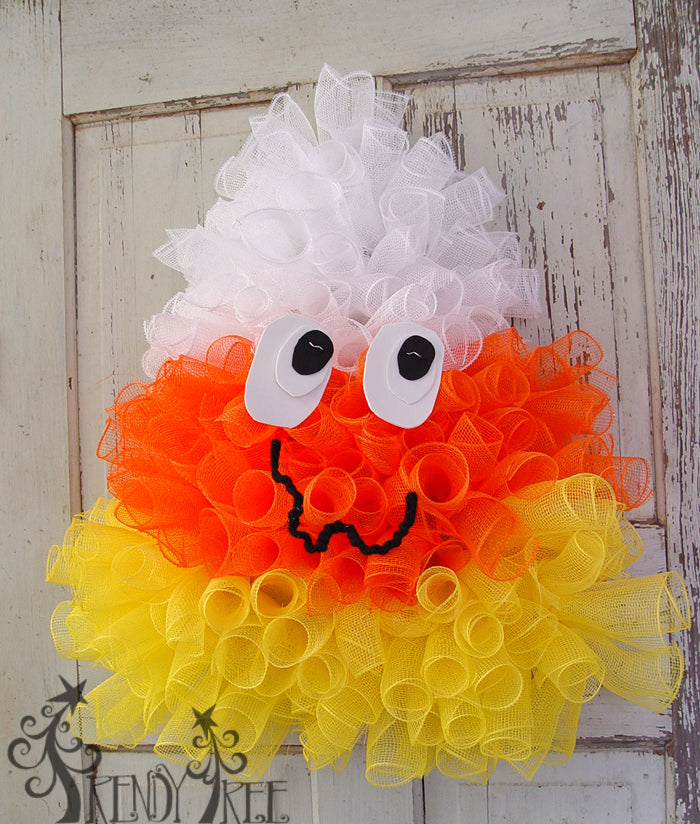
Candy Corn Wreath Tutorial
Supplies
XX765327 20" Pencil Open Wall Tree Work Form
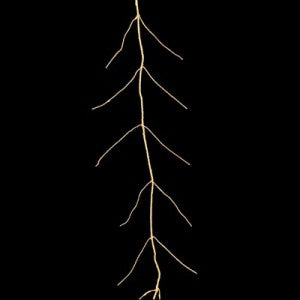
XX742908 Gold Glitter Twig Garland (no longer available)
RE130229 10" Yellow Deco Poly Mesh®
RE130220 10" Orange Deco Poly Mesh®
RE130227 10" White Deco Poly Mesh®
H3416027 RAZ Witch Hat & Legs
MTH11644 Hanging Lacy Fabric Witch Legs (no longer available, but we have other witch legs)
X00001-09025-B009 Glittered Purple Honeycomb Ribbon (no longer available)
Foam Craft Sheets
Create Form
The first thing we did was to take the
tree form and figure out where we wanted the layers needed to be.You could use any color of the Open Tree Form since the twists won't show.

We used a section of the Gold Glitter Twig Garland to mark off where the middle orange section needed to be. (Update: The Glitter Twig Garland is no longer available, but you could use chenille stems.)
It was basically divided up into thirds, with the middle orange section being a little bit fatter.
The Tree Form is open in the center so we used pieces of the Gold Glitter Twig Garland across the center section of the Tree Form to have to attach bundles of curls. The Pencil Twists on the Tree Form won't always work out perfectly to be in the right place where you need to place a bundle. So we snipped off pieces of the glitter garland to use to attach bundles of mesh.
You could also use chenille stems or floral wire for this same purpose. It helped to have the dividing mark with the gold garland to know where to stop the yellow mesh and start the orange.
The Tree Form has a trunk, but don't worry about this. We initially thought we might have to cut it off, but once the layer of yellow curls are in place, it is covered up. You only need to push the Pencil Twists up and to the inside of the wreath form to get them out of the way.
Curls
We used 10" mesh rolls for this project. The mesh was cut into 10" lengths. It took all the yellow and the orange, but we had a little left over of the white. So don't cut your white all up.

RE130229 Yellow 10"

RE130220 10" Orange

RE130227 10" White
Cut the mesh into 10" lengths, it will automatically start curling up. We made this rolls a little bit tight and one the mesh was rolled up, the diameter of the curls was probably a little over an inch.
We use a 24" x 36" self healing
Omnigrid Cutting Mat and a
45mm Omnigrid Rotary Cutter (these are available at Amazon and we have included our affiliate links.)
We created three curls, pinched them in the center, and attached into a set of twists with 3-4 turns. Lay the curls down with the cut side down.
You may have to fill in with a bunch of curls in an area that doesn't have a twist.....just snip off a piece of the glitter garland, or you can use a chenille stem.
When attaching a bunch of curls using an extra piece of the garland or chenille stem, or even floral wire, place the wire over the pinched up center of the curls and twist it tight from the bottom. Then fit your wire down over the Tree Form and secure with a couple of twists from the back side. This way, your twist won't show.
As you finish securing a clump of curls with the Pencil Twists, poke them to the inside of the Tree Form to get them out of the way.
Place a layer of yellow, then orange and top it off with the white.
Decorate!
You can leave your Candy Corn Wreath just as is and hang it on a door or wall. Cute!

You can add any sort of bow, or Halloween sprays....all sorts of options to change it up a little.

This is a
Glittered Purple Honeycomb ribbon that has wire edges. Any kind of ribbon would work.
You can add a Witch Hat and Legs.

This is a
RAZ Witch Hat and Legs combo. We separated the hat from the legs, but gently pulling on it. It's attached together with hot glue, but we were able to separate it without damage. The legs have a wire at the top that you can secure to the Tree From. The legs have wire so you can shape them.
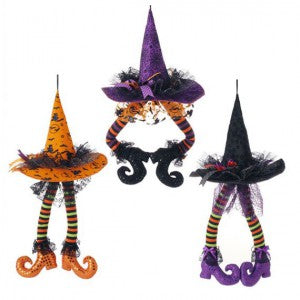
H3416027 RAZ Witch Hat with Legs

H3316402 RAZ Witch Hat & Legs Purple (only a few left in this color)
The witch hat was attached with floral pins, but you could add some hot glue for a more secure attachment, or run a tiny floral wire through the hat and attach directly to the Tree Form.
Personalize your Candy Corn Wreath! We browsed on the internet for some candy corn with faces to get a facial expression.

The eyes were just cut out from some craft foam and the mouth was made out of a piece of black jute roping (you could use chenille stems). We secured the eyes with floral picks, but for a better and more permanent attachment you could use hot glue.
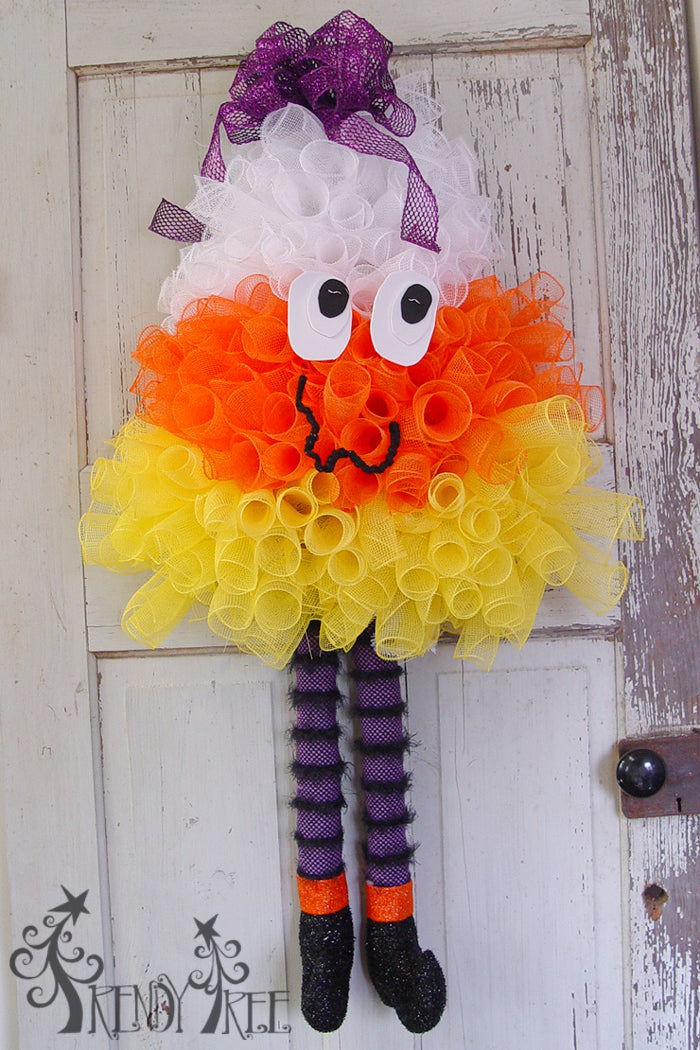
This is the version that we liked best))) The legs dangle, they do not contain wire. They are attached to the Tree form with a chenille stem, or you could use a zip tie. The legs are Hanging Lacy Fabric Witch Legs
and are available in purple/black or orange/black. (Note: Hanging legs sold out, but other witch legs are available)

MTH11644 Hanging Fabric Witch Legs (Also available in orange/black)
If you look for any of the supplies for this project and we are sold out.....there are many ways to substitute. You could make a chocolate layer instead of the the yellow or orange and use Chocolate Deco Poly Mesh.....or you could make it from Paper Mesh and use Yellow, Orange and Cream color.....you could use the ruffle technique instead of the curls.....lots of different options)))
Hope you enjoyed our Candy Corn Wreath.......of course making something like this requires having Candy Corn to snack on while you work! Try it mixed with some dry roasted peanuts......yeah.....tastes just like a PayDay)))
Happy Halloween!

Subscribe to our You Tube Channel!
Save