New Burlap Carrot Easter Wreath Tutorial. We started with a wreath that we had previously made, removed all the embellishments down to just the mesh, re-fluffed, clipped strings and started with our new additions.
Essentially, this is the wreath we started with. It was made using a 24" Light Brown Wreath form and 10" natural color poly/jute combination mesh. We used a sort of petal technique and pushed the petals to the outside. To see the tutorial up until this point, you can review the video below or view the written Blog post here.
We use a 24" x 36" self healing Omnigrid Cutting Mat and a 45mm Omnigrid Rotary Cutter (these are available at Amazon and we have included our affiliate links.)
For our Burlap Carrot Easter Wreath we used the following supplies:
YW2024 Light Brown Wreath Form 24″ (Use This Burlap Wreath if the YW2024 is sold out XX7488W4 Burlap Work Wreath 24")
XB93210-15 Natural Poly/Jute Combination Mesh 10″ – 2 rolls
MT18219 Burlap Carrot
92230W-204-10F Lime Green 4" Burlap Grand Dot Ribbon
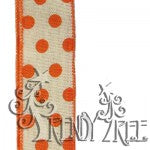
Q514109-19 1.5" Ivory and Orange Canvas Polka Dot Ribbon
Q519640-21 2.5" Chalkboard Ribbon
First step was to remove all the embellishments from the previously decorated wreath. We re-fluffed the curls and pushed them toward the outside of the wreath and snipped strings.
Ribbon strips were cut in 14" lengths using the 4" Lime Green Grand Dot ribbon and the 1.5" Ivory/Orange Polka dot ribbon. Ends of the ribbon strips were cut with a chevron finish.
There are 18 twists around the wreath form, so we cut 18 strips from each style of ribbon. After the ends were cut in chevron fashion (fold the ribbon and cut from the folded side at an angle), the narrow ribbon was placed on top of the wider ribbon and pinched in the center.
A twist was opened all the way down to the mesh, and the two ribbon strips laid on top of the mesh. The twists were then re-secured with a couple of twists.
Next we added our Chalkboard ribbon strips. I'm no painter so I picked out a font that I liked and printed off the wording to at least have something to look at when I free-handed the writing.
For those of you that have those great little vinyl printers.....I'm jealous! But, we did the best we could with what we had on hand. The Chalkboard ribbon can be written on with chalk but today we used a liquid chalk marker that we found at Wal-Mart. The marker will rub off and will wash off too. So let your wording dry before you add it to your wreath, it only takes a couple of minutes.
Practice with some scrap ribbon or paper before you print on your actual ribbon to get your spacing right.
We started the wording about 5-6" from the end of the ribbon and then left another 5-6" after the wording and cut the strip there. You need to enough of a tail to secure your ribbon to the wreath. The chalkboard ribbon was secured in the same manner as the other ribbon strips...un-do the twist, lay the chalkboard ribbon down on top of the last layer (which would be the ribbon strips) and re-secure now with 3-4 twists.
Love taking a wreath apart, and adding new items to give it a new look. A basic burlap wreath can work for several seasons just by changing up the embellishments. Course on this wreath, we went from Easter to another Easter wreath, but we wanted to share with you different ideas for using our Easter decorations))
3/6/15 Update: Here are a few more images with different embellishments to the wreath.