Beach Wreath Tutorial 2016
Supplies (A Limited number of kits containing items will be available, but tutorial will be left up after the kits have sold since the same instructions can be followed and alternate products used.)
Click here to purchase Beach Wreath KitXB97510-15 Natural/Denim Mesh - 2 Rolls
XX7488W4 24" Burlap Work Wreath
Q61740-46 Canvas Coral Print Ribbon
Q617340-09 Canvas Nautical Print Ribbon
RA13146M Jacquard Weave Ribbon
Q619009-27 Stripe Ribbon
3506636 RAZ Jute Balls Set of 3
MTF19903 Curly Grey Green Grass - 2
MTF19971 Weathered Coral Fern Bush - Set of 3
MTF19506 Sage Brush Bush
MT18254 Faux Wood Fish Plaque
This wreath was made using the curly technique and 10" mesh. It's an easy project to complete, just takes a little time. First step was to cut 10" wide mesh into 10" lengths.
The mesh we chose was a poly/jute product. It has a polypropylene base with jute thread which gives it a nice texture.
The Work Wreath was a 24" Burlap Wreath. Please note that our 24" Work Wreaths actually measure 15" across the metal rings, but with the addition of the twists and products, a finished wreath usually measures 24" or greater.
The mesh we used is 10" in width and 10 yards in length. It did not take the complete second roll of mesh, there were a few yards left over.
We use a 24" x 36" self healing Omnigrid Cutting Mat and a 45mm Omnigrid Rotary Cutter (these are available at Amazon and we have included our affiliate links.)
Next step is to make the curls.
The mesh has a natural tendency to curl up. But the curls do need to be a little tighter.
Just roll the mesh up starting at the cut edge, having selvage edges to sides.
Pinch the curl in the center. Make three curls and hold them together. You can angle them so they won't be sitting all exactly the same. Position them where the cut edges will be on the underneath side.
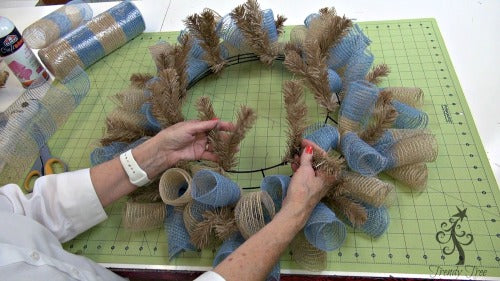
Start on the outer ring and secure the cluster of three curls in a twist. Work all the way around the outer ring adding a cluster of three in each twist. Just give the twist a couple of turns when you secure the curls, since you will be adding ribbon strips later. When the final item is added to the twist, you will want to secure with three or four turns.
Once you've finished the outer ring, move to the inner ring and continue to add a cluster of three curls working around the inner ring.
This next step is optional. We have been experimenting with products that might help reduce raveling. All mesh products ravel as do any type of woven fabric with a large weave. We wanted to try Elmer's Craft Bond Spray Adhesive on this wreath to see if it helped reduce the raveling and we think it did.
We sprayed the curls (cut edges) with the spray. This is messy and sticks to your hands.
The spray does have a little odor, but not unpleasant. We did the spraying outside.
Once the wreath has been sprayed you need to lift out or separate the curls so they won't stick together. You may have to go around the wreath more than once. Let the wreath dry thoroughly before moving to the next step. We didn't time the drying time and had other things to do, so we came back later in the day to complete the wreath. So ours stayed on the craft table for 3-4 hours or more and was dry enough to finish.
Next we laid out our embellishments just to get an idea of placement. It's always good to experiment before you start securing items.
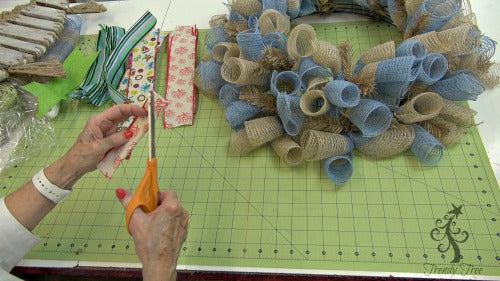
Before cutting ribbon strips, we always cut a sample strip using leftover ribbon from another project to get a measurement. We've learned the hard way by cutting up all our ribbon before we tested the length. We cut these strips 12" in length and did a chevron cut to the ends.
To make the chevron cut, fold the ribbon bringing the end together.
Fold again lengthwise.
Cut on the folded edge at an angle.
We also made some loops with the Jacquard weave ribbon. These strips were cut 24" in length and the ends just folded together and another ribbon strip layered on top.
Ribbons can be added in so many different ways. You can do strips, loops, add bows, add as little or much ribbon as you like. Strips and bows are one of the easiest way to add ribbon. You can layer your ribbons together and for this wreath we layered the nautical ribbon with the stripe on top and the Jacquard loops with the Coral print ribbon on top.
Ribbon clusters were placed in each twist.
The Faux Wood Fish was secured to the Work Wreath's metal rings using zip ties. Fish was positioned and the wreath flipped over and secured from the back. Ends of the zip ties were snipped with wire cutters. Be sure to turn any sharp edges toward the inside of the wreath so they won't scratch your wall or door.
Next the grasses were added to the wreath. Again, these can be placed in a number of ways. We chose to add two curly grasses to the top toward the left and two of the Weathered Fern Bush opposite that at the lower right. Another Fern Bush was placed to the right of the wreath and the single coral bush placed to the left.
The grasses were also secured to the Work Wreath frame using zip ties. You may have to secure them in more than one place to keep them from popping out.
The RAZ Jute Balls were the last thing to be added. They are made of Styrofoam or plastic and covered in jute thread. The easiest way to secure them is to apply a liberal amount of hot glue and nestle into the mesh. We did not hot glue ours, since we usually take the wreath apart after the tutorial, so ours were just secured using the tag, but this is not recommended, it was just short term for our use. You could probably make a small hole in the balls, insert a floral pick with hot glue on it and then secure to the Work Wreath frame.
Sometimes it's easier to hang the wreath to decide where you want to place items.
Once everything is secured, look at the back and check for anything sharp that needs to be turned to the inside or covered up. You can make a hanger using a couple of large zip ties. Put two together if you need to. Fluff out your ribbons and clip strips. It's better to clip strings rather than to pull them out. Sometimes that causes more raveling.
The Toucan add a tropical touch! The Toucan was just an extra touch and will not be included in the kit.
The completed wreath measured about 29" in diameter.
SaveSaveSaveSave